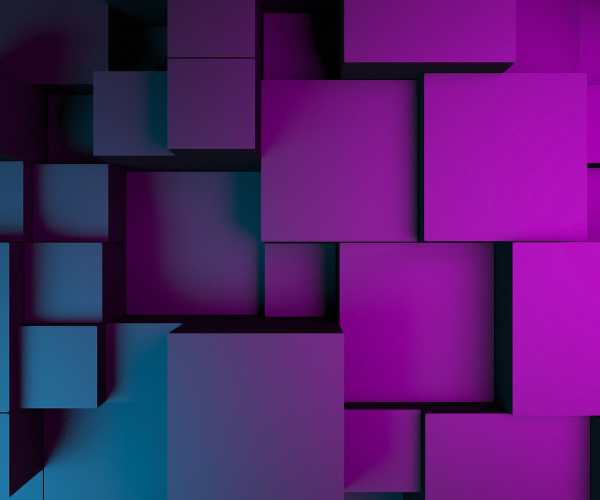
I’ll never forget a single moment from my past, particularly this digital artwork. The moment I beheld it, I was rendered speechless. The digital asset was so vividly created that its elements and characters looked as though they were as I was seated at the theatre, waiting for an illusion to unravel before my very eyes, I was spellbound.
That specific piece shifted how I viewed digital assets and opened up my mind to the unbounded potential of 3D design. All of a sudden, the plain designs which I previously used felt outdated. It made me go on a quest with countless novel experiments combining 2D designs with 3D design elements.
Integrating 3D elements into digital art is more than a passing fad; it’s an effective way to deepen imagination. Going forward to the topic of elaboration, I want you to picture how these additions can improve your design, making it more appealing and dynamic. It’s about giving people more tools so they can go beyond mere dimensional flat illustrations and use them to add new dimensions to their pieces.

Why 3D Elements Matter in Digital Art
Expanding Your Creative Palette
Let us examine how the addition of 3D elements to your art can take them to the next level. When I was first getting into 3D modeling, it felt as if I was given the keys to a whole new world. The ability to play around with shapes and forms gave me the chance to experiment in ways that I had not imagined before. I could suddenly make environments and characters that came to life.
Consider artists such as Beeple, whose well-known works of art in 3D have recently created a buzz in the digital world. These are artists for whom the boundary between real and imaginary is often blurred, and their creations leave the audience spellbound by the experience. Beeple’s latest pieces are almost unreal, as he takes his artistic craft a step beyond. One cannot forget Julian Glander’s iconic 3D animations that are fun, quirky and cartoonish at the same time. Their techniques are a reminder that contemporary art is about being creative, for instance, putting in 3D elements in your art can allow for new possibilities to be explored.
Enhancing Visual Storytelling
Now, let us take a look at how the integration of 3D effects improves Storytelling. There is a project I did once that needed me to tell a story about a fantasy world with magical creatures and places in it. To add to the exaggeration, I decided to add 3D elements to my illustrations for this project and the outcome was simply breathtaking.
The three-dimensional spheres I sculpted were animated, adding fresh dimensions of visual pleasure that any flat graphic could never hope to deliver. The role I played, the angles camera shot from, and the color effects I used lent emotion which inflicted the viewer with an experience as though he/she were walking inside that imaginary setting. A colleague once emailed me, “I fell as though I am inside the image!” After this moment, I understood in full detail how effective 3D could possibly be in engaging the audience because looking at the work of art was never going to be the same, it was going to be feeling art.
Tools And Software Needed for Application of 3D
Most Used 3D Programs For Digital Artists
Should you be delighted, even surprised by the use of 3D components in your artwork, there are several well-known pieces of software that you will need to learn about.
Blender is one of the most versatile open source tools which lately has attracted the attention of many users. It facilitates modeling, texturing and animating on one platform. Moreover, there is a huge online community with easy to follow tutorials which helps any new user.
For those who are passionate about motion graphics look no further than Cinema 4D. The interface is quite easy to navigate and the rendering capabilities of this software is second to none, which is perhaps why it’s a favorite of professional artists. If I recall correctly, using it in an animation project was a treat, I was able to create eye catching visuals within seconds due to its capabilities.
SketchUp is best suited for novices and individuals concentrating on designing architectures. Due to its ease of use, people can develop and conceptualize 3D models with great ease, especially those looking to add 3D components to a larger design.
2D vs. 3D: Knowing the Distinction
If you want to develop as a digital artist, knowing the distinctions between 2D and 3D art is useful.
In 2D art, we are limited by two dimensions: height and width. However, in order to create depth in these two dimensions, we have shading and perspective as viable options. But when we transition into 3D art we introduce a new dimension, which is depth, in which we are able to move an object in a more realistic fashion.
To visualize it better: a 2D sketch of a cup of coffee is two dimensional and depends on color and shadow for a little perspective. On the other hand, in three dimensions you have the ability to roll the cup, looking at it from any side or examine the way light hits the surface, and. This type of ability to depict objects as they are in the physical world expands the possibilities for an artist.
Methods of Including 3D Models
3D modeling, which we now get into is a truly rewarding activity if you can get the first steps through the sheer hard work. For those who are wondering how the initial modeling experience could feel, here is a basic outline to help you through the process:
- Select Your Tools: First things first, settle on a 3 D modeling tool which is best for you. I usually suggest people start with Blender.
- Begin with Geometric Shapes: Don’t complicate the process too much from where it stands. Begin with objects like cubes, spheres, or cylinders. These forms are the building blocks of most models. I remember my very first attempt at creating a simple chair – which was just a mish mash of squares. But it was such a huge accomplishment.
- Change Shapes: Employ slices of a software to stretch, scale and merge these primitive shapes. For instance, when creating the legs of that chair, you grab a cylinder, elongate it, and then set it in the right direction.
- Insert Components: Now that you possess the basic skeleton of your figure, begin putting in components. This can be all to marking traces or extruding shapes for edges. For me personally, the sculpting tools in Blender are great for this since the resulting images are much more organic.
- Practice and Be Creative: The main rule is to practice experimenting. Don’t be worried to make mistakes; these are necessary in order to develop. And the more practice you get, the easier it becomes for you.
Melding Computer Graphics with 2D Art
In this section, we are finally able to get closer to reality as we talk about blending 3D graphics into 2D art. One effective technique is to export a render of the model that you created alongside that artwork and then import them into 2D art software, such as Photoshop or Procreate, Here’s how you can do that:
Embroidery and lightning
Lightning and embroidery are what makes your artwork feel authentic. Let us discuss why these factors are essential:
- Lightning: The interaction of lightning with your 3D canvas can change the feeling of your work. For example, startling lightning can instill a high sense of drama while warmer lighting will create a heightened sense of calm. Once I made an illustration in which I wanted to draw attention to a character so I turned on high lightning with bright colors, which made this character the center of the picture. The difference was incredible!
- Embroidery: this technique can be used to provide your 3D models with a sense of realism. Texturing can also be employed to imitate materials, such as wood, metal, or cloth. An object that has a rough texture will look more realistic than a stone surface, however, glossy metal objects have a reflective quality.
When I started playing with the texture for the first time, I discovered that all you need to do is change the setting. For instance, I had a character that wore clothes, and I put fabric texture on them, and all of a sudden, the wearable became the character.
Layering Techniques
Incorporating Three-dimensional (3D) objects into a two-dimensional (2D) space can also be done using layering. This is what layering is all about. To do it correctly:
- Organize Your Layers: When doing 3D objects, ensure that they are kept in separate layers within 2D software so that you can manipulate and edit them without interfering with the rest of the artwork.
- Use Opacity: Try varying the opacity in these 3D layers as at times decreasing their opacity might let them blend into the background better.
- Balance and Focus: Try not to crowd your 2D work with 3D elements as balance is important. While doing that, I ask myself: Is the focus of the artwork defined and not blurred?
- One practical guideline: apply the ‘rule of thirds’ while placing your 3D aspects within the work. This technique fosters depth and allows the viewer’s eye to move around the artwork.
Real-Life Examples and Case Studies
Artists of Success Who Combine 3D With in Their Works
Allow us to feature a few artists who have a current/live practice and who engage as well with 3D elements in their work.
Woven Words: Greek Theatre and the Art of Projecting Stories
What I admire about Kara Walker is her extensive paper cutting, and shadow puppets merging both 2d and 3d narrative. But apart from that, her expertise in manipulating shadows takes her art to another level and draws the audience deeper into her world, making them feel as though they are a part of her narrative.
When it comes to his work on the Final Fantasy series, Yoshitaka Amano makes excellent use of 3D to add an extra layer to his painted characters and surroundings. He often combines 3D models with his paintings to create captivating pieces.
Both their methods go to prove how 3D aspects greatly alter the emotional and aesthetic feeling of a piece.
My Story: Experiencing Art in The Third Dimension
Thinking back on how I discovered 3d art , I remember it being quite difficult for me to try and add the third dimension to my illustrations. It was a lot to take in at once and at times a little bit disorienting—Learning how to use new software’s, understanding how to create proper lighting, designing a new strategy to merge 3d aspects into my preexisting 2d tone.
One project that stands out to me was where i had to design a mythical landscape. I spent countless hours working on turning trees and mountains into 3d models and while the process was exciting, not entirely easy. However, through every mistake I learned something new, that time spent was still valuable.
Eventually, I settled into a rhythm, and it was exhilarating to finally witness what I had imagined on the canvas. I feel that it is beneficial for everyone to take on projects as a journey of exploration, even when the project appears to be too complex at the onset. And trust me the exploration of 3D aspects in your art is absolutely merit your time!
FAQs
What are the tools that will best suit a newbie wanting to include some 3D factors in their art work?
If you are a novice to the 3D world, getting the right tools can be unnerving. Trust me, I’ve been there! So here are a couple of beginner-friendly software that are very effective:
- Blender: This is hands down one of the best free tools out there. Blender is flexible and when it comes to moderate support Blender is a good start. I still recall opening my very first Blender tutorial and feeling completely lost but it is so well explained, it doesn’t take long to grasp the basics.
- SketchUp: If anything, SketchUp is great for materials that include architecture and maybe even crafting. It’s as simple as it gets but allows users to generate semi sophisticated 3D models.
- Tinkercad: At a noob level, Tinkercad is truly the best interface as it’s easy to understand and use on a web browser. It is very suitable not only for children but also for adults. I most appreciate the fact that such basic models can be created quickly and later modified in advanced programs.
Utilizing each of these tools, you will find tutorials and other materials to assist you on your eosinophil journey. The most important thing is to choose one and begin to feel it out – it’s okay if it isn’t perfect!
Is it possible to integrate both 3D and 2D elements into a single piece?
Definitely, and one of the best parts of digital art is this! Imagine 3D and 2D elements and how beautiful they’d look. Oh, I totally enjoyed using these styles on my own!
For instance, one can first create a 3D character and then place that character into a 2D sceneries that has been beautifully illustrated. This gives the impression of three-dimensional space thereby allowing the viewers to better experience the scene than if one style were used.
Another technique for adding interest to a piece is to render 3D models and add them to 2D images. Feel free to try! Many of my best works derive from trying different ways of combining the two types of art in unpredictable ways.
What skills do I need to start incorporating 3D elements?
Fortunately, in order to begin integrating 3D elements into your artwork, you do not need a PhD in art or design. Listed below are a number of skills that can be of great assistance to you in achieving your goal:
- 3D Modeling Skills: Getting your hands dirty and learning how to build basic three dimensional objects is very crucial. For instance, start by designing objects in shape and compass them.
- Attention to Detail: When you are working with 3D technology, the need to be detail oriented is important. For instance, when you adjust the lights or ever change the texture or blend 3d objects into 2d artwork, being detail oriented increases the appeal of your work.
- Knowledge in Theory: Particularly color- a color theory will assist you in making effective decisions to select shades for your 3D models which can complement or clash with your 2D composition.
- Patience and Practice: Like any other form of art, dedicating time and effort to learn 3D elements of art , takes time. Accept the process and keep in mind that all your mistakes are a part of the improvement process.
Don’t forget to stay consistent and make it a point to practice, otherwise there is no chance of moving ahead in your career. The more tools and options you experiment with, the better you will be at what you do.
What steps can I take to achieve realism with 3D elements in my digital creations:
What steps can I take to achieve realism with 3D elements in my digital creations. Realism is in the details when it comes to 3D elements. Here are a few recommendations that have released wonders in my art:
- Lighting: This is essential! Experimenting with different lighting techniques will alter the look and feeling of your models. Realistic models can be achieved by using light that is not too harsh or too soft, while dramatic lighting can achieve a model with intensity.
- Textures: Applying quality high textures will ensure an accurate representation of whatever it is that is being modeled. For example, a rough stone surface texture will provide realism to the model, on the other hand, a smooth texture will provide the desired reflection for metal.
- Shadows: Don’t forget how important shadows are, they give the 3D detail personality and make the element pop out What I tend to do is experiment with shadow opacity.
I recall creating a piece where I applied an object on top of a surface and aimed to make it look realistic. The perfect balance of light, shadow, and texture was perfect for each other and it did take a look to create.
What I suggest you do is go to youtube, udemy or some other similar source for upskilling as they have free courses and 3d modeling tutorials on various other software too. Blender Gurus and Reddit also have their specific communities that provide mentorship when starting out
As an artist, you know the road you take is unrepeatable, so make sure to keep looking for your style in the course of incorporating these techniques.
And do not forget that the art world is wide and there are any rules in regard to the way to create.
I encourage everyone to comment and share their experiences and projects. Let’s enjoy our creative journeys together!


