Are you one of those people who while gazing at a beautiful scenery, wish to sketch it down for eternity?
Taking inspiration from nature’s rich color palette and creating landscapes is indeed a fulfilling experience.
By using pastels, you can bring your imagination of the stunning landscapes into reality.
The first thing that caught my attention when I started using pastels was the combination of color depth and tonality.
I could feel the touch of light as I started working on landscapes and using watercolors to paint the different scenery around me on separate canvases.
In this post, we will work through how breathtaking landscapes can be made in an enchanting way using pastels.
What I can guarantee, whether you are an amateur artist wanting to learn how to create an image or a professional wanting to improve your draws, is that you will learn new pastel techniques, tools and tips with me.
What Are Pastels?
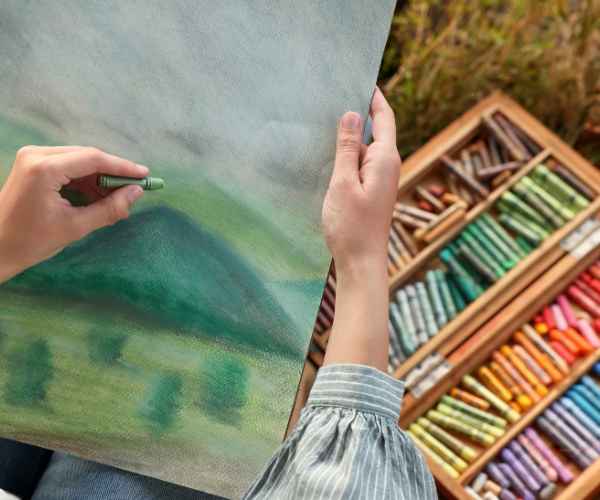
So, let’s jump into the mesmerizing world of pastels, shall we? We can start with the very definition of pastels. Pastels are a type of art medium which is composed from pure powdered pigments and a binder. There are three kinds of pastel, which are: soft pastels, hard pastels, and finally, oil pastels. Soft pastels are the most used by landscape artists as they come in a variety of vivid colors and can easily be applied onto the canvas. These soft pastels can create deep and rich shades and they easily blend into each other and are perfect for depicting different shades of light and dark on a canvas. While soft pastels are generally the most loved by landscape artists, hard pastels are also a great substitute as they have a more sturdy feel to them and are great for polished lines which are necessary while outlining a composition. Lastly, there are oil pastels that have a differentiating waxy texture, which gives your painting a new type of blend along with layering. Each pastel provides you with a distinctive flavor and they all help in expressing the exact picture you have in your mind. To begin, pastel painting makes me happy because of the variety of surfaces it can be used on along with its usable on. It’s also multi functional as it can create depth within your painting alongside the ability of accurate layering.
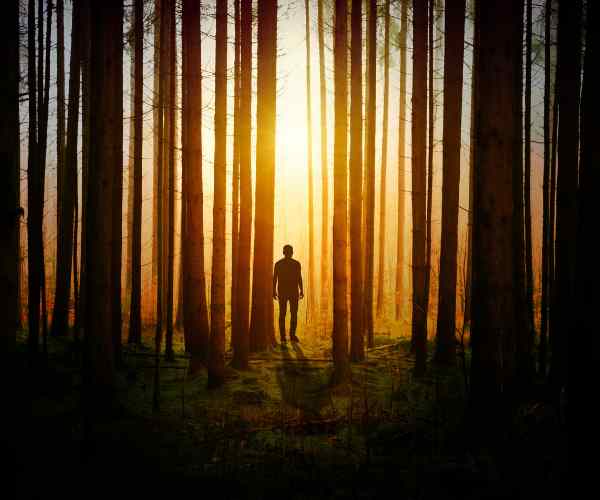
Think about blending gentle hues in order to represent a sunset, or mixing deep browns and greens in order to capture a forest.
Landscapes tend to appear more captivating with the use of pastels than with any other medium.
Why Choose Pastels for Landscapes?
Pastel landscapes still raise the question, “What made you choose pastels for your landscapes?”.
Here’s the thing – the blending and color vibrancy is unparalleled.
They breathe life into the work when applied. This is because the colors are vivid and stand out when pastels are used.
For example, when I first worked with pastels, their blending capabilities impressed me immensely.
In retrospect, it feels like it has been ages since I first tried to capture the beautiful sight of the sunset on a blazing summer day.
Bright orange to pink to a hint of purple was the selection I made for the paper as I visualized the setting sun on the horizon, and with each stroke I could feel as if light was bouncing off the paper, the intensity made me want to be an artist more than I was already.
The strokes were endless, and each stroke fused warmth and texture. The combination transformed the paper into a tribute of a moment.
The best part about using pastels is you can be as informal as you want to be.
You can forget about the pompous routines, such as cleaning the brushes or waiting for the paint to completely dry, you can just sit down with your pastels and let your imagination fly.
You’re able to rapidly and expressive paint especially when seeking to remedy nature’s elusive moments.
The crazy thing about pastels is the sense that comes with them, it is quite surreal to hold them in your hands.
You can smear, mix and stack to your hearts’ content.
And let us not forget how fun it is to dirty your hands a bit!
The creative process I was on started from pastel dust on my fingers and renting that feeling is something I still value.
Strategies for Making Realistic Landscapes Selecting The Just Right Equipment.
Now that we have just touched the tip of the iceberg, let me grab your attention as to what you will require in creating your pastel landscapes.
Having the ideal equipment will greatly impact your Artistic modernist history!
So here is a basic to-do list of materials to purchase for making your pastel landscapes.
Pastel time – Ok, so we have hear interest soft pastels, hard pastels and oil pastels, so when starting from scratch soft pastels are advised as these are bright encouraging easy to use.
My recommendation is to visit Sennelier or Rembrandt. They have a nice ish selection of colors.
If you’re just a newbie, then consider purchasing a student set from Cray-Pas or Faber-Castell this can be an easier option to soften your pockets during the making of this type of art.
Paper: In pastel artwork, using the right type of paper is of utmost importance. Seek to get a paper that has some form of texture since this will allow the pastel to be retained better.
For me, I love the Canson Mi-Teintes paper for its awesome variety of colors and texture. It indeed aids the grips of the pastels quite a lot.
Blending Tools: Though fingers could be your best blending tool, you may want to buy some blending stumps or tortillons.
They help in gentle rendering of the edges without too much dentation.
Fixative: No doubt a good fixative is an important part of finishing the work. You wouldn’t want your pretty looking landscape to smear when you frame it!
I like Sennelier Fixative a lot, it is most suitable for use with pastels without changing their colors.
Erasers: A kneaded eraser can remove pastel and make marks or highlight corrections.
It’s a weapon of the artists professional!
If you have these materials, you are certainly on the right track.
Quality prima facie does matter, though, do not feel shy seeking out the most expensive supplies straight away.
Just begin with what, you feel, is easy and you will slowly discover your favorites.
Color Theory for Landscape Art
Now, let’s get into the interesting aspects of color theory and how it relates to landscape art.
Understanding color theory is very important as this greatly enhances the quality of the landscapes to be created.
In its essence, color theory is based on the color wheel and it features primary, secondary and tertiary colors.
This combining and matching of these colors will enhance a piece of your work.
When doing the color selection for your landscapes, keep in mind the time of the year and the time of the day.
For example, the sunrise and sunset will be warm – so think about orange, pink, and yellow – colors while a calm and peaceful winter scenery would consist of blue and white colors.
One of the biggest lessons I learned very early on was to look at nature deeply.
Oh yes, I vividly remember on a beautiful autumn afternoon when the trees went on fire with the changing leaves.
Rather than grabbing the usual pastels of green and brown, I used bright reds, burnt oranges, and just a little gold that mimicked sunlight.
The result was astounding and it showed me the need to not just photograph the colors that I painted but the feelings those colors created.
Colour selection should be done with clarity, and understanding, Before grabbing the brush, first think of what your colours will be.
First create a small swatch of the palette in figure so as to test how the colors in the palette in lawn interacts with one another.
This small exercise will save you hours and great amounts of frustration later.
Layering Approaches
When working with landscapes using pastels, layering becomes one of the most essential techniques lending the work realism.
It gives your paintings more depth, texture and realism.
Here’s how you can go about layering:
Commence with a Basic Layer: Start from the simplest form which is washing the pastels lightly to get the base color of the landscape.
At this stage, don’t look at the details— think about what you want to be covered for painting.
Add mid-tones: After drying the base layer, begin incorporating mid-tones which are the colors that are going to carry your landscape.
Gently color greens where the trees are needed or the blues on where the sky needs to be with a very delicate hand to keep the paper from getting oversaturated.
Build Shadows: Deep shadows are the areas set aside to add more depth to the mid-tones applied.
Use shadow which occurs in an object when tinted with color on the mid-tone as the final layer.
Seldom is the shadow pure black and light grays tend to be colored somewhat by the local color where the shadow is placed.
Highlighting: Use highlights from lighter pastels to touch up final rough edges.
Highlights make the landscape appear fuller and the three dimensional quality aids the image to serve its purpose.
One of the first layering attempts is recollected and it particularly displays a misty morning landscape.
In order to achieve that faint diaphanous effect, several layers were required.
Looking back at the process, I came to appreciate the work more as I was able to inch ever closer to that ideal image that was in my imagination after every adding every layer to my work.
Blending and Texturing
If you want smoother edges and more believable pastels landscapes then do take note that the ultimate goal of the blending process is ideal smooth transitions.
To improve your blending skills, use these techniques to get better:
Use Your Fingers: Blending with fingers is the best in my opinion.
It allows for great control over the blending process.
Avoid over mixing them or you won’t have their intensity!
Blending Stumps: To substitute your fingers for something more professional, blending stumps or tortillons are the best.
They can produce cleaner transitions especially for use on smaller regions.
Spray Concentrate: Maintaining your batch while blending can be troublesome if you do not use fixative spray while doing so but applying too many layers without letting the pastels dry can be equally irritating so make sure not to make the layers too thick.
Now, let’s texture our landscapes.
Using Various Tools: Old credit cards, br ush, sponges , the tools with which you blend your work are not only good at blending but also make for some fine landscaping. each tool creates different effects enhancing the overall work.
Scratching Techniques: Use soft pastels to create images, and then take a palette knife or any other sharp tool to scratch into the soft pastels to create more mark-making.
In the creation of your landscapes, this method can accurately simulate the appearance of grasses or tree bark among other great possibilities.
Layering Textures: Do not hesitate to use other methods as layering techniques.
Blending alongside texturing will really give you stunning results when done correctly.
I still remember the exhilaration that came with learning this methods in one of the sessions that I had attended.
The instructor’s texture saturating layered colors with a sponge to create an impression of how water would flow taught a new lesson that I can’t forget.
The final outcome went above and beyond my expectations in terms of realism and detail(new layer of texture).
Capturing Light and Shadow
The very first step to breakout from the ring of mediocrity is to be able to observe and interpret light and shadow in relation to your landscapes.
This is the way to go about this:
Observe Nature: Free time spent outside can be beneficial in watching how diverse landscapes deal with light.
Mark the areas with direct light and those that remain in shadow.
This practice is excellent – it will work both with sharpening your skills in observation and with painting.
Identify Light Sources: With each new piece, always start with deciding your light source – Sun or Moon or some artificial light.
This will help you know where in the composition you should decide where to put some highlights and where to put shadows instead.
All right, it is time to roll up our sleeves and get our hands dirty!
The following steps are designed for practicing how to capture the interplay of light and shadow:
1. **Pick an Outdoor Setup:** To start with, locate an outdoor setup that is light and shadow friendly, for instance a tree or a building.
2. **Make Key Light and Shadow Notes:** Use a pencil to draw a little on where your subject will be and make key notes on light and shadow.
3. **Begin with Light Pastels:** Start the exercise by laying down light pastels first and then those of shadows.
4. **Observation:** Judiciously see the light pastels and how they affect the shadow colors for you will discover that shadows are more than simple darker pastels of the dominant light color!
5. **Final Touches:** Finally, step back for a second and concentrate on building a three dimensional final model using the interplay of light and shadows.
When I first attempted to do this exercise, for some reason, it opened my eyes to shadows and their alterations at different times of the day. My landscapes crafted an aura around them that I had never thought possible before.
Real World Examples of Light and Shadows
Masterpieces of Light and Shadows
So, within the constraints of this timeline, let us take a quick glimpse through some esteemed pastel landscapes and deduce which particular aspects contribute towards them being attention drawing and effective.
Edgar Degas is one such artist whose pastel paintings give a feeling of pure beauty and tranquility.
He is especially gifted in portraying movement and light in the painting of ballet dancers and in the painting of landscapes.
Notice how edges and colors are married to give the painting a mood.
In analyzing these works, make an effort to spot the layering and color structures that he has built.
Another beautifully pastel painted work is by Jean-Baptiste-Siméon Chardin where still life and landscape are rendered with an excellent painting of light.
Watch how he works on reflections and textures of things.
Seek out those elements that make the painting appear more life-like.
When looking at these works, I suggest that you take notes on the techniques used that you feel might be useful to you.
Also think of how you can fit a similar approach in your own works done in landscapes.
Personal Story: My Journey with Pastel Landscapes
As I reminisce about my experience with pastels, there’s this single nightmare I had while working on a landscape of a quiet lake that sat betwixt some mountains.
To begin with, I did have a problem with achieving the correct reflections of the water.
With the application of the pastel, I indeed found it rather impossible to create harmonious colors that would portray the calmness of the picture.
This made me rather irritated so I moved back and took a few deep breaths.
So instead of attempting to forcefully make an impression, I opted to go for a different style than what I was using.
I meticulously went about incorporating the colors so that I was free to have fun with the shades of blue and green until I stumbled upon the color that would do justice to the image of the lake.
FAQs
Which pastel should a novice use?
If you’re a novice in the world of pastels, choosing a good brand will already cover a lot of the problems you might run into.
Learning brands create vibrant colors and a forgiving mixture of ingredients, which means that getting the hang of it is simpler.
As a beginner, I would recommend Cray-Pas and especially the Cray-Pas Expressionist range.
These chalk pastels are relatively inexpensive, come in different colored sticks and provide a standing start to the new user without great expense.
Another great band is ever popular Faber-Castell’s Student Pastels.
Consisting of soft and firm pastel to use, these have great affordability whilst allowing users to practice without being too expensive.
If you need a full kit look at Sennelier’s La Petite Pastel Set.
Both the colors and the sangs are perfecto and is great for people serious about pastel art and only want the best quality that pastels have to offer.
Beginning with such brands, you will be able to express yourself in amazing ways.
Keep in mind, it’s not only pastels while creating, but also the enjoyment that comes along the way!
Can pastels be applied on any paper surface it can be on?
Yes, and that adds one of the wonderful aspects one can do with the pastels!
Pastels can be applied to many surfaces, But the choice of primero paper types matters if one wants the best outcome.
When I was trying pastels for the first time, I made the mistake of using regular drawing paper which caused it to yield poor results.
But at times, it gets quite annoying when the paper does not blend in well with the pastel or when the surface does not hold any pastel at all. So Yes, While it does work for starters, it is not advisable for starters in the field.
Instead, go for the pastel dedicated papers.
Canson Mi-Teintes, for who do not know is a textured paper which is perfect for a variety of pastels and it also has the additional advantage of offering a wide color choice.
Strathmore’s Pastel Paper is also a great alternative and its plotting grip will make sure your pastel layers stick to the paper efficiently.
One could even use watercolor or sanded pastel paper instead. If you are looking for an alternative surface for your pastel paper!
Make sure to keep this in mind: if the paper has a lot of texture, it is likely to hold a greater amount of pastel which will improve your blending and layering skills.
How do I get rid of mistakes when working with pastels?
Messes happen- it is all part of the creation process, and even with pastels, it is no different!
I used to be very paranoid when I began pasting, realizing that I had over applied one shade or shaded a region that I did not desire.
Pastels however are very appealing because they can be relearning doing so.
And, here’s how to resolve those annoying mistakes:
Employ a Kneaded Eraser: This tool is great because it is able to remove pastel from the paper without damaging it. Just dab the area where the pastel has been incorrectly applied and all that residue would be extracted from there.
Layering: In the event that too much color was applied in one region, replacing it with another pastel on top of it will always work.
In such cases, instead of erasing the former color, simply applying a new one can sometimes add new depth that is needed.
Blend: If a specific color does not fit properly, mixing it with other related colors can help achieve a smoother transition.
This perspective can easily enforce an area and change a mistake into a noteworthy feature of your creation.
Accepting It: I came to accept certain blunders as opportunities and mistakes as lessons learnt.
One of my best works began as an unfortunate incident. So, I encourage you to think outside the box while trying to integrate those factors in your pieces of art.
Do you need to apply a fixative for pastel art?
This is a great question and one I have asked myself a great deal during my pastel explorations.
The short answer is: it depends on your project and how you want to preserve your artwork.
Fixatives are used to safeguard your pastel works from smudging and fading with time.
I remember the first time I had finished a landscape that I was quite pleased with – I forgot to use fixative and then caused a smudge trying to mount it in a frame!
My sweet lesson was learnt then.
When you choose to fix, use a fix specifically made for pastel.
Sennelier’s gnf Austine provides excellent pastels that do leave streaks of color or blemishes and Sennelier’s Fixative is widely used because it does stop pastels from discoloring or changing in texture.
Remember to apply it lightly and from a distance to the work to ensure you do not saturate it.
And remember that any fixative you apply will prevent you from doing any more work on that piece so it is advisable to use it only when you are completely happy with your painting.
If, however, you like the feeling of pastel in your hands and intend to work with your artwork all the time, applying a fixative is a good idea.
However, if you are fond of the process of creation and are going to store your piece in a portfolio, then you can simply ignore it.
Conclusion
As a conclusion, we have moved through the part of the universe that has a special quality that allows one to create realistic looking landscapes using pastels and started delving into basic techniques and materials that could be of use in your artistic career.
Each of these steps, whether it is selecting the ideal pastels and appropriate papers or learning about the color wheel and developing effective blending techniques, brings you a step closer to recreating nature onto a sheet of paper.
I invite you to go wild with pastels, don’t hesitate to make errors and use colors that are different because that’s how successful works are built; through the failure of countless ideas and concepts.
Remember, it’s just as much about the process of making the piece as it is about the piece itself!
I would like to know how you feel and your experience in the comment section.
If there are any questions, don’t hesitate to ask!
Join me in decorating beautiful landscapes.

