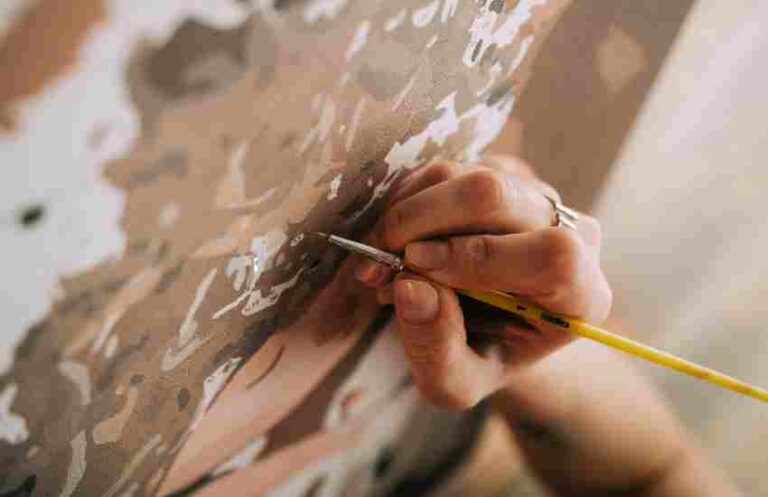
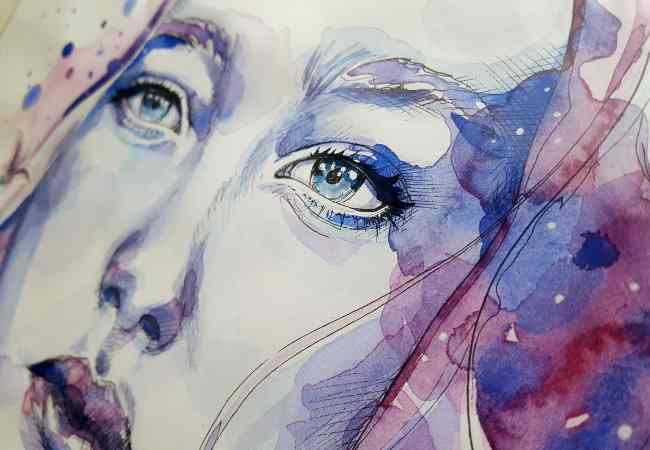
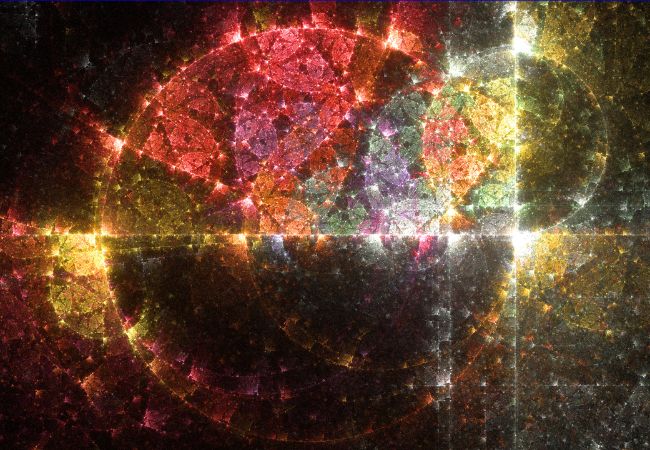
Combining traditional artistic skills with modern tools that are created via new technology is what defines the world of digital art. The creative process makes full use of what is provided by today’s technology and digital art always has and always will transform with time. The scope for digital art is vast as it can include illustrations, digital paintings, 3D models and even sculptures.
What is this digital art that we speak of?
Whenever someone refers to a digital artistic work that has either created or presented using technology, he is always pegging it to the digital era. If there were to be an artefact or art form that best represented the use of a computer for art purposes, then there are many specialists and experts who collaborated in the 70 mater termed as new media art.
Advantages of Learning Digital Art
Studying digital art is an excellent chance for both self-expression and career options. Let’s take a look at some thought-provoking reasons to pick up this art:
Freedom of Imagination in Art: As a digital artist meaning of art can be as limitless as the imagination; any styles, techniques, or media may be ‘played’ with, all without the restriction of being required to have some resources available.
Job Opportunities: Fluency in the art of digitization connects one to career opportunities in video game designing, animation, filmmaking, advertising, and much more.
Easy to Approach: Equipped with the right tools, anyone can begin their digital art journey as they learn and practice at their own pace with various online aids available.
Beginning with Digital Art Tools
When beginning one needs to identify which type of equipment one wants to use based on your art requirements and what your budget looks like. This section will help you identify what basic equipment you will need, the features of popular tablets, and a few details on drawing tablets with pressure sensitivity.
Measuring Your Hardware
Choosing the right hardware can make or break the experience and opportunities for digital artist, be it a newbie or someone looking to enhance their current setup. The type of device being used can impact the ease of use one gets while creating their art.
Computers and Tablets for Digital Artists
A key selection of specifications to consider when choosing a computer for digital art includes the speed of the processor, the amount of RAM and graphics. A fast processor and higher RAM modules (16 GB or more) would be handy for handling multiple large files and complex software. While picking up graphic tablets, commonly included are:
Wacom Tablets: Designed to meet the requirements of professionals, a wacom tablet is a robust device which is effective for its responsiveness along with the pressure sensitivity.
Apple iPad Pro with Apple Pencil: It is an easily portable solution with excellent apps like Procreate, suitable for those artists who are constantly out.
Microsoft Surface Pro: It gives the functions of a laptop along those of a tablet and works with high-grade programs like Adobe Photoshop.
The Benefits of a Pressure-Sensitive Drawing Tablet
Using a pressure sensitive drawing tablet enhances the pleasure of digital drawing significantly because it simulates the innate feeling of drawing on paper. The tablet recognizes the pressure applied on it by the stylus and turns it into a stroke of different thickness and opacity thus creating lines that the users have more command over. Such a feature is a must for many custom hand models, including sketching, inking or even character designing.
Market Trends and Statistical Analysis
According to a survey conducted by the Digital Art Software Association in the year 2023, around sixty percent of digital graphic artists prefer a tablet that has a pressure sensitivity of at least 2048 levels. With respect to customer satisfaction, tablets including the Wacom Cintiq and iPad Pro were rated the highest, with features such as tilt recognition and no lag gaining the most praise.
Comparison Table of Popular Graphics Tablets
| Tablet Model | Pressure Levels | Screen Size | Compatibility | Price Range |
|---|---|---|---|---|
| Wacom Intuos | 4096 | No Display | PC, Mac | $70 to $200 |
| Wacom Cintiq | 8192 | 15.6” HD Display | PC, Mac | $650 – $1300 |
| Apple iPad Pro | Varies with App | 11” or 12.9” | iOS | $800 – $1200 |
| Microsoft Surface Pro | Varies with App | 12.3” | Windows 10 | $750 – $2300 |
What Are the Best Software Choices for Digital Art Beginners?
For people just starting with digital art, selecting the appropriate software to work on is a very crucial step. The program you pick should be within the bounds of your technical capabilities while carrying out your creative endeavors. In this section, we will talk about some of the best programs that are good for a beginner and highlight ease of use and essential functionality that will have to be offered in them.
Best Digital Art Software For Newbies
Adobe Photoshop: As one of the most versatile tools in the hands of digital artists, Adobe Photoshop is among the most commonly used software tools. This software aids all kinds of genres including drawing, photoshopping, and painting. People who are new to using Photoshop have a range of tutorials courtesy of the vast number of Photoshop-using communities. The 2022 Digital Artist Market Analysis survey states that over 85% of digital artists use Photoshop to start their digital art career because of the resources readily available to them.
Procreate: Considering the fact that Procreate is available only on the iPad, it is commendable for its user friendly interface and flexibility in performance. With regard to performance, even beginners in digital art can make good use of this software as it has over 130 brushes along with custom brush importation and an advanced layering system. Furthermore, Procreate offers an animation tool which is rarely available in most beginner-friendly software. Additionally, on the 2023 user survey, it showed that 70% of iPad users who practice digital art stated that they most use Procreate.
As it can be comprehended from the name, Krita is free and open-source software best for digital artists on a budget. Unlike other software, Krita has a simple interface that is more painting oriented than photo manipulation, and comes with a variety of brush engines and stabilizers to create a more realistic painting experience. According to Open Source Graphics Software Use, Krita saw a 50% growth in the downloads by beginners in the last year more than what was expected.
Using Digital Art Software: Beginner Artist Tutorials
Brushes and Layers: Having learned about the artistic software, start off with the brushes available in your software. Every brush has its uniqueness and its trying out can give you the best effect for your style. Layers are important in the sense that they allow altering parts of the piece without changing the entire thing which lets you to experiment and use elements you are not sure of.
Color Science – How to master the color wheel: Get the hang of working with the color wheel while creating your paintings. Many color tools are built into most digital art software packages, which allow you to quickly find the right shades and contrasts.
Regularly Practice Newly Learned Skills: Like any skills, regular practice is important.1 Set time a day or a week where you can make the most of your software by using various features in it. Try new challenges of recreating the work you admire to get a sense of their techniques, and the effects they use.
What Are the Must-Have Accessories When Practicing Digital Art?
Aside from the art software, having suitable accessories greatly improves the digital art experience in terms of ease and efficiency. In this article, we will discuss some of the important accessories that you may want to consider for your digital art equipment.
Important Digital Art Accessories
Styluses: The precision a stylus offers while painting or drawing artwork is out of this world. Unlike your fingers, it provides palm rejection and pressure sensitivity which is essential for sketching detailed designs. You should definitely invest in stylises like the Surface Pen or Apple Pencil for your iPad or Microsoft Surface tablet.
Screen Protectors: These serve a two-fold purpose; ensuring your tablet stays intact while minimizing glare. A matte screen protector for your tablet is a great option since it can help recreate the feel of paper to provide a more organic experience when used for sketching.
Ergonomic Tools: Health is as essential as artwork which is why sketching isn’t about slouching over; visually appealing hand and neck postures along with well designed chairs, adjustable desks, and adequate stand placements during long working hours can prove beneficial in the long run.
Tips for Practicing Good Ergonomics for Digital Art Setups
Adjust Your Chair and Desk: Aim to situate your desk at your shoulder height while making sure your chair maintains your back straight.
Monitor Position: If you’re a monitor person, make sure to place it at eye level to avoid neck soreness. If need be, use stands that can be adjusted to help find the optimal height for the monitor.
Regular Breaks: Working for too long can get tiring; do yourself a favor and take breaks. Try to use tools like the Pomodoro Technique that offer the ability to work for 25 minutes, stretch for 5 minutes, and repeat the cycle ceaselessly until you feel worn out or time is up.
What Are the Basic Techniques in Digital Art?
For beginners, being able to grasp the essential fundamentals of digital art will help them exercise their creativity and make marvelous pieces of art. In this section, more in-depth practical tips and guidance will be provided for knowing your software interface, basic sketching and, as well as, coloring and texturing techniques, in order to expand your knowledge on how to get better at digital art.
What is the Process of Understanding the Software Interface?
The first step in producing an amazing piece of artwork will be choosing a suitable computer software, and learning how to operate it. Let us take a look at the tools and features available on Gimp and Adobe Photoshop.
Layers: Layers are extremely useful as they enable you build the separate whereas and documents for different sections of your work. By doing this, editing certain components becomes much easier. For instance, if I have layers for the background and the main subject, these combined with other layers for details or effects will make the entire photo very easy to modify.
Brushes: Artificial-brushes are perhaps the most common tools used in digital painting, and these brushes allow you to add texture, color or even certain effects to your work. There are a lot of nylon-brushes which are often included in most painting software, these can include round, water color and oil brushes.
Basic Tools: Exploring and mastering the brush tool, eraser tool, selection tool and gradient tool are all important if one wishes to develop successful digital art pieces. As such, it is crucial that one reports their practice with these tools
Example: Photoshop Interface
The layers panel in Adobe Photoshop is towards the right of the window and there is a motion for the tool and other required tools just on the left. The left tool motion includes the brush motion, selection motion, and text motion, all of which can be reached with just a click of a button.
How Do You Master Sketching Basics?
In order to create the best digital art work, sketching is the most important step, it is where thoughts tangentially collide and plan is concocted. Its like drawing the footpath ahead of the road. Here’s what a learner can do to practice their skills digitally so as to improve their sketching fundamentals.
Step-by-Step Instructions: A slow start to forming circles and lines is advised as it will make using a drawing tablet more tolerable. One will gradually develop the urge to take things a step further to constructing intricate shapes and compositions, and it will be okay if you have not fully developed your confidence in it yet.
Emphasis on Basic Exercises: Distilled and gesture drawing, contour drawing and still life sketch will not only ensure your range is widened since there is greater room for variety but the exercises will also boost eye hand coordination skills.
Tradition to Digital Artwork Transition: University students have been replacing traditional painting with drawing on tablets for ages now, so make sure to know how to use pressure sensitive and angle stacking. Get comfy with different brush settings and try to replicate the stylus pen or charcoal brush.
For Example: Essential Tools for Drawing Exercise
To get better at basic sketching, start off with easy sketches of everyday items like, fruits, household objects, your own hand, etc. Ensure to sketch with the essence of these items without worrying about the accuracy of outlines, angles or character ratios.
What are effective techniques for combining colors and textures?
Through effective color and texturing techniques, a digital drawing that was once just a sketch can become a work of art. Below are a few ways to enhance your coloring and texturing skills.
Brush Usage: Make use of various brushes and settings making an array of textures and effects to an artwork. Textured and opaque variations in brushes can imitate traditional techniques in painting such as stippling, cross-hatching or impasto.
The incorporation of color theory plays a significant role in decision making. With knowledge of color theory concepts such as color harmonies, it becomes possible to design color palettes and pictures that are beautiful. Use color theory principles to stimulate emotions and invoke certain atmospheres.
A seamless blend of colors and textures requires smooth transitions and layering capabilities. Becoming adept with the techniques enables you to paint the picture accurately. Play with blending modes and layer opacity to get the desired outcome.
Example: Texturing Methods
While working on a 3D picture, go through different brush options under texture, scatter, or flow to apply patterns on objects. To make a viewer feel these textures better and in a more three-dimensional way, use a brush to implement patterns on images, surfaces, or backgrounds.

How Do You Create Your First Digital Art Project?
Digging into the nitty-gritty of your very first digital art project is bound to be a little overwhelming. But that’s perfectly okay. The current section will explain how to approach the entire process starting from crafting an idea to printing and exporting it.
What Is Your Plan-To Paint An Artwork?
Seeing the process of creation through outlines and timeframes is an essential aspect of working and it will further aid you in structuring your ideas adequately. In particular, here’s a recommended strategy for organizing your digital art:
Conceptualization:Engage in a thought process and generate ideas that you can use for the art work. Consider appropriate themes, subjects, and narratives that you connect with and that will aid your work.
Mood Board: Mood boards are visually appealing portfolios that contain images, colors, textures and everything in between in order to help your creative process. Using Adobe Spark or Pinterest, make mood boards that will provide an insight into the style, tone, and aesthetics of the digital painting.
Concept Prototype Sketches: These are basically sketches that are employed to analyze the arrangement and visual components of a design before hand sketching and engraving them out. Use Procreate as a digital sketching tool to experiment with new pages, angles, and designs that match your previous sketches.
Example: Planning Your Artwork
Let’s assume you are looking to plan for a digital painting in a fantasy setting. To begin with you could start to collect reference pictures. For instance collecting images of generic landscapes, forests, and mountains can help you build a reasonable canvas for later. You will then have to make a collage of the reference images with building colors and textures that make up the misty atmosphere that you were hoping to develop. In the end, creating multiple models of the canvas will allow you to explore different structures and shapes while honing in on one specific final version.
What Is a Step-by-Step Creation Process?
Considering you have a good structure in place to begin with, we can begin with the project. To help you with the process, here is a step-by-step guide allowing you to shape your digital art:
Setting up The Canvas: The very start will involve you entering the digital art software of your choice, there you will need to configure a new canvas and set the dimensions and resolution depending on how you are planning to use the canvas later (e.g., web graphics, print, etc.).
Sketching the Composition: Using the layers available, start off by picking an appropriate prototype, that will allow you to roughly sketch the outline of the artwork you are building. Make sure to focus on bringing symmetry and overall proportions to the design.
Enhancing the Sketch: Go back to your initial drawing and revise it by expanding the details and forming a stronger representation of the subject. Change the sizes and the opacity of the brush to vary the weight of the lines and the formation of the subject.
Bringing in Color and Texture: Once satisfied with a sketch, paint the artwork in multi layers and use blending modes. You can also try out various brushes and varying techniques to roughen the image and any other forms.
Applying Final Details and Effects: At the end of your piece or artwork, add certain details such as highlights, shadows, and texture covers to finish your artwork. Employ layer masks and adjustment layers to get more accurate hues and shades.
Example: Step-by-Step Creation Rule
For example, if a character is to be painted digitally, a new layer is created and the outline and shape is constructed, then that shape is slowly detailed in starting with a facial expression and clothing. After this is done coloring and adding texture will help make it more realistic by shading and highlighting. Now the final touch of the painting can be set on it that will improve the look.
Finalizing and Exporting Digital Art: Steps and More
Adding finishing touches to your artwork, ideal for sharing or printing, is the final step in creating a digital piece. Here is a guide on how to properly export and add the finishing touch to your artwork:
Last Steps: Look at your artwork from a higher perspective and make the final changes and tweaks to the piece to ensure it aligns with your vision.
Exporting: Once you have the end product you are looking for, flatten any layers that need to be flattened, resize the piece, and change the file type.
File Conversions: Keep the art’s potential use in mind when picking the file type, for sharing online, your go-to types are JPEG and PNG while for printing or further editing TIFF and PSD formats are ideal.
Example: Final Steps and Exporting
Let’s say you were working on a portfolio illustration for a client, then you would polish them by adjusting the colors, tones, or the position of the elements used. After that, you would make the files to be saved in high-quality JPEG or PNG so that they can be uploaded directly on websites or social media platforms. If the plan is to print the illustration, you will want to save them in TIFF or PSD file types so that layers will be stored and quality will be kept intact.
Common Questions About Digital Art
Are you excited to explore digital art? As a newbie, it is okay to have some confusion and to help you out we have compiled a few common questions and the answers to them:
What Is The Best Digital Art Software For Beginners?
There are many great digital art tools available and making a decision on which one to use, is extremely crucial for all aspiring beginner entry in digital art. Below are some of the common and widely used options:
Adobe Photoshop: This software is loved by many digital artists due to its feature-rich toolset and being user-friendly at the same time.
Procreate: This is another application specifically found on the iPad and is equipped with a user-friendly interface to assist artists on the move.
Krita: It is an open-source application and rate-free where we find an interface that is user-friendly and a large library of paint tools. It is widely used by beginners with a strict budget.
How Much Money Do You Need To Get Started With Digital Art?
The cost of starting digital art is also dependent on tools and equipment you will be using. Here are the possible costs:
Digital Art Software: There are digital art software that are priced as open-source such as Krita and there are also software that requires a subscription model or an outright purchase such as Procreate and Adobe Creative Cloud.
Graphics Tablet: Budget students can purchase a graphics tablet for below 100 us dollars while professional tablets go for above 1000 dollars.
Accessories: More costs would be for styluses, screen protectors, ergonomic set up etc.
Is a drawing tablet a prerequisite to learning digital art?
A drawing tablet adds to the experience but is not required to begin your journey with digital art. Many people begin their digital art careers with a mouse and touchpad and eventually get a tablet after getting comfortable with the artform.
What are the Most Common Mistakes a Beginner Makes in Digital Art?
Here’s a list of common mistakes that a common beginner in digital art may make:
Misuse of Filters: A beginner can tend to use computer generated filters too much rather than concentrating on the basic manual skills
Disregarding Composition and Perspective: Infringing on the principles of composition and perspective can lead to dull and bland pictures.
Not Saving Progress As They Go: If periodic saving of work is neglected, it can be a real bother since hours worth of work could possibly go missing because the computer or software could crash.
Is There a Way to Search and Get Ideas For The Same Such Than The Mentioned?
Searching for ideas and materials for a digital art project can easily be done with:
Nature: Drawing landscapes, animals, and even plants is a crucial concept and can be seen as part of art.
Literature and Myth: Looking up books and classic myths can bring forth new creative ideas and enable people to create new types of imaginative arts.
Pop culture: If you are an artist, ideas can range from your favorite movies or a specific character from one of your best video games.
Conclusion
Starting your voyage into digital art is a thrilling experience and a rewarding one as well. You can outdo yourself as long as you have the right tools, keep practicing, and source inspiration from your surroundings as the world of digital mediums is boundless. Do not forget, anything has to be done multiple times can go rotten or stale and remain a waste – thus keep working, experimentation, and rational harnessing of imagination should never be something to be scared of. Let your creativity blossom and let your artistic journey begin!
More Post
- Two-Point Perspective Drawing Tutorial: Mastering the Art of Depth and Realism in Your Artwork
- How to Become a Creative Director and What to Expect?
- How to Sell Your Art Online and Make Money as an Artist?
- Mastering the Art of Freelance Photography: How to Find the Best Photography Jobs and Become a Successful Freelance Photographer
- How to Use Free Stock Photos Without Getting Sued: Navigate Copyrights and Licenses Like a Pro


