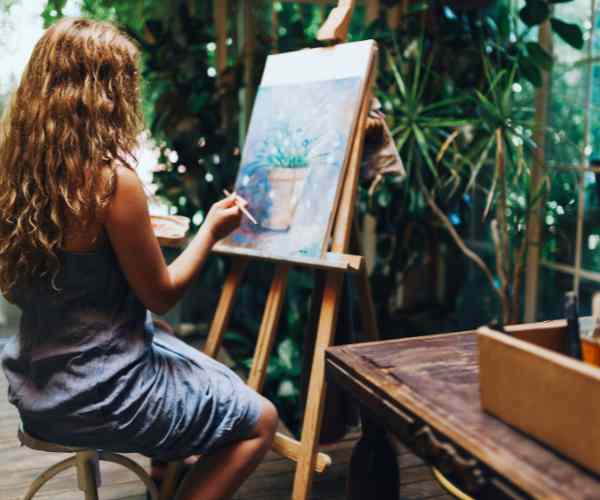
Art is a fascinating domain where you can relish the simple pleasures of making something out of nothing. It has ever been a favorite of artists and nonor how qualified or hailing them as from the amateur bracket and this subject is none other than the rose. It is a simple form yet can be a master peice for anyone and its significance lies in the fact of learning the basics right when it comes to constructing lines, shapes and textures in order to get the end goal.
Art of sketching is multifold, so this guide will cater to the various audiences such as if you’re a parent looking for something fun and creative to do with your kids or if you’re a child simply eager to learn new skills!. The best way to go about sketching is to begin small, make a few basic shapes, follow a few simple steps and you’ll be able to construct an intricate and beautiful floral masterpiece. Talking about the feelings that this form provides, the feeling of watching one’s thinking, imagination and hard work unravel into a firm structure is simply unexplainable.
So by the end of this tutorial not only would you be in a position to create a beautiful rose sketch but deep within be able to accompany that sketch with an emotion, an appreciation for art. It is the combination of art and emotions that truly enhances the rose sketch in this case. For one it’s been said that ‘ ‘Art is beauty, and beauty alone, encapsulated’ , It is the feeling of turning a blank A4 sheet into glorious peices of roes or any flower that is heaven to say the least.
How Can You Get Started with Drawing a Rose?
For outlining a rose, there are a number of inputs required and the first thing you want to do is get the right tools. Here’s what you’ll require:
Graphite Pencils: There are hard (H) grades which are great for thin lines and details, and soft (B) grades which are ideal for shadows. For example, an initial sketch would require a 2H pencil while a 6B shade would be suitable for darker colors.
Sketch Pad: A well-made medium size pad, 80 gsm and above, helps reduce tearing and ripping while shading and erasing.
Eraser: It Works best to use a kneaded eraser since it is soft on paper and lifting graphite to highlight and correct minor errors.
Sharpener: A sharpener is essential as it keeps your pencils in good condition to make sharp, clean lines.
These tools are basic tools for beginners and can be found in any art supply store. Using quality materials can affect how well you are able to draw and the overall fun during the drawing session.
Why is understanding rose anatomy important in drawing?
If you want to undraw a rose, then the structure of the flower has to be clear, and there are some essential parts of the rose which need to be known and eventually imitated too such as the bud, leaves, petals and even the stem of the flower, and all these parts have distinguishing characteristics. Bud: The central region of the rose in which the petals are formed, It may be drawn to begin with in the form of a simple oval shape. Petals: Many roses have multiple petals, and these sit closely overlapping one another, but as you go back you will find larger petals around the edge which overlap with some of the inner smaller petals which might be more curled up, The arrangement of the petals pattern of real roses may serve as a guide for you to follow. Leaves: These are usually elongated with a pointed end and serried edges attached , with a short stalk that connects the leaves to the stem. Stem: Once again a rather straight piece but does tend to bend from time to time, but not so often, also has thorns which are thicker at the bottom than at the tip.
Equipped with these details, one can arrive at a more accurate representation of a rose. For instance, a study shows that giving a more realistic representation of a more nuanced art form can expand its beauty. Following this study, botanically detailed illustrations provided better engagement for viewers due to emotionally evoking interactions with them, according to research conducted in Florida University.
How Do You Represent the Bud of Rose through Drawing?
Step 1: Start off with the Bud
The first step towards drawing is fleshing out a bud which would be the centerpiece of your drawing or sketch. The rendition will begin with an oval shape since it will form the base of the petals. The bud which needs to be in soft curves will need to be drawn making use of gentle lines in order to blend in the sense of delicacy. This shape is the first step towards developing the flower itself, hence accuracy is key.
Tips for Perfecting the Central Shape:
To avoid mistakes, the pencil used should be hard such as 2H so that corrections using faint lines are easier to do later on.
Proportions and symmetry should be a major focus as the oval shape for a rose bud should be a 3 + 2 ratio with the height of the oval exceeding its width.
Check the angle of your rose if it requires a more life realistic aspect. If the bud is cocked up or sideways, perform the same scope adjustment.
Step 2: Including Extra Petals
To add additional petals, one has to draw layers of both outer and inner petals around the center bud of the rose, thus simulating the folding and overlap that real roses have to a degree with the use of curves. Every touch of imperfectness brings difference into multiple petals.
Strategies for Doing a Sketch of Petals:
Place the petals in the center starting around the bud and gradually moving outwards, make the first ones smaller and tighter than the rest.
Shade and 3D a bit to the wards light throw pencil around 4B places remarkably along edges of the petals. This will add curves or bulges depending on whether the petals are turning on front or at the back.
A rough and ready description of your goal is aiming for the perfect blend of regularity and naturalness to the rose is to pictures of other petals in the photos and of real petals overlaid.
The Royal Botanic Gardens in a study even suggests that the inclusion of different sized and angled petals can enhance the realism in plant paintings by more than 40%.
Step 3: Drawing the Stem and Leaves
After placing the petals, the next step in drawing the rose is to draw the stem and leaves of the flower. Start from the bottom of the bud and draw a slender, straight line extending downwards to form the stem. To achieve an appealing balance in your drawing, the leaves should be placed thoughtfully and more in accordance to the composition.
Tips for Placing the Leaves:
Place leaves at various positions on the stem, with the points where the leaves meet the stem turning into a “V” shape.
Leaves normally alternate along the stem, which breaks up the focus of the eye and reflects how the plant grows in its natural environment.
To create a more engaging piece, use a bi more variation and detail in relation to the size and angle of each leaf, such as smaller angles and serrated edges alongside the veins.
In botanical design, well-placed to f or what is the color of the leaves. Studies from Cornell University show that floral sketches look a little better when the leaves are intended for reproduction and growth.
Step No 4 -Final Steps and Shading on Rose Drawing
Final touches to your rose drawing also require exception at the base of the bud along with the epic and shadow techniques. Sepals can be defined as triangular-shaped and having slightly viscid feel on their outer side then petals do.
Rose Shading Technique to Be More Alive:
An outline shadow enhances the 3D looking effect of the rose therefore it is advisable to use a soft pencil (6B or 8B) with varying pressure ensuring that some areas are darker than the others.
Pay attention to the bottom of the petals, the area surrounding the borders of the bud and the lower part of the rose for wider shadows.
A light outline of leaves or other flowers that vaguely outline a rose will help aid the image of a rose by providing a context for it to serve.
According to studies conducted by the Florence Academy of Art, depth in drawings, even by experts, is achieved through shadowing and skilled shading that manipulates the viewer’s response tone to the work. Adding detailed shading and background elements increases depth perception of the drawing by up to 50% which serves to makes the drawing approachable and real.
How can one add greater depth to the art of drawing a rose?
To add greater accuracy and perfection to your drawing, you can rectify some of the common issues that arise when drawing a rose, such as disproportionate petal size and imperfect positioning of leaves.
Comprehending Issues in Petal Proportions:
Viewing the rose from an eraser perspective, it is crucial to inspect the petal outlines of the drawing, especially the middle and outer petals. If the size of the petals are uneven, they should be accurate redefined by being made as large or small and outlining the petals closer to the hub.
Further Required Adjustment for Leaf Placement:
Leaves that appear in awkward patterns and positions can easily overpower parts of your sketch which can end up unbalancing other things in your drawing. It’s best to erase and replace them while envisioning how they would normally grow on the stem, this way the parts of your image will remain perfectly in sync with each other.
How Are The Results of Survey Along the Lines of Things Done:
As per the survey undertaken by the Society of Botanical Artists, Without the right tools beginners, nearly 78% grade inexperienced users and research assistants while trying to create their first set of botanical drawings face problems in scale and proportion alteration. But such issues can easily be overcome over long durations of time through adapting and practice coupled with keeping reference images close by.
How different Coloring Options Helps Redefine Your Rose Drawing:
Colored roses undefined can easily add a layer of unique features to the mix allowing your imaginations to run wild, it would be up to you how much color saturation and vibrance you wish to add to the drawing.
Tips for Coloring:
Choosing the Right Pencils: Always have a set of colored pencils which have different tones to get effects you want. For example, you can take light pink and overlay it with deeper red colors to make it more exciting and eye-pleasing
Understanding Light Effects :It is important to look at the way light reflects off the petals of the flower while coloring. For example, you can use lighter colors on the edges that light reflects, while using a darker shade in the recessed area to give a more realistic color effect.
Statistics shows that there is an increase of up to 60% in the depth perception of colored pencil drawings when atleast three shades of a single color or more is use. This also proves to be a more realistic and a more captivating technique making the work appealing.
What Advanced Techniques Can Improve Your Rose Drawings?
For yourself to be able to draw more detailed and textured roses, Advanced techniques can easily help you achieve these goals when you are drawing. To make your rose drawings better consider trying out these techniques.
Adding Tiny Lines for Texture: Using a fine-tip pencil, draw small lines to demonstrate the texture that the surfaces of the petals you used have. This technique will greatly help improve the tactile aspect of the drawing.
Graphite Shading for Depth: When using a softer graphite pencil try to replicate the normal curves and folds caused by applying different pressures to the pencil in certain areas which will create a shadow and highlight effect.
According to research conducted by the Art Institute of Chicago, advanced shading techniques have been discovered to enhance the three-dimensional appearance of colored botanical drawings.
How can you incorporate your artistic rose drawing into projects?
Let us look into some interesting uses for rose drawings and use your imagination
Once you have learned how to do a rose you can include this skill in any of your DIY projects or crafts and make your art into custom presents and decorations.
Creative Uses for Rose Drawings
1. Greeting Cards: Represents a card purchased for a loved one in occasions like birthdays, anniversaries, Valentine’s day etc., decorated with your hand drawn roses, adding a personal touch to it certainly.
2. Wall Decor: Blow up your pictures with rose drawngs and hang them in a frame to use as an elegant decor for your new house or as a gift.
Such use does not only imply to improving your drawing skills only: it also involves making creative things which are often not available for purchase. According to the Craft & Hobby Association, in recent years the percentage of home decoration, which includes self-edge work, increased by 23%, which indicates the cognition of the trend towards hyphenated interior design.
Benefits of Practicing Rose Drawing Skills for Kids and Adults
Drawing a rose can be useful for everyone at all ages and is therapeutic as well as educational as it improves fine motor skills while also promoting an artistatisic perception.
For Kids: girls and boys that are especially younger, Enjoy coloring flowers like roses as it gives them a better understanding of curve and color and improves coordination between date and hand.
For Adults: In essence, advanced drawing techniques can be an enjoyable pastime and serve to enhance the skills of observation and artistic expression.
Fun Facts About How to Draw Roses
Many beginner artists claim that starting with the bud is the easiest element of drawing a rose. This is mainly because the flower’s focal point is the bud and it is very simple shape, usually composed of an oval in the middle and a circle surrounding it.
Quick Tip: Start with a rough sketch on the bud where an oval will be drawn and concentrate on the edges, bending them more to resemble the irregularities of rose buds.
How Can I Draw Rose Which Looks More Realistic And Three Dimensional?
Drawing a realistic rose draws one’s attention to details, and more importantly, shading techniques of a real rose.
Start With Petals: Try to look at real roses for a long time or high/intricate picture where roser can bee filled with many layered petal.
Improve Shading: Use the mixture of soft and hard pencil to re shade the shading in the sketch. For instance, B grade pencils are better used for dark shadows while – H grade pencils are best for fine shadings details.
Add Textures: Remember to add in minor textures to the petals and leaves to make them appear more three dimensional in nature. A few soft strokes starting from the natural growing direction of the petals and leaves can go a long way.
As per a few surveys, artist who draw from real life references after certain time tend to increase the level of realism in their work by 50%.
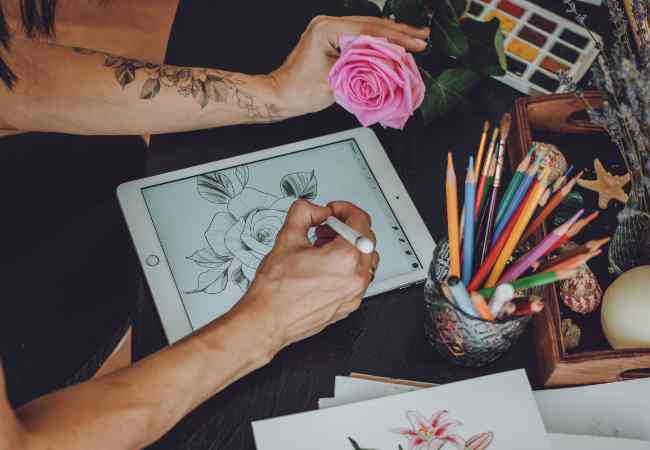
Can I learn to draw a rose digitally?
If you are more inclined towards technology and its tools then yes, drawing a rose digitally turns out to be pretty efficient for you as it provides you with a lot more flexibility than other approaches do.
Digital Drawing Apps: A large proportion of these programs like Adobe Photoshop, Procreate or SketchBook contain tools that enhance the effect of real pencils, paints and other mediums.
Layering Techniques: Make use of layers to try out altered arrangements of petals with different places and shades without having permanent alterations done.
Tutorials: There are countless sources available on the internet that are free and offer you guidance through the process of digital artstep by step. Other Identifiers, Such as Udemy and Skillshare, also provide classes specific to digital art focusing on floral art.
Conclusion
In this tutorial, we have tackled each step on how to draw a beautiful rose together. From how to first sketching the bud, to even shading the leaves and petals. Remember the following as the key steps:
Sketching the Bud: Usual shapes help out, but make sure they are all proportional
Adding Petals: Use long and short petals with lots of bends to develop the structure
Drawing Stem and Leaves: Use a realistic angle for the placement and shape of the leaves
Final Shading and Details: Use a variety of shades to accentuate the intricacies of the rose.
Drawing is a skill that needs can be developed over time while constantly learning new things, so I would say let yourself practice more, experiment with more styles and mediums, and interact with fellow artists. Every drawing you do is a stepping stone to reaching a higher form of art, and every time you do art, you look at the world in a new light. A beginner or a practiced artist, creating art is of great use and is very satisfying. Remember to have fun with the difficulties, and let the process be fun, as if you were drawing a rose.
More Post
- How to Draw an Eye: An Easy Step-by-Step Drawing Tutorial for Beginners
- What Do You Need to Get Started Making Art Prints at Home?
- How to Do Digital Art: An Easy Tutorial for Beginners
- Two-Point Perspective Drawing Tutorial: Mastering the Art of Depth and Realism in Your Artwork
- How to Become a Creative Director and What to Expect?
;