Do You Want to Bring Out the Artist in You?
Every one of us has a moment when we feel like we can do the impossible, and for some that moment is accompanied by the feeling of doodling sometime during a meeting or sketching the edges of a notebook. It’s all so simple, but what if I told you that with some effort you could analyze the methods behind such simple techniques and develop the ability of creating whatever you could imagine.
You will learn skills that every artist should have, You will also learn about different tools used for sketching, and along the journey, I’ll make sure that all the anti-sketching skills disappear from your toolbox, making this journey as enjoyable as it deserves to be.
This blog is for sketching first-timers, from explaining the materials needed to picking the right techniques, this blog has everything to build up your confidence so that you can finally open that sketchbook you’ve been keeping closed for so long. So, are you pumped? Then let’s dive right in.
Sketching is more often than not, the most thoughtful part of making something, it gives the artist in any person a chance to come out. It is a great way to convey emotions and experiences and even help ease boredom. I still remember the thrill I felt when I thought to myself that I could turn a pencil into my time machine.

Getting Started with Essential Sketching Techniques for Beginners
For all art lovers, it is a general understanding that sketching is the first step on becoming an artist.
Sketching is the first form of verbal creativity, which aids in portraying concepts visually for example. If you feel like you want to become an artist or take a simple artistic hobby, it is compulsory to learn the basics of sketching.
This text is about the need for sketching skills. Sketching is considered to go past the basic activity of drawing lines on a piece of paper but rather sharpening your hand and eye coordination skills. This improves the way in which one perceives reality and gets new ideas. It can be imagination exercises for your creative muscles.
With that said, let’s now shift our focus to the various forms of sketching. There is the realistic approach that aims to replicate the world exactly as it is, right down to its most intricate features. Then, there is abstract where there is no realism involved thus exclusively feelings and concepts are expressed. Each style is equally fascinating and it makes unique self-expressions and holds an identity. As a person that is just starting drawing with these techniques is a good way to find the best technique that fits you.
One example might be the artist Pablo Picasso. Certainly, all beginners begin with simple sketches, and Picasso was no exception. As a child, Picasso produced a few drawing while he was extremely young. Today, the most famous sketches which are appreciated by many are the portraits of people and objects. The vision of how a sketch will be brought to life is richer then the rough outline. A sketching is the first manifestation of an unconcealed art of the artist that every novice wants to immerse oneself in.
In order to avoid such disappointments, a sketch should be done with proper tools. In my opinion there are such things as tools you must have and tools you need.
One, you can never sketch without having a range of graphite pencils and charcoal pencils. Especially if one wants to sketch in different shades and texture. Graphite, for instance, is versatile owing to its ability to range across hardness and softness; from H to B. This range allows for greater manipulation of darkness and line quality. Trying out these techniques to find what one is comfortable with is good practice.
The kind of paper you use is equally crucial. There are a lot of choices, ranging from plain sketch paper to textured paper which gives your artwork a better finish. Additionally, depending on the type of drawing you are planning to do, prepare yourself paper wise. If you are interested in doing detailed work, then a thicker paper might suit you as it will withstand more pressure and more erasing without ripping.
And do not underestimate the importance of a good sketchbook too! It is a part of you, a place for your thoughts, ideas and for whatever art you wished to play with. I can still recall my first visit to an art supply store – the endless range of options I had to pick from. I have vivid memories of standing there with a sketch book in my hand and thinking how if felt as if i was going to begin a new and exquisite adventure. The purchase of the right tools could set the atmosphere in which the art in one is experienced.
Let us not forget the money issue. You can start sketching without spending all your savings thanks to the availability of affordable options as well as professional quality supplies. A good place to start is to get some sets of pencils or the sketch books where they offer a better quality for a cheaper price ideal for starters.
A friend of mine, who only recently started sketching, didn’t want to购买太多的借口。 For this reason, she only went to her local store and purchased a set of graphite pencils along with a sketchbook. She set out on her artistic journey with basic materials and realized that it’s the amount of time spent practicing, rather than the supply costs, that truly mattered. It was just not the kind of sandpaper she wanted that mattered.”
Stepping stones for mastering Basic Shapes
So, what’s with the quest on why basic shapes are indispensable in sketching? Becoming proficient in simple shapes,like circles, squares, and triangles,lays a base,so to speak, for creating more complex subjects and objects,that one may try imagining.
If you always put what you see into these geometric shapes,it certainly becomes less frightening. Take for example, a sketch of something human—graphically speaking, use the oval elizabethan head shape for the head and transfer the drawing through speaking with rectangles for arms. Such a methods advances the sketching techniques and directs attention mainly to structure and proportions.
As an illustration of two dimensional drawing ‘pizza cake’ concepts,now let us work through a different type of exercise see how best one can develop their observational skills:
Let the circles come before you: Draw more or less similar circles together but of different sizes, concentrating instead on ensuring that they are as even and round as possible.
Move on to squares: Move on to squares now and repeat the procedure while being conscious of the angles.
Combine shapes: When you feel confident enough, attempt to join these shapes to form a basic object such as a cup or a tree.
Real-life examples are always inspiring. A budding artist I know explained how after mastering such basic shapes, her sketches improved drastically. First of all, she was not very good at representing likenesses of actual objects. However, as she drew circles and squares, there was a gradual advancement in her performance. It was something like she had an epiphany—she felt more confident and started to sketch anything that she saw, from her coffee mug to trees in a park. This was a crucial step during her artistic development because it made her realize that every artwork starts with a simple shape.
Exploring Line Techniques
When it comes to sketching, the lines you use can make a world of difference.
Let’s explore various line techniques that can enhance the dimension, texture and motion of your work.
Continuous lines deliver a seamless flow which is helpful in describing the subject smoothly, for example the soft edges of flower petals or the rounded surfaces of a face.
In addition, there are broken lines, which suggest some sort of motion or accentuate edges. Think of the broken lines of a mountain range—this stylized design accentuates the manic intensity.
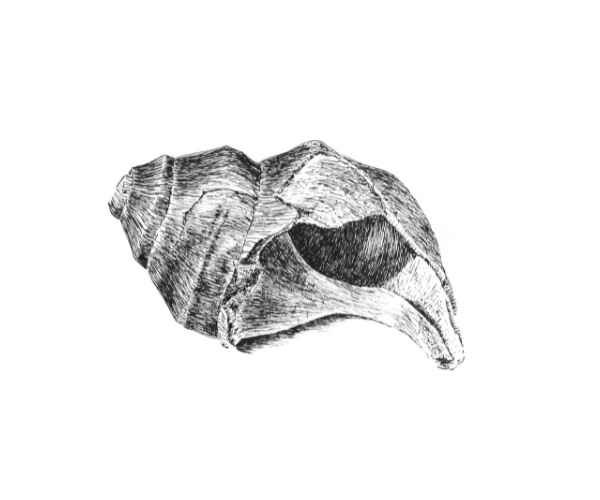
In the end, cross-hatching is in quite good way for shading. The darkness perspective can be achieved by overlapping lines at different angles.
To practice these techniques, try this exercise:
Continuous lines: Find a simple object such as a mug and with no lifting of the pencil outline the object in one continuous line. This involves letting go of your pencil as it creates a seamless image.
Broken Lines: Now, outline the edges of the same mug with a pencil but do not lift it when drawing the details. The outline will now have a broken detail. Varying hard distances between lines can result in different effects, experiment with this.
Cross Hatching: Finally, take a considerably more complex object; for example a tree, focus on depicting the bark and using shadows to create depth with a cross hatched pattern.
Line quality as well the weight is important; heavier set lines will effectively highlight areas of interest while thinner lines will create an impression of gentleness. an experienced artist, Sarah, she is new to artwork, realized this when she was trying to sketch.
Initially, she would only use one weight line which caused her work to appear flat. Yet through practicing continuous, broken, and cross hatching, she gradually developed an understanding of how to depict shadows. Her drawings underwent development as she learned to use and apply line weight appropriately in order to create depth forms and add life to artworks she never thought possible.
Shading Techniques for Depth and Dimension
Having been introduced o lines, it is now time to move on to shading techniques which will be utilized in sketching.
Light and shadow are crucial in crafting the illusion of depth to your drawing. Understanding their interaction with structures enables you to pull off the transition of a sketch from two to three dimensional.
Let us take a look at a few key techniques.
To draw shadows or shadings, intro makes, vertical and or horizontal lines called hatching are drawn parallel to each other. The more the lines are, the darker the designated place will be.
Those who have a little patience will absolutely love stippling. It involves forming many tiny dots to provide gradation in depth and texture.
Blending is another widely accepted method. Using fingers or blending stumps one can blend out their pencil marks for a more gentle transition from dark to light areas.
Try this exercise: Hatching: Manipulate the lighting. Begin with drawing a plain figure of a ball and then shaded, blend and try to distinguish how light may influence the object. See how shading and blending using lines alters the simple structure of the object. Stippling: Next, grab an apple or another fruit or any other object. Instead of using shades blend dots to remind Greek mythology and metaphors. This may take time, but the end results are worth it. Blending: Lastly, choose an object such as a glossy ball or something appealing to the eyes. Again use a blending stump to mess around with the darkest and the lightest parts of the object. I remember a novice artist called Mark sitting next to me during a workshop. Mark started from a dimensionless flat depiction of a fruit bowl: immediately after applying the first impressed cross-hatch and disappointed blend, his art got noticeably better. With using the above ideas, Mark was able with practice to make spatial volume and reality into his pictures. It was profound to see how shadows added another layer of imagination to his artwork. Gesture Drawing for Movement and Flow Gesture drawing is great for any artist who wants to learn how to concentrate on the movement of an object.
This method concentrates on the entire outline and motion of the subject rather than the smaller details. It is purely based on velocity and enthusiasms.
In order to try out gesture drawing, follow this activity as an exercise for me:
Get a live model, a pet or a friend. Put the timer on a minute and try to draw the model as best as you can within that time limit.
Try to concentrate on portraying the position and activities instead of small intricate details.
For this exercise, increase the time limit by 5 or 10 minutes. This will ensure that rather than a single pose, multiple other poses are captured.
Gesture drawings ensure the proper observation of the body’s shape and its flow. I recollect during a gesture drawing workshop, which she was conducting, I met an aspiring artist, Lily. This young artist began with a struggle to sketch a refined simple sequence of actions. But there were a couple of quick exercises, and then she was able to learn how to put the energy of the human form in just a few strokes.
She must have felt like someone gifted her with a great great wisdom, for she has opened her heart to purity. Therefore, Lily has started to incorporate ‘gesture drawings’ in her daily schedule. They have embedded themselves into the core of her art processes. The best part of her drawings is enveloping images that embrace the meaning of motion.
Creating Something Original
Every artist has a different story and trying out different styles and techniques is a necessary step in the process of finding your artistic self, And such concepts are crucial in the act of defining your style.
While doing this, you might discover that some techniques are more appealing to you than others. So the most important thing is to enjoy this process of exploration!
Finding ideas is also facilitated by looking at what other artists do. Check out the art in galleries, art books, or online platforms for more ideas. Try to figure out what it is about their artwork that makes you so interested in it. The colors? The forms? The feeling it gives you?
A perfect example is my friend James, a therapy patient and an novice, who started out unsure of what his style was but had an idea as to how he wanted to develop his art. After spending months trying out talented artists, james was able to discover the concept of blended media. By mixing different styles — for example, using both water colors, charcoal and oil — he was able to combine distinct components in his painting to represent his history and provide a completely new meaning.
His development comforted him in an exhibition of self-expression through art. Believe it or not but your style role is not limited based on the way in which you paint. Rather in what you want to tell with your paintings.
As you try different things, consider the reality that every artist has a starting point. Enjoy the process of being an artist and allow it to be spectacularly, chaotically unveiled.
FAQs
What sketching techniques can I use as a total novice?
If you’re a total novice, some techniques that can help you include getting used to basic constructs, line strength, and finally shading.
Firstly, use basic geometric shapes such as circles, squares, and triangles.
Such basic shapes serve as the foundation for advanced subjects, such as the figure of a person or complicated objects.
Equally important is to pay attention to your line work. Practice different types of line – continuous, broken, and cross-hatching to add texture and depth into your sketches.
You can use shading techniques such as hatching or stippling to create three-dimensional effects on your drawings to represent light and shadow.
It’s all about practising the skill so enjoy the process! You should not be scared to get out there and try letting things not to go your way. Every line you put is part of the art journey.
How can I enhance my sketching skills in the shortest time possible?
In short, sketching skills can only be enhanced with practice and including numerous practices in the daily regime.
You might wanna incorporate small bits of your life into your sketches as well: it can be some random stranger on a bus or a friend who’s doing their best to sit beside you.
Perspective and form are structures that can be wholly grasped only with the help of life models, and so life models should be the focus of one’s sketches.
Consider practicing with other artists or joining a sketcher community to further expand your network and your circle.
There is always something new to learn from other people and by sharing your work with them, you can help inspire them to do more and create new things.
When I became a member of a sketching group, I noticed how much my improvement increased, as there were so many supportive people to help me improve different skills that would have been hard to practice otherwise.
Are expensive tools necessary for amateur sketching practitioners?
To begin sketching, you would not have to use expensive tools at all, and in fact you want to avoid using them.
You can get the newest beginner tools without worrying about them breaking the bank.
Explicitly mentioning, a superb sketchbook, a couple of lean erasers, and a couple of charcoal pencils should aid you when painting.
Similarly, mechanical pencils tend to be inexpensive, and can even be found in multiple shapes and sizes at a local store.
Tools should never restrict you from practicing and other wonderful opportunities.
Many tools can be used by professional artists for visually pleasing works of art, and they are extremely simple.
A pencil and paper can be combined to create enjoyable sketches.
Substitute the cost of the materials with your enthusiasm and ingenuity and see where magic happens!
How often should I practice sketching to see improvement?
To see improvement in your sketching, aim for consistent practice.
Try to sketch daily or at least several times a week.
Even short practice sessions can lead to significant progress over time.
Set specific goals for your practice, such as mastering a new technique or completing a sketch of a specific subject.
Don’t forget to keep your sketchbook handy! You never know when inspiration might strike.
In my early days of sketching, I used to carry a small sketch book everywhere I went.
Elbowing in free time, waiting for a friend or suddenly coffee breaks were great opportunities for practicing new patterns or doodling.
Those free periods when the sum were ticked and turned out they were very useful in my developing as an artist!
Conclusion
In this blog post, we’ve delved into the basics of initially sketching techniques such as shapes, lines and shade techniques providing the perfect starting point for beginner artists.
We’ve emphasized drawing gesture and style development and suggested finding your tools and practice making appropriate sense.
Of course, every master had been a beggar at least once in their life like you.
It’s important to accept the process and allow oneself to be artistic and creative with their drawings.
So, grab a pencil and start drawing today!
Give yourself the ability to try things out, fail, and then gain knowledge from those failures.
Consider your sketchbook as your personal space where every piece of art you create helps in developing your art skills.
I would really appreciate listening to your stories of how you learned to sketch!


