I remember the first time I dabbled with oil paints. I was both elated and nervous as I had the thought that it’s the magic sauce that distinguishes a beginner with a captivating painting. I’d observe the finest works by artists and marvel at how the paintings had the power to make the viewer feel as if they were right there in the scene – as if they could feel the emotion captured inside a portrait. What I didn’t quite get back then was that the concept of depth I was missing was the key component in achieving realism.
Having said that, let’s not get get carried away too much. Let me clarify: working with depth using oil paints is not working with an abstract concept. It’s simply using a few key foundational skills which mostly includes layering, grasping how light interacts with objects, and becoming proficient at color mixing. Once you get these handled, your dull and boring paintings will transform into ones that are alive.
Incorporating depth in your painting allows it to have the 3D quality that is visually appealing. It creates the illusion that a canvas is not just a flat surface covered with paint, but rather, it is its own universe. And once you start to view your art in a more unfathomable way, you will have difficulty reverting to your old mindset. Trying out warm and cool color palettes on a simple landscape helped me break through to depth, as one such piece I was working on was simply a landscape. By applying cooler hues to the background and warmer tones to the foreground, I was able to achieve a convincing result that enhanced the composition. It was like those small details had so much more to offer because there was a background to it.
These tools and methods are particularly simple to grasp and implement regardless of the complexity of your art ranging from abstracts to more traditional oil mountains. Let’s end here so you can start exploring and enhancing your day-to-day oil painting skills that will undoubtedly make your next creation feel almost real. Aim to feel like building on your next painting is more of a step-by-step process once you have your basics ironed out. Let us get going!
What is depth, and Why is It Important in Art?
So, what is depth when it comes to painting and Why is it so important? When you think about it, depth does touch on the difference between a baby artist and a more developed one. If an artwork does not have depth, it does not feel right. Objects appear as you would expect, but they are not appealing. But when there is depth, there is a sense that the audience stands at a window that opens into the painting and invites them to take a step over the boundary between them and it.
I remember how I used to draw, looking at some of the early pieces, all I got out of it was pure frustration because I absolutely could not find that missing piece, that so called ‘wow’ factor which always seemed elusive. I mean they were fine, but quite frankly they seemed more like photographs than art. What dawned on me later on was that the missing piece was depth.
In two-dimensions, it becomes easy to make things appear three dimensional and all it requires is depth – or does it? This is where techniques like linear perspective come into play. Linear perspective is the technique used by artists to make it appear like objects are a far distance away by using diagonal lines that meet up at a vanishing point. It’s a technique you see employed effectively by Carolyn Lord as she guides our eyes to the depth of her paintings. It allows the viewer to be mesmerized by the work and for the masterpiece to feel infinite.
Another important aspect of creating depth involves value, which emphasizes the lightness or darkness in color. Now value is incredibly important as it determines the shape of an object to stand out and creates areas where the viewer’s eye should focus related to distance, whether close or far away.
Tools and Materials You Need for Adding Depth
Whether or not you have the right tools readily available will determine how easy or difficult the process of creating depth will actually become. While technique is king, you need the ideal materials for the technique to work effectively.
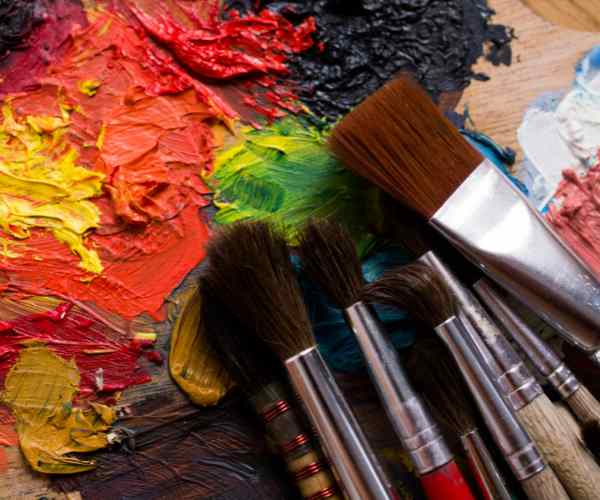
- Bristle Brushes: I cannot emphasize enough the need for having a good bristle brush in one’s arsenal. These brushes come in handy whenever there is a need to apply thick strokes, which is essential when creating an impasto effect – paint with texture, which gives a three-dimensional quality to the surface. The stiffness of the brush allows for slathering of the paint in the desired manner.
- Palette Knives: There was once a time when I used to refrain from using palette knives as I had the impression they were exclusively for paint mixing. How wrong I could have been! A palette knife is fantastic for introducing coarse and realistic effects to your work. It can be dragged across the canvas to produce well-defined edges and rough patches that give an impression of texture. This is particularly advantageous in landscape oil paintings aiming at depicting rocks, trees or anything else found in nature.
- Oil Mediums: Glazing can be an absolute nightmare if not used appropriately. Linseed oil or walnut oil are the most recommended oil mediums for people as they not only aid in changing the flow but also work towards making your paint color more transparent. Glazing on the other hand, is a technique where a dry layer is painted with a transparent thin layer in order to create a new effect. This technique allows for subtle changes in the color and adds a slightly more saturated depth. If you wish to add intricate layers to the painting, glazing would serve as the perfect solution.
- Warm and Cool Colors: As I stated before, warm and cool colors are the perfect way to add depth to your painting if utilized in moderation and proper care. Cool colors, for example, light blue and green work as a great background and allow the painting itself to seem further away. To the contrary, warm colors such as reds, oranges and yellow have the complete opposite effect and push the painting closer to the viewer. The addition of these colors cohesively work together to create a more engaging scene and help deepen the painting.
All of these tools add a different element to your work, be it a texture, color, or value. You will also understand that subtle changes can have a large impact on the overall impression of the piece as you use them more.
Importance of Perspective and Layout in the Process of Depth Creation
Linear Perspective
Ah, linear perspective – this is one of the oldest tricks in the book, and for good cause. If one wants to give off an impression of an object being more distanced or to give a work a more three dimensional vibe then the way to go is mastering linear perspective. When I started incorporating it into my own work, it was so transformational that I equate it to flicking a switch. Indeed, my objects no longer merely sat on the canvas. It brings that whole other realism whereby the audience feels they can step inside into the piece of art.
Here’s how it works: imagine a collection of diagonal lines emanating from a single point on your canvas, simply referred to as the ‘vanishing point’. What is fascinating about these lines is that they create the optical illusion whereby distant objects seem smaller while objects that are nearer to the viewer seem larger. The eye is fooled by this gradual tucking and pulling of objects as they approach the vanishing point into believing that there is depth when there’s none.
Take into consideration the image of standing on a straight and long road, or even seeing a set of train tracks. The more you focus on the tracks the more parallel they seem until they almost meet at some distant place, which is say the vanishing point. Once you think in this manner and apply it into your painting, the audience gets the impression that they are inside the painting witnessing the entire painting unfold in front of them. This is especially good for use in landscape paintings but can be utilized in virtually any scene where the impression of distance is required.
I used to have difficulty grasping the viewer’s attention, especially when they were representing scenes with multiple background elements. But after I started applying linear perspective, I was able to direct their eye where I wanted them to look, as if dragging their sight through the painting. It is a powerful means and control of the composition because it is subtle.
Aerial Perspective
Although the linear perspective does the job when it comes to creating a sense of space, aerial perspective (atmospheric perspective) is the trick that makes the scene look real, capturing color and light just the way we actually see them. Have you ever seen how a mountain in the far distance looks a bit light-colored or a bit desaturated as compared to close trees or buildings? That is how aerial perspective works.
For a landscape painting, aerial perspective is the best tool to create an illusion of depth. To explain it simply: when objects are farther away they become less distinct, weaker, and wider because of the atmosphere diffusing light rays. You may create such in a painting by means of cool colors and light tones used in the background where color particles lose the strength and faint from the horizon making an object appear farther away.
Let us discuss an example when I am painting mountains. I tend to start off by laying a coat of very light blues and greys on the canvas. I would say that thinner paint goes a long way. This shifts the tone of the mountains in a way where they appear farther than they are. Foreground elements are best suited with warmer tones which allow them to seem close and even center in attention. Everything has to be in moderation, adding too many colors in the background ruins the depth and space while not putting in enough makes everything look dull and ordinary.
Now, in order to create perspective more dimensions you have to manipulate the colors. Think of a tree or character as the focus of the art piece, it would be better to use richer colors on them, however, use muted colors for the characters further in the back. These small tweaks in color have the incredible effect of giving a painting an impression of infinite dimensions.
To Start: Identify Light and Shadows
“In an object, there is light reflection and there is an area where there is no light. Within the light reflection area of an object there exists shadow geometry. It is this geometry, also known as a shadow volume, that kills the confusion associated with flat images.” ← this quote is deep. Understanding how light works is crucial, but there’s still one step you need to take. Knowing the reflection geometry and the shadow volume together answers the light source problem. Understanding how to apply this in paintings though, is a bit more challenging. For example, when I was doing one of my paintings, I thought that the colors were appropriate as well as the perspective, but the picture seemed to be lacking something, the picture was flat. Upon reflection, it dawned on me: I had been lax with shadows and highlights in the work done. Since the light reflection volume is shadow volumes, in literature, shadow refers to the color on the object facing away from the direction of the light. Hence, the light reflection volume is determined by the shadow color that is determined and provided by the light color shadow. The source of light always covers a wide range of aspects. As soon as a light source has been identified, everything can fall into place, and more depth can be created with light and shadow regions. For instance, if the light source is located at the top left corner, the side of the object must turn or point towards the light and its opposite side will become dark.
The contrast between light and dark needs to be considered. The harder the contrast, the worse the depth is. There are times, particularly when working with powerful or direct light, when it’s necessary to generate tough shadows that outline the edges of objects. However, on a cloudy day, for example, in a landscape painting, the light is less intense and the edges around the shadows are Last but not least, to the next crucial aspect.
Painting shadows: soft vs hard edges
The painting – realism because of and through varying soft: The silhouettes of the pieces are defined by the edges and their degree of hardness. There was a time when my landscapes seemed quite rigid, but I had no clue as to why they were so. The reverse was true, I was creating overly harsh shadows around everything making every object feel artificial, all cut out of a piece of card.
When working on painting a scene, soft edges will need to be added where the shadows begin to fading into the lights. This is especially crucial in the middle ground and background of a painting. To demonstrate, towards the limit of a landscape oil painting you will find that the shadows developed on the hills and trees are quieter compared to the ones found at the bottom of the painting. Further back shadows will appear fainter so as to enhance the perception of dimension in the scene.
While on the flip side hard edges work brilliantly for body movements that have strong defined shadows and are found in the forefront as this is where the focus naturally is for the viewer. The trick is to balance between the type of shadows– the current blurred vision of the object is because hard edges marked the front and soft edges pushed it further back. All in all things appear three-dimensional and realistic as depth is induced in the painting by materials used.
Now think about a landscape picturing a bright and sunny day. The lights that are dominant will make the shadows on trees at a closer distance darker and sharper than others. But toward the edges of the picture where mountains can be seen the shadows will be sharper and faded to suggest a greater distance and atmosphere.
Creating an illusionistic effect in painting requires an artist to know how to handle shadows and highlights. That is one of the practices which once learnt can make a significant difference in making an oil painting look more realistic, but it is also one of those skills that takes some time to master.
Glazing 101: Deepen Your Dimensions
I have to say when I first heard of glazing, I had no clue what I was getting into. It also seemed to me that it is some ultra-high end technique for professional artists only with years of working experience. But after trying it, I understood that it is not difficult at all, and glazing is a great technique to create and add some depth and dimension to your artwork regardless of what your skill level is.
So, what is glazing then? Glazing is simply a method of applying thin transparent coats of oil paint on top of previously painted layers. With this technique one can apply some accent to the color intensity and value without the need to cover what is underneath. Instead of having a flat ‘picture’ of a color, glazing allows colors to build up from layer to layer resulting in a much more vivid color which adds depth to your painting.
Before anything else, let’s discuss the materials you will need. Firstly, you will require an oil medium to help dilute your paint for glazing. I myself enjoy using linseed oil however walnut oil is just as effective. These mediums allow one to achieve those smooth transparent layers which makes glazing efficient. They also increase your working time which is awesome because patience is needed for glazing. The beautiful thing about it is that there is no need to rush. Each layer that is created is built off the last, so it is possible to create depth and even stronger color.
If, like me, you like to play with texture, glazing is a good technique for richening up, especially around the foreground of your pieces. For example, after doing the primary base layers of your painting and want to enhance the sunset or the shadow on a mountain, a few light layers of glazed paint can achieve this ideal transition resulting in a more realistic painting. And the best part? You have no fear of making the canvas too heavy or losing the intricate details below and can continue to refine and build the layers up.
One of the most rewarding experiences I have had with glazing has to be during a landscape oil painting – where I wished the foreground to have a warmer and richer color. The first base layers were dry, but I wanted to enhance the colors more than they were at that time. So, I experimented with a warm orange glaze, which I then carefully brushed across the grass and rock foreground. It brought a sense of life and dimension to the oil painting which was never there before. It felt as though those elements intersected, increasing the sense of contrast between the foreground and the background.
FAQs: Common Questions About Creating Dewy Effect with Oil Paints
Q: What techniques do I use to ensure my backgrounds appear more distant?
A: This is an amazing question and the solution is always pretty straightforward! You will want to use coll colors for the background such as shades of blues, greens or grays to ensure they push the objects back in a more natural way, giving the viewer a different impression about distance. Another piece of advice I would like to offer is to make set pieces with lesser details for your background. Using such techniques will help your background appear softer, lighter and less well defined.
Q: How would you make amends to ‘a painting gone wrong’ without the involvement of any color?
A: I completely agree! A painting with no depth and no definition is quite disappointing. This problem can be fixed by glazes. It helps to bring back contrast in a painting caused due to some reason being lost. Impasto creates a technique of texture to your piece which can be done using a palette knife. This adds depth as well as interest due to having mass and texture in the painting.
Q: How can I tell that I’ve gone deep enough in my approach?
A: This is precisely where it is vitally important to take a step out of your work. An aspect to bear in mind is to determine that there is a clear difference in the foreground, middle ground and background to avoid excessive depth. If the viewer’s eye can glide naturally between these different planes, you may have reached the depth you want. It’s all about creating space for the eye to wander, so don’t hesitate to rest and try viewing your painting again. Sometimes stepping out for a few hours (or days!) provides the needed perspective to be sure it you have got it right.
Conclusion
Although more confidence might be required in the beginning, exploring depth with oil paints are easy when the practice is broken down into steps. Be it using linear perspective to layer your oil paints, utilizing cool and warm tones to change photographs distance, or gently layering glazes, oil painting is sure to build your confidence up into good form. Each technique helps you build up that rich, lifelike dimension that catches the eye at the art work.
Ultimately, the goal is to have some fun and explore countless options to pull or push the components of your painting. So, the next time you grab your canvas, try concentrating on the dimension you can create with every stroke. With practice, you will notice remarkable changes, as your artworks change from flat to 3D drawing and lifelike environments.

