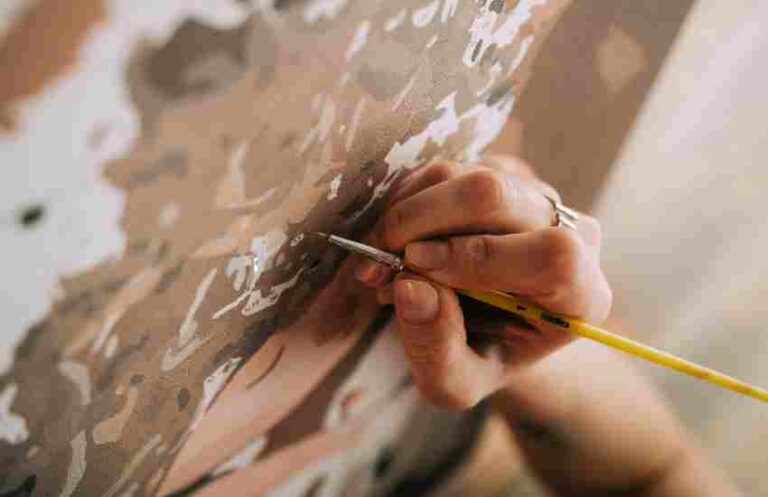
Do you want to be engaged in a more captivating activity, than you are doing now? Well today’s lesson will provide you with the fundamentals needed to draw a perfect eye from scratch! Drawing in real time serves as a springboard for unharnessed potential and will allow you to exercise creativity which brings in the satisfaction you desire. This tutorial is made simple and easy to follow through, so sever beginners don’t have to worry about not being able to keep up with the steps.
Step 1: Understanding the Anatomy of the Eye
Before you can start impressing anyone with your eye artwork, it is crucial to first understand the basic anatomy of it. An eye consists of an iris, pupil, a pair of eyelids and a pair of lashes as well. For you to get realistic or aesthetically pleasing results, you need to grasp an understanding of the purpose of all of these components.
It has been found in studies that drawing a convincing eye requires one to have a realistic perspective on the eye as well as replicate the proportions and symmetry accurately. An article Journal of Vision states that most people are not fond of unevenly proportioned eyes which translates over to artwork as well, it shows to impact eye’s beauty and realism.
The task of cutting their complex structure into simple shapes greatly assists beginner artists during their first few artworks. Drawing circles and ellipses to shape an eye allows the artist to smoothly transition into adding details to an eye.
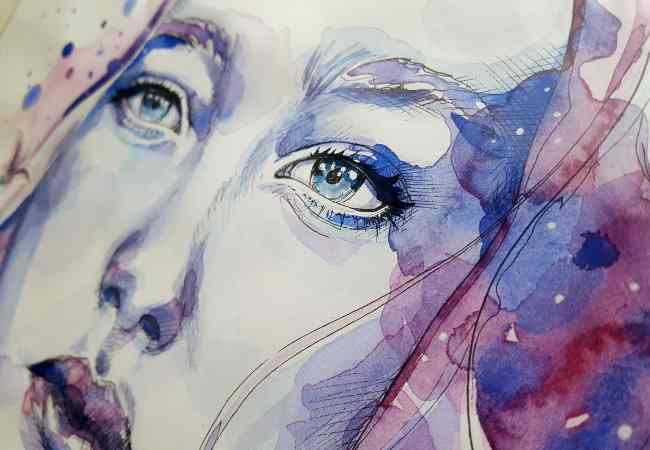
In diagrams and illustrations are important as they enhance the overall comprehension of the reader. Surveys done by American Psychological Association state visuals increase learning retention by 65% more than text instructions, and we will also incorporate visuals along with the clear and precise informational steps we provide in this tutorial.
Step 2: Drawing the Outline
How about breathing life into your eye drawings. Then, begin with the outlining for the sketching to begin, so that we can make a breathtaking piece of artwork.
There is an insight through some research that the drawing of the eye outline is critical towards achieving the real and authentic finishing of the drawing. In a research paper published in the Journal of Applied Psychology, Dwyer, watches out for the objects which have sharp outlines as they tend to look more like shadows than pictures.
The outlines that are drawn on the eye still need to be sketched on with light strokes and free flowing lines so that adjustments may be made when necessary. This technique cuts down on the risk of making permanent markings. As da Vinci once articulated ‘Perfection is achieved not when there is nothing more to add, but when there is nothing left to take away’.
Finding the right proportions of your eye drawing means plenty of trying out some thing new. While you pursue perfecting your work avoid constantly switching to one way of drawing and rely on the pencil as a tool to sculpt new beginnings and new opportunities.
During my journey as a copywriter, I have interacted with plenty of beginners who were incapable of sketching the outline of an eye but through persistence and determination, they were able to create beautiful art pieces.
Step 3: Adding Detail and Depth
In this stage, we see how to integrate detail with the outline of the eye which you sketched in the previous step. This is the stage where the magic of art happens as you begin to bring your eye sketch to life by adding in detail and depth to the outline.
An example of this would be shading or highlights on the eye, a realistic eye already has shading and highlights as a key component to it, by understanding how to approach these in your drawing you will be able to illustrate a three-dimensional illusion. A study conducted by the University of Art and Design Helsinki has proven that the application of shading and highlights has had a significantly beneficial impact on the level of realism in the eyes that are drawn.
To achieve realism the application of different pencil grades provides appropriate contrast and texture. Highlights in the eye are best illustrated with lighter marks, which require the use of 2H type pencils that are harder and for shadows and depth the use of 6B pencils is appropriate as they are softer.
Realistic illustration of the eye requires appropriate layering, to detail the iris and eyelashes one needs to be specific with the layering. Try to use subtle strokes layered with various degrees of pressure to imitate the actual eye pattern. Additionally, make sure to examine the real-life example or reference for inspiration.
**Step 4: Refining and Perfecting**
Are you prepared to elevate your eye drawing? This is the phase where we discuss how to refine and perfect your drawing by saving it through hard work whilst keeping the details in mind.
It is well documented that patience and perseverance are the criteria to become a master at any skill. A study by Stanford University found that people high on perseverance traits will do the best in tackling and completing tasks that are difficult to achieve.
For example, as you make revisions on your drawing, it is crucial for you to accept and embrace your mistakes during the learning process. Some misdeeds like asymmetrical or disproportionate eye features, instead of being considered failures, represent chances for improvement. This is how you will develop through addressing these discrepancies and then you will be creating better artworks.
To get your drawing skills accurate it is necessary to draw the same thing over and over again. Spend a little time analyzing real eyes, concentrating on the shape, texture, and light. It was pointed out that a closer examination of the drawing in general and the eye in particular has greatly improved the accuracy and realism of drawings over time.
As with any other ability, improvement in drawing necessitates consistent practice. Allocate some time during the day to devote yourself to drawing eyes or the area that needs improvement. Do not forget that, after some time, results can be achieved even by practicing for a few minutes every day.
During my work as a copywriter, I had a chance to observe on numerous accounts how the hard work of a person makes that person’s drawing skills grow significantly. One of my clients could not draw perfectly symmetrical eye drawings, however, he improved after carrying out the practiced exercises as recommended.
Both personal and third-party touching stories are also great ways of inspiring wannabe artists. Those who have achieved success against technology and audience obstacles can motivate readers to dive deeper into artistry. If you add your story and stories of other people’s, your audience’s belief would be built and their motivation strengthened.
FAQs
How Many Hours Does an Individual Require to Draw an Eye?
Every individual is different, and so is their approach to learning any form of art. If someone is naturally good at drawing or painting, they may be able to pick it up much faster than others and vice versa. The findings published by Berkeley University indicate that while some individuals might quickly develop their artistic skills, others will experience a much slower pace of development. One thing, however, remains constant and that is consistent practice, or rather, effort, is the most crucial in progress. Findings published by the Journal of Experimental Psychology suggest that after 6 weeks of practicing for a bare minimum of 30 minutes a day, the majority of individuals were able to draw a noticeable difference in their drawing skills. So, if you want to learn how to draw an eye perfectly, there is no set timeline, but all it requires is consistent effort and practicing at the ideal frequency.
Is there any specialized material necessary to draw an eye?
Exquisite art supplies can indeed improve the drawing process, but they are not necessary even for producing breathtaking eye drawings. For example, if someone is a beginner, simple drawing items like pencils, erasers, or even paper is adequate. Pablo Picasso, an esteemed artist once said, “It is not in the drawing that I see the skill in men, for it is evident in every child no less,” which is a quote on promoting craftsmanship and acceptance of failure in creative pursuits. Or more simply said creativity with available resources might lead to interesting and innovative art. Most importantly, it is not the machetes that define the artist, but the creation of the work and the zeal that goes with it.
What if the eye that I have drawn doesn’t look quite realistic?
Trusting realism in one’s works might be challenging especially when one is an amateur. But errors and blunders are part of the learning curve as well. If your eye sketch is not up to your expectation, you should expect to encounter certain troubleshooting options such as changing uniformity, altering the amount of detail and using reference pictures. Also, you can obtain other perspectives and ideas by asking friends and instructors for their opinions. That being said, every mistake is there to be rectified, and the way to improve is through consistency and hard work.
Recap
In the end, learning how to skilfully draw an eye isn’t an overnight process as it takes time and effort, both of which are at the authors disposal. By incorporating the methods outlined in this tutorial alongside with the practice it becomes possible to draw stunning eye impressions, let your imagination run wild! Be sure to keep your peers updated about your progress as they may have some insights, this reciprocation may only help you on your quest to self-improvement. Make sure to stay dedicated as there is no ceiling to what can be achieved in the vast world of art.
More Post
- What Do You Need to Get Started Making Art Prints at Home?
- How to Do Digital Art: An Easy Tutorial for Beginners
- Two-Point Perspective Drawing Tutorial: Mastering the Art of Depth and Realism in Your Artwork
- How to Become a Creative Director and What to Expect?
- How to Sell Your Art Online and Make Money as an Artist?
;