Hello, global art lovers!
Let me introduce you to a newly found fascinating world of drypoint etching, a printmaking technique that is as beautiful if not highly rewarding to learn in my opinion.
Drypoint is a technique/ process by which you create a scratch on a piece of artwork that feels and gives off a sense of three dimension, texture and personality, and that’s where the beauty of drypoint artwork comes in.
It is almost self evident that when scratching with a needle on a largely acrylic-based or metallic surface, ink is deposited into these scratches and grooves. While placing pressure over the plate onto a piece of paper, it forms a piece with dry point that is almost completely impossible for a painter to replicate over digital art. Many deep and wide lines non-restrictive of a modern artist’s painting are present on the creation.
What polarized me when it comes to drypoint etching in particular, is the emotional presence and soul that is there within every drypoint creation. The communication and direct interaction that can be derived from each scratch of the needle is almost as if the plate itself is narrating a story. Ideas, emotions, and intentions get friction fit onto the plate and each of the folios you draw with a pencil onto that plate and eventually what comes out is a fusion of your thoughts and emotions.
So for this particular post, my purpose is to inform you about the art form and how can we achieve drypoint together. For this post I will assumes that you are either a novice with the art or want to master different techniques of achieving this art.
Let us get straight into it then! Grab your pencils and papers, let’s get started!
What is Drypoint Etching?
So, what is drypoint etching?
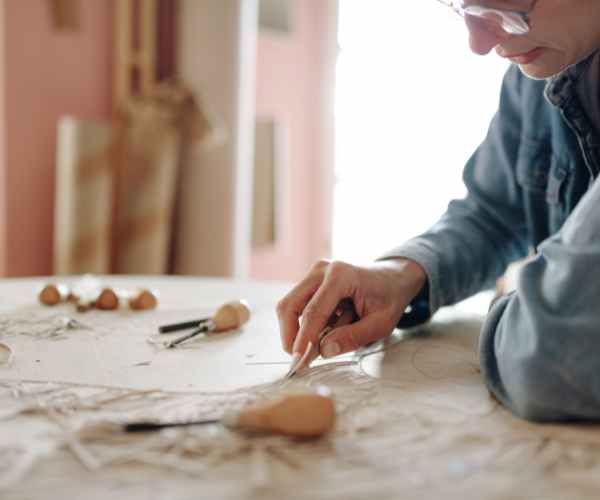
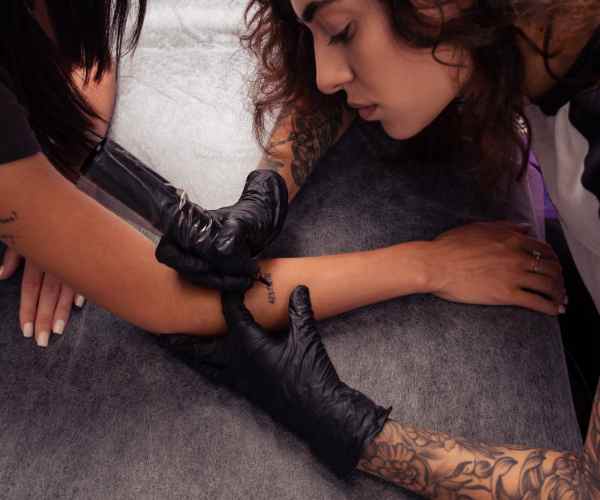
At its most basic level, drypoint etching is a method of making prints by scratching and roughening the surface of a plate or a surface with a needle or other sharp object to create a design on it.
While most forms of etching apply an acid to the surface that will carve away a design, dry_point only requires the plate to be scratched. The scratches produce a raised edge, which is then used to hold ink for the printing process.
Drypoint is particularly beautiful in its richness of line and intensity, adding depth to your artwork.
Drypoint has been considered a form of art since the 15th century, although among sharp point artists it is now a well recognized form that has undergone significant transformation.
A prominent name in the drypoint etching is Rembrandt van Rijn who was completely proficient in this technique and had used it to produce great intricate images.
I recall attending an exhibition featuring his works and being astounded by the use of light and shadow in his prints. The touch that he gave to the prints, made me a little too Anizengage, as I would move my hand over them, tracing the lines that he put on each and every one of the pages in order to find out the art he portrayed in them.
Key Requirements and Materials for Drypoint Etching
As we move on, let’s discuss the key requirements and materials required for the process of drypoint etching.
Plate: You can begin with a drypoint plate, which can be metal, acrylic or cardboard. Many different materials can be used so don’t be afraid to try out some new ones!
Needles: Negatives or drypoint stylus will be scraped into the design, so a set of needles or something similar will be needed. I always suggest a small assortment of points to work with as this will let you vary the line quality.
Ink: What type of ink do you want will be very important to select. For instance, my preference is, as a rule, oil-based inks with their brilliant colors and thick consistencies, but if you do not care about the cleanup as much, you can also try water-soluble ink.
Brayer: As it will assist to spread ink over every edges properly, its absence would not make a situation very comfortable. This tool is vital in ensuring that your ink is set to the grooves you have created.
Paper: Try to avoid a soft paper such as Japanese rice paper or a 100% cotton rag paper but i would recommend going for a hard absorbent because the final texture should depend on the type of paper.
The materials you choose must be of a high standard if you want to get the best results. A long time ago I made the mistake of using cheap paper on my first attempts at Drypoint. The end product was poorly done, and I came to a conclusion that the type of paper used mattered a lot in how the ink applied on it.
Artistes as Käthe Kollwitz whose work portrays her emotional intelligence and expressiveness in printmaking are concerned with the quality of the materials used while making prints as well. Her art pieces, which are plentiful in narrative and references, would lose their message if the surfaces were not appropriate for the base of the work.
Working as an artist in the field of printing requires the purchase of good materials and the professional devices which contribute strongly to the confidence of the artist. Well, go on, buy some good materials, and set your imagination free!
Mastering the Drypoint Technique
Step by step easy guide to making your first drypoint etching
Making your first drypoint etching could be so much fun!
Allow me to break down the process and ensure you that it will be so much enjoyable.
Gather Your Materials: To start with, be certain that you have everything at hand. Take your drypoint plate, needles, brayer, ink and paper of your liking. It’s like gearing up for a mini sport! Prepare Your Design: One should always start with a simple sketch on paper before starting to scratch. It should not be a complicated design. I recall the very first design I made, it was a small bird which I think though simple, yet was really captivating. Incise Your Plate: Now this is the fun portion! Take your plate and firmly push it on a solid surface, then using your needle start carving in your design that you wish onto the surface. Change the pressure to manipulate the thickness of the lines. It’s a movement of sorts, the more it is done the more practiced you will feel. Tip: For those who have some experience in this, it is best to work in an area with plenty of light. Believe me, you will want to see those lines. Inking the Plate: After you have set the design, the next step is to take ink. To ink up the plate pour some onto a brayer along with some water and roll it into the plate, design is filled to The grooves previously made. A light touch works wonders here. I’ve seen people put way too much ink on their plates and it just gets messy to say the least. Trick: Don’t hurry In this stage! It’s all about balance.
Eliminate Extra Ink:
Let’s wipe off excess ink from the plate. We can do this with a cloth or even our fingers. Ask the person sitting next to you. They’ll tell you how nerve-wracking it can get. But then, practice makes perfect, doesn’t it?!
Settle For Printing:
It’s time to set the press if you are to use one. If not, a barren can be used to put the pressure while printing. Once the print is done, very carefully place your paper over the plate. It has to be true to alignment.
Etch, Print, Weed:
The moment of truth is them! Turn the plate around or the barren for printing. Yes when the paper is lifted up that’s the true excitement. Printing has always been like that, a little secret waiting to be told.
Tidy Up:
It is vital to tidy up your plate and whatever tools have been used for the printing. They do need to be kept clean for the next time we plan on making use of them. Maintaining the quality is a must.
In my case, the paper I had originally printed was never perfect. But that feeling of creating something worthwhile was just perfect.
Mistakes Artists Should Avoid
Mistakes are an integral part of every artist’s practice and that is absolutely fine.
Below are some common things I have noticed when beginning and shortcuts for amending them:
First Mistake: Printed Plate Is Over Inking the Plate
It is quite easy to go over theboard with the ink, and when this happens, your print will be too fuzzy. To solve this problem a little amount of ink should be used and then build it up gradually.
Second Mistake: Not Applying Enough Pressure:
Not applying enough pressure when printing can make the prints very weak or the outlines very blurry, I have been there and it is irritating! When using a barren even pressure should be used or when using a press it should be applied as per the instructions.
Overlooking the Importance of Plate Maintenance:
Letting your printing plate remain dirty and not washing it after every usage can negatively impact the future usage of the plate. I made the mistake of leaving ink on my plate one time and when I reached to use it the next day, it had turned into a gunky nightmare. One rule must always be engraved in your mind : Always wash it properly after every use!
Ignoring the Necessity of Sketching:
Skipping the initial step of planning and moving straight to the plate can cause hints of chaos and annoyance. Don’t rush, grab a paper and pencil and sketch first. I can assure you that this will save you from so much trouble in the future!
In order to reassure you more, allow me to narrate an experience of a fellow artist friend of mine named Claire. During her first attempt, she would end up smearing more ink than necessary all over her plate making the end product look more like an abstract painting than what she had intended. However, rather than losing hope, she took that opportunity as a lesson, changed her approach and in no time, she managed to create some mesmerizing artworks and secured a position in an art gallery nearby.
Now that you have mastered the art of the basics, it only seems natural to move on to exploring new elements that are bound to enhance your drypoint etching experience.
It is no doubt that drypoint etching can become so interesting due to enhancement and incorporation of new plates.
Copper and zinc leave a classic aesthetic while acrylic plates are more contemporary in their appearance. Each of these types has a distinct feature which influences the outcome to quite an extent.
As for an example, sharper plates are most likely made of metal and softer plates would be an acrylic one. Metal tends to get sharper results while acrylic adds an overall texture instead. I prefer using both because this means each plate allows the prints to have a new identity.
I suggest you experiment with other altering items too! Consider the outcome that would occur if yet another item was utilized, if for an example acrylic wasn’t used and cardboard was instead or even Plexiglass was used. Wood prints are another stunning one of a kind material that some artists utilize.
One artist who I have great respect for, Tracy O’Brien, utilizes recycled materials and converts them into given prints. In her opinion this broadens the limit of possibilities as one can do anything her prints are no exception!
Bringing together drypoint with other printing techniques now, brings us to the next topic, traversal techniques.
Integrating drypoint etching into your printmaking and combining it with aquatint or lithography can surely add another dimension to your work.
For prints, using aquatint along with drypoint results in beautiful tonal variation and soft shading. There was this workshop I attended that used aquatint while drypointing and the texturing and layering we achieved was something I had never seen before in a professional setting.
Jasper Johns is a perfect example of an artist that combined aquatint relish with other practices and techniques, resulting in breathtaking imagery. He did things differently than the classical printers and took printmaking to another level.
FAQs
What is the best kind of paper to use for drypoint etching?
When selecting paper for drypoint etching, textured and heavy gram paper always works best.
This type of paper such as Arches and Rives BFK has an excellent surface that withstands the pressure of the printing process and absorbs ink quite nicely.
The same would be true of the paper’s texture, which feels aesthetically pleasing when applied in the prints.
Different papers can give astonishing results, or so has been my observation throughout. For instance, the soft cotton rag paper I used allowed my print to feel supple, in synergy with the etched in lines I had printed.
How can I etch with deeper lines?
Creating deeper lines in drypoint etching is all dependent on how you approach it as well as the tools you have on hand.
To start off, ensure that you’re using either a sharp drypoint needle or a stylus to scratch the design into the plating.
Etching with more pressure is also another factor that can assist with deeper grooves creation.
However, remain calm and composed as you go about it, don’t get too vigorous as moderation is also important.
In case your first print barely had any lines, feel free to go on and re-etch just ensure that the plate is cleaned before it is redone.
I remember a time when I was certain that my lines were deep enough but the printed version had them nearly invisible, I learnt from that and now I give my work the time and attention they require.
In drypoint etching, what type of vaches is commonly used?
In drypoint etching, the printed version changes within seconds, thus the type of vaeches used is crucial.
Oil-based vaeches are highly sought after in the market as they provide high pigmentation colors and the ability to work them into the grooves of a plate.
Printmakers like using Speedball or Gamblin brands as they have bright colors and are consistent.
Just like I, there are some creative enthusiasts fond of experimenting with water soluble ink. The only difference is the texture of the result. But the best part is, the water based ink is much easier to clean up.
The last time I checked on metals, their incorporation truly complemented the rest of my work, all that I had previously imagined was done, when incorporated alongside ink.
Is it possible for me to incorporate a digital program into the first step of the drypoint etching?
Of course!
It’s reasonable to assume that the new digital tools would enhance drypoint etching quite beautifully.
Most painters opt for digital sculpting in applications like Adobe Illustrator or even Procreate which allows for modifications to be done with ease.
If that is the case, once they are satisfied with their pamphlet, they can go on to print their target pamphlet that can then be used to look up information on drypoint etching on the plate.
Some even simplify the work by projecting designs directly onto the plates.
I’ve seen more unusual fusions of digital with traditional techniques of drawing that make the mixed media more impressive. It is up to you and your voice.
Conclusion
Now that we’ve had a closer look at the world of drypoint etching, it’s my hope that you’ve grasped the beauty and the possibilities that printmaking technique has to offer.
From the starting point where you learn the principles and acquire the needed equipment all the way to the final step when you learn how to use drypoint tools there’s so much to learn and relish.
Don’t forget, the take home messages include:
Use quality materials such as plates and paper so that the end result is commendable.
Learn and practice your technique; each print is a process and an improvement.
Be willing to experiment; this is how you will uncover your identity.
I would advise you get those tools and go for it!
Try different things, combine techniques and simply express yourself.
Drypoint etching is an amazing way you can show who you are and what you want to say to the world.
I am here because I want to learn about your stories or anything that you might want to ask.
Please, let me know what you think in the comments below. Let’s continue this artistic dialogue!

