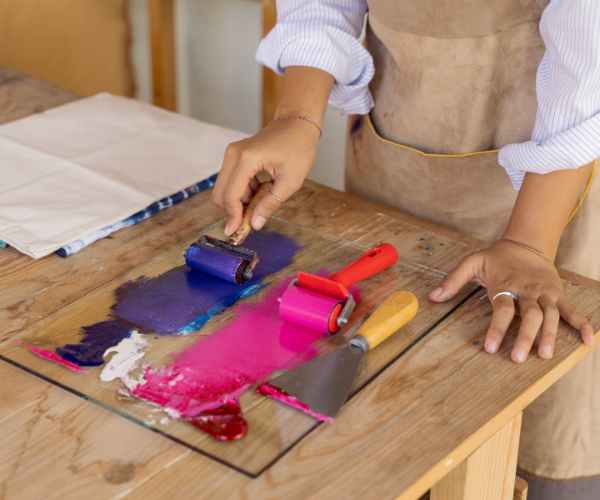
I can vividly recall the very first occurrence when I rolled out ink on a brayer and decided to print it on a sheet of paper. It was a mesmeric rainy day and I still vividly recall being in my living room sipping tea while being snuggled between my all time favorite books. Also, the scent of ink was so enthralling that I can almost feel the joy when I ripped the paper away from the linoleum block. I produced a delightful print right in my home. That single minute seems to have been the source that fueled my ever-growing love for printmaking in the years to come.
In essence, printmaking can be deemed the perfect form of art for all those that possess a creative mind as well as a skill as it can be so easily done in a method that is highly fulfilling. There is always a need to invent new ways to better articulate an idea and regardless of whether one is an artist or not, printmaking allows inventiveness to thrive. A person doesn’t need to own a sophisticated studio or expensive equipment as all they need is a small millimeter within their room and a pinch of curiosity.
Owning a home printmaking studio has loads of benefits. Having those rare Sunday quiet moments to get some peace of mind, an early morning or a late night can make a difference as having the ability to create whenever an idea pops up is what makes it easy. And even more, there is something special in the ability to create art in one’s own space. Or even what’s better, you can place yourself in a favourable creative environment with everything that inspires you, from photographs, and quotes to even anything that you love. This can be a source of endless creativity and passion for you.

Choosing the Right Space
Setting up your printmaking studio at home is believed to be a great creative idea in finding the right corner for it. It the thtat matters most the look of simple space can be turned into an ideal work station with a few changes.
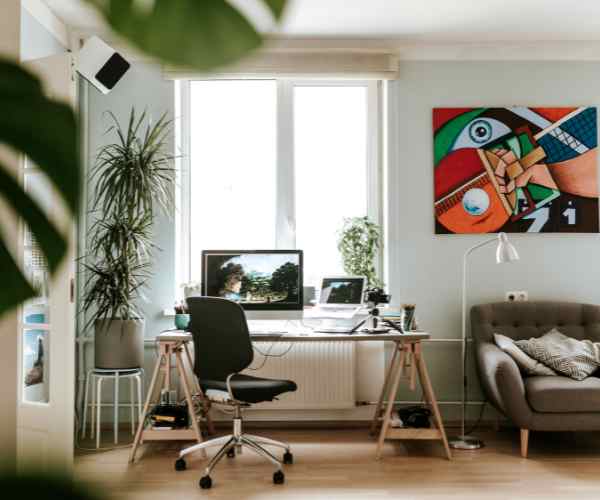
To begin with, make sure you have adequate natural light. I distinctly recall how I missed being exposed to sunshine when I included printmaking in a poorly lit space. So not only does natural light provide sufficient vision to properly utilize the different ink colors but it also has a positive effect on your calm nerves. In case you are able, try and select the corner that is adjacent to the window because, after all, who wouldn’t like the sun light brightening their art?
And then go on to the ventilation aspects. While solvents that are used in inks are great for printing, their fumes can be a negative side. Unfortunately, this was a lesson I had to learn in a confined, airless room that I had previously occupied to conduct several printing sessions. After a moment I ended up feeling dizzy and bored. So an intricately crafted equals room devoid of enclosed air would ensure free flow in your brain.
The proximity of water is of paramount importance as well. It is best to be able to wash your tools at sinks that are close by, rather than having to walk far. At the beginning of my printmaking career I was required to transport my supplies between the kitchen and my other materials and this disrupted my flow. But once I got myself a small utility sink and integrated it into my workspace, I’ve never looked back since.
Let me tell you a particular event from Ahmadi’s real life: One of my friends Sarah was able to turn a small & unused nook in her living room into her print making studio. To set the mood, she would paint the walls a soothing pastel color & buy a sturdy table set up near the window. She tended to fill every shelf with her supplies and the cutest prints she made decorated the walls. The best part was every time she walked into that corner! She would feel a creative rush. It’s amazing what a little creativity and organization can do for your space!
Exploring Different Printmaking Techniques
Linocut Printmaking
For those search for a fun, easy, afford unconstructive technique to integrate into their printmaking linocut is the right fit! As one of those techniques which do not overwhelm & have amazing results.
Just follow these simple steps to make your first linocut print.
- Collect Your Tools: You will need a sheet of wood carving materia which can be found in art supplies as well as carving tools, printing roller, ink specific for printing and paper.
- Select your design: Try to start with simple shapes, words, or even a flower. I recollect sketching a small sunflower which allowed me to hone in my carving skills which were non complicated.
- Transfer your design: Use either carbon paper or a pencil to transfer your design and engrave it onto your woodworking sheet. This step is even more easier as you can visualize the final product instead.
- Start engraving: This is the fun part where you try to create imagery on your carving sheet using your tools. Remember not to put ink in the parts which you carve out as those sections are not meant to have ink. This part allows for immense flexibility allowing you to create a perfect product.
- Inking the Block: Grab a brayer and load it with some ink Roll out the ink and evenly layer it onto your linoleum block.
- Printing: Place your paper on top of where the block has been inked and push it downwards with equal concentration Using a baren or your hands can be useful at this stage Remove the paper and watch your print come to life!
Linocut serves as a great first step because it provides an understanding of how design works alongside technique. The same block allows for multiple prints and hence the exploration of various colors and different types of paper.
Screen Printing
Another exciting technique that will open an insatiable creative aspect is the screen printing technique. What excites me about screen printing is that it is not limited to paper or fabric alone. With little practiced patience, you can still achieve professional results, though it requires a bit more work than linocut.
Read on for a rough description of how the process looks like:
- Make Screen: Use a screen with small mesh. One could either purchase a pre made screen or stretch one to their specifications Use a light sensitive emulsion to coat the screen and keep it in a dark room to dry.
- Your Design: There are two approaches to making a design; you can either hand paint it with a unique marker or use a masking tape. I have a habit of first putting my designs onto paper and then to the screen.
- Exposing the Screen: After perfecting your design, take the screen and expose it to UV light for a designated period of time (I recommend taking a look at the emulsion’s instructions). The emulsion is hardened in the places where the light hits and the areas where your design is left unexposed.
- Washing Out the Screen: With your design other than the logo exposed, wash out the screen using water to remove the soft emulsion.
- Gear up for printing: place the screen over the cloth or paper of your choice, pour in the ink and make use of a squeegee to push the ink through the mesh. With this completed, the screen can be lifted up and voila, the printed design is revealed!
I remember a friend of mine, Jake, who started screen printing straight out of his garage. He had no formal education, but was enamored with the idea of making custom T shirts for his band. After several attempts and failures, there were some attractive designs produced, which not only delighted Jake’s friends but also sold well at local concerts. I hope it’s clear that it is easy to set up screen printing is easy for anyone with some imagination and willing to work!
Engraving and Similar Processes
So if you want to take a risk and wish to go off piste, then you may consider trying engraving as it is quite the interesting technique. An acid is used to carve drawings on a metal plate and while it does require a bit more of a complex setup as well as knowledge on how to operate, it can yield some amazing outcomes.
There are other techniques such as monotype and relief printing, which can round up your artistic skill set, and don’t be afraid to cross the boundaries! Each of the techniques has its own significance and it’s only through innovation and patience that pieces of art come to fruition. Try other methods, I always tell my colleagues. It is a stage in the process of finding your distinctive voice in art.
Frequently Asked Questions
What is the best paper for printmaking?
When it comes to making prints, one of the most essential aspects of the process is the paper that you use, and it is quite unsettling to find out that not all papers are equal. When working with linoleum cuts, Rives BFK or Stonehenge are two wonderful choices since they absorb ink perfectly even when under great pressure from brayers or presses. It is hard for me to forget my first experience of using regular printer paper for my linocut prints. The end product was merely average since the paper was somewhat inefficient in ensuring great richness with the ink and made me feel somewhat let down. Using a high-quality printmaking paper however, completely reshaped my work!
When it comes to screen printing, depending on the work at hand, you can use a range of papers. In case creating prints on fabrics, it will be necessary to utilize fine screen printing paper or light weight cotton while while white bright smooth paper is recommended for paper prints in order to better see stark contrast with colors while keeping everything simple!
For etching, it’s best to use papers that come with a more delicate finish, such as dampened 100% cotton paper. Such papers retain ink better and enhance details in a design. There have been times I have immersed my etching paper before I print so as to get a sharper image. This might feel a little like a ritual, but it’s all part of being an artist!
To summarize, picking out the perfect paper can give your prints a boost, which is why you shouldn’t hesitate to buy the best materials out there.
What type of ink do I need for my prints?
There’s an extensive list of inks available and choosing the correct ink is extremely important in printmaking and can be quite a task. Typically, there are two main types of inks used, which are water based and oil based and each type is different in its own way.
Water-based inks are a great option for beginners as they can be easily washed with soap and water. Also, they dry reasonably fast, thereby retaining efficiency in work. I always make it a point to have these inks handy whenever I have a tight deadline for a project. However, while working with these inks always be patient because in some cases they might smear or lift the artwork which makes it hard to fully dry.
On the other hand, oil-based inks have a rich color that simply cannot be surpassed. They remain workable for a longer time which is beneficial in achieving complex designs that take longer to execute. The downside? They require mineral spirits for cleanup, which can be a bit daunting for beginners. However, they require extra time and effort to achieve brilliant colors and to obtain long-lasting prints. I remember the first time I decided to try out oil based inks for a set of prints, and I absolutely fell in love with how deep the colors were. It inspired me to me push my creative abilities as well.
In the end, you will have to consider your personal comfort and the specific printing method you will like to use while making the decision.
Is it feasible to organize a print making studio in a tight or limited area?
Setting up a printmaking studio in a small area is not deterred by the small size of the space instead it can be very beneficial. All one requires is adequate planning and innovativeness. Thus, a large room is not a requirement.
To start with, evaluate your house for any areas which seem underutilized. Parts of the dinning table or closet can be utilized in a way that they become tools for a printmaking area. For example, when I was in the university, I had a small printmaking setup in my shared apartment, stored in a rolling cart and placed it in a corner. While the size was compact, I managed to utilize it by being diligent in keeping everything organized.
To help free up both the work space and the cubicle, installing shelves and pegboards on the walls can help facilitate efficient vertical storage. Further, consider using folding carts or collapsible tables for occasions when you do not require them.
Finally, consider your workflow. Always have tools and materials that you use frequently within reach and keep those you seldom use out of sight. That way, you can work in a neat and organized environment. Don’t forget that all sorts of spaces are conducive for creativity, therefore embrace the space you have and create!
Conclusion
Creating a home printmaking studio is an adventure that is full of wonderful opportunities for creativity.
We have tried to cover every aspect such as the main requirements, locating a suitable area and individual techniques like linocut and screen printing.
Nothing can compare with the pleasure you will experience from producing artwork in your home, which is why I urge you to go for it.
However, feel free to seek out and experiment what is suitable for you.
Your printmaking studio can be different just like your art!
Please let me know in the comments section, what is your experience with your art and artwork.
Let us motivate one another in this endeavour.


