Watercolor washes are one of the techniques that most art students have the biggest difficulty mastering. In the art world, watercolor paintings often get a bad reputation because many people think they have a flat and lifeless look to them. Using watercolor washes can change that impression drastically, though, by incorporating more movement into the painting.
This is the place where you have the opportunity to create and perfect art ‘‘ creation above perfection’’ as they say.

The Magic of Watercolor Washes
What are watercolor washes?
Alright so now you might be asking yourself what even are watercolor washes? Allow me to explain.
They are essentially layers of water paint that has been thinned out and then applied with a brush to either a surface or paper.
Using this technique lets you alter and layer colors in a painting that would be impossible to do with thicker mediums.
For instance, let’s say you are trying to paint a sunset. You could begin the painting by using a yellow thinned wash for the horizon, then once you shift to the more middle area you could switch to an orange and finally for the top of the sunset you could use a deep purple.
The washing method would produce a soft yet beautiful gradient filling the sky that would perfectly capture the beauty of the transition phase between day and night while giving the viewer the opportunity to feel immersed within the painting.
As for the painting of watercolors there are three main types of washes.
Flat Wash: Flat washing is a method that paints a section of the painting in a single unvarying color. This is particularly useful for painting backgrounds and skies that require a solid base without any tonal dramatic range.
Graded Wash: A graded wash is slightly different, it requires slowly changing the concentration of the pigment in order to avoid jarring contrasts. Instead this technique would allow for a natural sense of rhythm as if it were lighting shifting in natural nature.
Wet-on-Wet Wash: At this point, you can use wet paint on an already wet canvas or surface. The colors intermingle and the effects created can be that of soft clouds or mist. This wash is creative and often fantastic results are produced.
Why Use Watercolor Washes?
So what is the mind behind the creation of washes?
For starters, they add dimension.
Washes provide an atmospheric feeling that can catch the viewer’s eye and stir up emotions that may have been otherwise lost in a more structured piece.
They are also highly adaptable.
If the desired surrounding is light, then a soft piece may be painted to give the artwork a gentle touch and if the aim is dark and moody then again seals can lend a hand to that vision.
Recall how an artist like Claude Monet N these used washes in his water lily paintings.
Reflective light in a painting gives a feeling that looks as if a pulse is pushing resonates inside, design which is made up of layers of color and light.
Likewise, Andrew Wyeth has captured a sense of BW time and desire feeling in landscapes and the warmth feeling due to watercolor washes mastered skill.
Watercolor washes are considerate techniques which when implemented into your artwork will surely up your game since they are great for finding your voice as an artist and conveying emotions with depth.
When you start out this journey, it is important to keep in mind that every artist has to begin otherwise.
You shouldn’t be afraid of erors, use it as a chance to improve yourself.
Delving into watercolor properly will give you the best sense of style that you’re likely to want to achieve.
Advanced Watercolor Techniques For Washes
1. Stacking Washes To Create 3D Appearance
Stacking lots of washes is like stacking building bones, you start large and thick creating something intricate and beautiful in the end.
This method requires doing several washes of paints with the third wash you are waiting for previously painted one to dry.
Layering possesses its beauty because it adds another level of depth to your artwork.
When you think about it when you make a wash you are not simply applying a color but effectively developing a textured quality which should create a strong point of interest.
I remember the first time I tried painting and layering washes for the first time.
I was doing a landscape where I was in trying to paint the color changes that happen when the sun sets.
After my first wash of bright yellow I felt that the scene was calm and so I wanted to bring greater depth to it.
As I started mixing in some darker tones, the painting began to look like an animated sunset.
One painter who is well acquainted with this process is John Singer Sargent.
He often uses various skin tone washes, which not only enhance the portrait’s depth but also provide inner luminosity to the subject.
Focusing on how Sargent was applying his layers in such a manner could help you give your own paintings a natural sense of depth and realism.
2. The Utilization of Salt to Add Texture Effects
To put it this way, salt. The flavoring material that any watercolors should add that distinguishes them from the rest!
When added to wet watercolor, salt draws the color pigment and creates unpredictable textures. This is because sodium chloride creates idle white spots.
We definitely believe it is perfect for enhancing organic things such as the rough surface of a tree or the small structures of a blossom petal.
To Apply Salt and achieve textured effects, Here are the following steps:
Gathering Your Materials: Get a clean water source, salt, watercolor paints, and your preferred watercolor paper ready. Table salt should do the trick.
Sprinkle some salt: This has to be done while the wash is still wet, then salt should be spread over the texture as evenly and thickly as desired. Take control over the foolishness by using your fingers or a spoon. Let it dry: Now the painting is complete. As it dries, the salt will absorb the pigment and create fascinating patterns. Brush off the salt: At this point, it has in fact been a little bit thinned out, so I suggest gently brushing off the salt in order to expose the one that has been left with some effects on it. I will always remember my introduction to say the above mentioned technique. Trying to glaze a stormy sky, I got rather surprised when I first extended my hands over some wet paint and ordered the thrust over salt. Something magical happened. While each piece looked exquisitely unique, it also felt like I have unlocked dimension I have never seen before in terms of the ‘creativity’ I was expressing over winter timers. 3. Masking fluid for creative shapes goes here Masking fluid, more or less, is a role-reversing superhero for a lot of watercolorists. It’s fairly easy to use, especially when attempting to keep sections of paper clean while washes are made, which you will be able to do later on without the fear of wrecking your work. Think of mess if I were alone painting a colorful flower landscape and I would still wish to preserve the slim white of the Leave.
That’s where masking fluid becomes useful!:From What I Heard
Primarily come Up with Designs: Outlining a composition is critical as it helps to know the areas which are going to remain untouched.
Applying the Masking Fluid: Masking fluid is applied using either a fine brush or a dip pen to the areas which were previously identified.
Moving at a slow and steady pace allows for clean cut edges
Leave It Be to Dry: After the masking fluid is applied, let the paints dry before washing it off.
Skipping this step will result in you ruining the entire purpose of the exercise and the paint.
Cover Your Paints with Washes: After you have masked the fluid, go ahead and apply your washes.
The colors can be stirred and blended as much as you like.
Tearing Off the Masking Fluids: After the paint dries up, use an eraser or your fingertips to gently rub off the masking fluid in order to bring forth the areas which have been left untouched.
My favorite use of masking fluid is where I use it to make a complex underwater scene using a mixture of different colorful fishes.
It felt like stripping off a gift wrapper while you were peeling off Your masking fluid.
All of the colors together contributed towards a greater balance in the contrast alongside fluidity between whites and colors.
4. Alcohol Techniques
Now that you’re interested in rubbing alcohol, what happens
if you apply it to watercolor washes ? You never know demanding shapes and patterns can be created using rubbing alcohol.
When it comes to beauty, alcohol does quite the opposite since it bypasses wet and dry pigments. It is possible to obtain incredibly vivid results. It is an excellent technique to utilize when you want to surprise the viewer.
So let’s get down to the nitty-gritty of fusing alcohol with watercolors:
Gather Your Supplies: Watercolor Paints, a Brush,
Rubbing Alcohol, and a dropper or a small brush for applying alcohol
Making the Wash: Taking a brush, paint a wet wash on your paper with the watercolor paint and make sure its still wet once you start applying alcohol.
Applying Alcohol: Once the watercolor paint is wet, use a brush or dropper to apply rubbing alcohol to the alcohol paint.
Watch and Learn: Observe how the paint begins to disperse and shapes start forming and now you can learn about alcohol’s effects with your paint.
Experimenting: More the alcohol you use, more the interaction you will see and once the interaction occurs, you will be able t see the difference. You don’t need to stop there, you can even tilt your paper to alter the effects.
Let It Dry: Watch your alcohol inks transparency come through by allowing your art to dry as the textures and patterns created by the alcohol come together.
During the course of the art retreat, I remember attempting this technique and having a fond time trying it out.
It felt much more organic, more free range than I had thought it would be.
The theme is about the various ways one can resist the urge to overly control the outcome of their artwork, and each of these pieces served that purpose beautifully.
This feeling is similar to times when you are reminded of the importance of just loosening your grip and reconsidering the results you achieve.
5. Leverage The Use of Mixed Media
For those who regularly engage in the incorporation of various mediums such as ink, pastels, or collage with standard watercolor, it does get fun.
Watercolour_cosmetics_1950s_sources (1) Adding collages and adjusting textures into artwork sounds tedious and annoying, but the end result makes it worth the effort.
Remember how beautifully ink watercolor would pair and how other mediums complemented each other.
Even slight watercolor or mixed media integration into the artwork can serve as an appealing alternative.
To get started, I suggest considering the following steps to incorporate mixed media into your artworks:
Be open minded: All forms of art tend to be personal so you should tell yourself that all kinds of art are valid and thus, begin making art.
What is your plan – do you outline with the use of ink and finish the work with watercolors or the opposite?
Ask yourself what comes first: watercolors or other mediums, and work in that order. Apply the washes before bringing any other mediums into contact with the surface you intend to paint on.
This will assist in ensuring your washes do not lose their luminosity.
Experiment with Textures: Try layering with pastels or colored pencils over dried watercolor washes for extra detail or shading.
Such interactions are enjoyable in that they produce interesting contrast.
Don’t Be Afraid to Collage: Include torn up pieces of paper, fabric, or photographs to your work.
They can enhance the piece tremendously by creating surprises and layering.
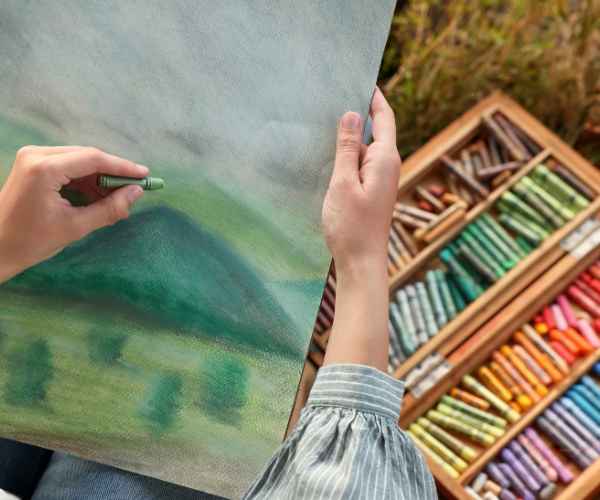
This one time while painting I felt inspired to try pastels on top of a warm colorful wash I had done. The combination of pastel and watercolor had an interesting mellowness to it, but the pastel lines were more defined which created a nice balance.
There was a dialogue between the two, which made me want to experiment more with different mediums alongside watercolors.
Practical Tips for Mastering Watercolor Washes
Like all innovative techniques for watercolour washes, it seeks mastery through practice.
To this effect, here are some practical strategies to maximize your growth.
Keep a Sketchbook: Use it so that you can try out a variety of washes and other methods without the pressure of making something nice looking.
Indulge in practicing these techniques and explore innovative ways to approach your art- it is important to forget the rules every now and then, but always remember to appreciate the beauty that lies within creativity.
Explore and Observe the World: Nature seamlessly carries a blend of color, take time to admire the colors.
Everything around especially sunsets, buildings and flowers can aid in deciding the best color option for your art work.
Challenge Yourself: Set specific goals, for example, only using washes or mastering a particular technique.
Such challenges will motivate you to move away from your safe zone.
Feedback and Sharing: look for local art or other online forums to display your work.
Such sites allow for feedback which acts as the fuel for growth, often inspiring new thoughts.
Experimentation: feel free to try out different techniques and blending other methods with them.
Every form of experimenting acts as a new lesson aiding you in better shaping your future in the artistic world.
It would not only give you an understanding of different wash methods, but also allow you to shape your artistic voice better.
Keep striving for the better, encompass the thought that it all is the beginning of something extraordinary.
The brush hold’s its own power, every tip has the ability to create magic.
In the end all your strokes would be aimed towards something serene and breathtaking.
Frequently Asked Questions
What are the suitable papers to use when washing off watercolors?
When it comes to watercolor washes, ensure to select the right paper as it can greatly impact the outcome of your work.
Imagine for a moment that you are looking forward to creating something in watercolor. You are ecstatic about the colors you are about to use, but the moment you grab a paper with watercolor on it, the expectation doesn’t match reality.
Disheartening, right?
This is why it is critical to use top grade water color paper.
Now consider the following key points when choosing paper for your washes:
Weight: Always go for 200 gsm or more when selecting paper. Printed documents should feature a weight of at least 200 gsm and for the more delicate pages, it is even more crucial. Heavier paper stays flat and wobbles less, allowing you to create those dreamy, flowing washes without concern for surface buckling.
Texture: Consider watercolor. It comes in three textures – hot-pressed (a very smooth surface), cold-pressed (somewhat rough, a bit like textured paper and abbreviated as NOT), and rough. I gravitate towards cold-pressed because It is a bit rough and the paint tends to cling onto paper rather giving it some depth.
Composition: 100% cotton paper is the best you can find. It’s hard, it soaks, and is ideal for applying washes. While it can be more costly, the results make it worth while.
Acid-Free: Remember to purchase acid-free paper, as acid-free paper will not fade as easily as paper that has been treated with acidic substances.
As if it were just yesterday, I would never forget using 100% cotton paper.
When I was completing a big watercolor wash, I was captured by the way the colors swirled and shimmered on the surface.
I felt as though I was painting on an oversized canvas instead of a piece of paper, as the paper soaked up the water excellently. It has indeed made my experience much better!
Is it alright to apply watercolor washes on a canvas?
Most definitely! However, I would recommend approaching with caution as there is a lot to consider before making that decision.
Using a canvas paper broadens up your horizons in your use of watercolor because it allows you to create bigger pieces while also giving a different texture to your work.
From my experience, I have learned:
Preparing The Canvas: If you are working with a raw canvas, using gesso is a good option. Using gesso decreases the absorption rate of the watercolor on the canvas and increases the rate of blending which is very useful.
Texture Of The Canvas: The canvas will rub against the paint differently than paper which may make it more difficult to work. The canvas will most likely absorb more water which in turn, will create very different results.
You may end up with remarkable textures that cannot be achieved on paper! Layering: Since canvas is a thicker surface, you can, in principle, layer washes in a similar way as you do on paper. Again use caution however, particularly with water, as it can cause drips or uneven washes. Varnishing: After you are satisfied with what you have done, you may also try a fixative or a varnish in order to cover your piece. In comparison to paper, the pigments on canvas would be more prone to dust or fading. Some time ago I was trying to paint using watercolor washes on canvas for a project based on the beach sunset. The impression was that the way colors were applied to the rough surface was quite intriguing. It was enjoyable to step away from the conventional uses of paper and try something different! So what do I do, for example, to correct the mistakes done while using washes? Mistakes, ah, every artist has them! Now the interesting thing with watercolor washes is that there are ways to fix some of them without having to start from scratch. So this is how you tackle those annoying little gremlins; Blotting: You can use this technique if you notice a mistake before the wash dries! Grab a fresh paper towel and gently blot the area around it. This may remove some of the pigment and make the error less noticeable
Water Lifting: Use a damp brush to get rid of the extra paint. Just wet the paintbrush and lightly scrub the region that has an excess amount of paint.
I’ve done this a lot of times when I needed to weaken a sharp edge or fade the color for some reason.
It feels like a rescue game, a little!
Layering: In case the mistake is even larger and more wrong consider using two or more thin washes and blend it in so that the mistake gets camouflaged in the finished look.
Masking Fluid: For later works, you might consider using masking solutions beforehand in order to protect the spots that you don’t want to paint over.
In fact, this can avoid the mistakes by such means from occurring in the first place!
Embrace the Happy Accidents: Sometimes a bit of a blunder creates a real masterpiece so try to always welcome such away.
Just think of the happiness that you derive from creating something – those things were never planned can add up value in other forms and change the outlook of your work of art!
I was once working on a landscape and I ended up throwing too much paint on it.
But panic never afflicted me, I just seized the splatters as flower blossoms.
The affected area turned out to be a witty centerpiece in the work piece, even though it was supposed to be a blunder!
Conclusion
As this creative washes in watercolors session comes to an end, I hope you will grab your watercolors in hand and get started to be creative.
We’ve discussed how layering, salt, masking fluid, alcohol, and mixed media can deepen your washes and help you to find your voice as an artist.
Keep in mind that every day, every artist learns, goes out there and explores new techniques, and evolves.
Don’t be afraid to try these methods out, and let them help you find your own originality.
I would suggest sharing your artwork with me if you employed any of these methods.
What emotions or new feelings did you experience in working with watercolors?
Lets us create a family where we cheer for each other’s lives and lift each other’s spirits for a constant flow of becoming better artists.
Happy painting!

