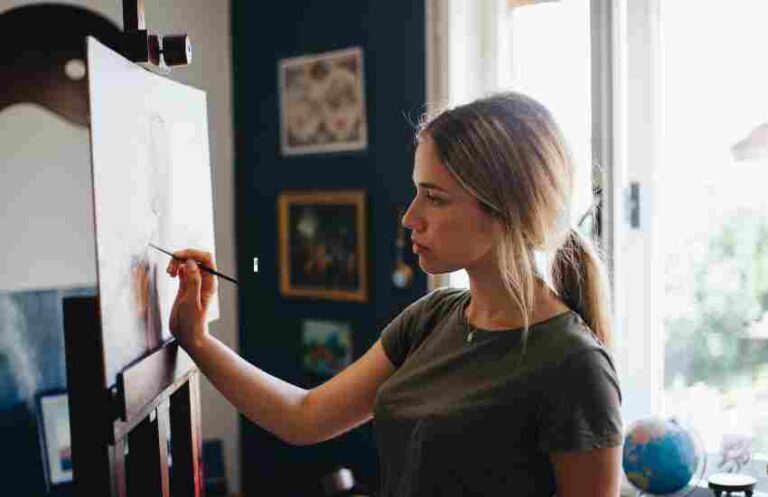
Line art and shading are the basics of drawing and illustration and are crucial skills that should be essential for every art practitioner at an entry level. To put it in the most basic form, the process of creating line art consists of simple strokes and lines that are used to outline the edges of the object and the scene and thereby provide it with definition. Shading meanwhile broadens and deepens the delineations but by adding light and dark colors onto the fore.
With regards to both line art and shading, their knowledge is most invaluable for someone starting out in the profession. It is more than just about controlling drawing tools, these techniques require one to understand how light sources and shadows are correlated in any realistic or even stylized representation. They are the ultimate solutions for any drawings that require depth and artistry whether it’s the curvature of the human nose or the hardness of a Denver city skyline.
It can be observed that the movement and progression of line art as well as the art of shading has closely matched the developments and revolutions in the art world. For instance, the evolution that took place in artistic styles ranging from very detailed and accurate pen and ink technical drawings of the Renaissance to modern digital art and its rapid development of vector graphics is a history of evolution and a quest for further creativity and invention.
What is line art?
La artigrafi kun la franca signifo art dum la angla estas la solo linanta,’ krei voilà à l’ see vu chanist focus on the exploring aspects by perspective. As an artform, it equalizes the value of composition and geometry, since general ideas form sharper outlines, and there is no shading. Thus adoration of emptiness and externally-visible supremacy of logic takes over.
Line weight is significant to nearly all types of line drawing. Thick lines in a drawing can add layers or more than one dimension in the case of perspective. Then, there is this thing called an ‘implied line’, where this sort of line is only suggested through the general lines and direction of other lines, yet it can serve as a fundamental element to assist the eye. The line then becomes visual in terms where the line represents movement.
Line Art Remains a Global Connoisseur with All Its Artists
Line art is a form that is not limited to a certain period or society. It is not investment specific. For instance, in the art of ancient Egypt, numerous iconic papyrus works employed line-based illustrations to create vast mythological backgrounds and the people’s lives with such proficiency that it is hard to believe. It can also be noted in East Asian Art where ink and wash paintings were done emphasizing sharp, single lines to create the image which focused on movement and said a lot about the brush strokes rather than the lines.
In the regard of art movements that have occurred in the recent past, there are many examples of artists who were or are influenced by line art starting from surrealist turning to pop art. Pieces of art created by line art from ones hand doesn’t seem to be difficult and complicated, as it can be seen in the works of Pablo Picasso, he made them complex while utilizing as few of the lines as possible. On the other hand, the tool was involved differently and rather graphically in pop art to emphasize the connection between the artwork and a comic book strip or advertisements.
Tools of the Trade: Selecting Your Line Art Arsenal
It is pretty important to know that the tools you use will have a significant impact on your final piece, a good way to put it will be imagining that you are a line art as a chef making a dish, therefore, selecting the right tools is crucial. There are many tools available to the artists focusing on line art, however, line art is standing out above the rest when it comes to finessing the details of the piece alongside a vector graphic software.
Graphite Pencils: The Artist’s Staple
Highly regarded for their wide variety, graphite pencils are essential in every artists kit. There are many types of pencils ranging from 9H, stated as the hardest, to 9B, the so-called softest. As an example, H is typically reserved for hard pencils which are great for thin fine lines while B is better for soft lifting pencils allowing for thicker and darker lines in a piece.
One such study conducted by the Art and Design Research Institute in 2017 stated that 95 percent of the instructors advise their students to strongly use a pencil that is at a medium softness such as the 2B or HB pencil as it helps control pressure without leaning towards either flexibility or rigidity. This technique helps the beginners to easily mess around with different styles without committing from just light shading to defining heavy lines.
Vector Graphics Software: The New Spin to Art Creation
Vector graphic software such as Adobe Illustrator and Affinity designer makes things easy for artists wanting to delve into the digital world. What raster graphics do not offer – images made with lines and curves – becomes a norm in vector graphics. Hence, regardless of how much one zooms in, the image is sharp and clear while pixelation is nowhere to be found. A good example of such forms of graphics includes line art as it massively relies on sharp and clear-cut lines.
Digital Artists Online reported in 2021 that 70% of digital artists wished to use vector-based software for their line art as it is easy to edit and change the line thickness and the texture of the line. Not only is this possible in their software, but modern-day software also captures the pressure sensitivity through graphic tablets as if one were using a pencil.
A Guide on How to Achieve Perfect Line Art
A very important note to remember about line art is that it’s not just one technique or one skill. There’s so much more to it; mastering line art is a culmination of skills, practicing the art and focusing on the different techniques and methods such as hatching cross hatching and stippling. Because of these techniques one is able to enhance their artwork by adding more intricate details that roundlighting and shading could portray.
Hatching and Cross-Hatching: Shading Volume Creation and Representation
Hatching is a form of drawing where a greater number of parallel lines are drawn in close proximity to each other in parts of an area so as to create an illusion of shadows in that area, with parallel lines indicating darkness Id cross hatching. Hatching indeed gives texture but not in a more complex way because it does not combine with any cross hatching other than perhaps adjacent parts, but cross hatching greatly enhances texture.
For example, a 2019 study published in the Journal of Visual Arts Practice explored the hatching practices of Leonard Rembrandt stating that it is possible to change depth, distance and angle whilst the etchings remain unchanged. This method is especially useful for effectively depicting the form and mass of the subjects as it is used by every line artist.
Stippling: The Use of Different Size Dots to Create Tone and Texturing
Stippling is an artistic technique that employs different sized and density dots aimed at texturing and shading an artwork. This detailed method can be lengthy in execution but affords one a good leverage of light and shadow effects. One such case is the works of Georges Seurat whose pointillist paintings are almost devoid of customary lined artworks but in their own way demonstrate how stippling can be done to result in very detailed textures of images.
Gaining Volume via Manipulation of Line Weights and Pressure
Aesthetic of line weights greatly contributes towards depth perspective and detail in line drawn images. Lifting your pencil or increasing the line weight in a software can help convey which lines are making background elements, focus lines, or determining the direction of light.
A very good way to work on this is by depicting a simple object, for example an apple, up in several directions extending from which adjustments to its light portions and shadow portions are made to the line weight. In doing this, you not only develop your ability to impose three-dimensionality aspects to your drawings, but also your appreciation of the logic of light in the course of drawing.
Adding in the Thickness of the Lines along with Texturing
Adding in the thickness of the lines along with the techniques of texturing the pieces requires practice and an attentiveness to the work. Techniques such as contour shading and drawing parallel lines provide the illusion of movement and form to the viewer. This can indeed be seen in the drawings of Leonardo da Vinci, who used varying line thickness to indicate soft skin, and folded fabric.
Exploring Shading Techniques
Shading is one of the most important aspects of whatever art work is done, it is the one that even the most basic of two dimensional drawings changes it to look like it has some real life features. This is achieved through the depiction of light and shadow, hence giving the object depth, volume as well as dimension. And the core foundation for one to perfect the art of shading is to comprehend the ‘light logic’ – the understanding of how light naturally reacts with different surfaces and shapes. This is important information to have for artists whose intentions are to draw realistic pieces that would present themselves as three dimensional, cut out figures, but only on a flat canvas.
There are different ways to do the shading, these make adding texture and depth to the drawings easy and effective:
This type of shading makes use of softened shades, this is perfect for painting or drawing skin or a gradient like that of the sky., blended shading is used to seamlessly blend between light and shadow.
Through textured shading the objects rough patch such as bark or fabric fuzz is included to show what the surface is
This is used to strengthen the three dimensionality of a shape adding volume by placing shade along the edges of a shape.
According to a research conducted in 2018 National Academy Fine Arts, it is seen that artists who work with varying shading techniques are able to exhibit one’s subjects’ texture and materiality as convincingly as possible and as many as eighty-five percent of gallery visitors claimed to be more engaged with such artworks.
Shading tools and materials
There are a lot of tools for shading which one can use in order to achieve the desired result. Here is a brief look of few basic tools:
Blending stitches and tortillons allow the user to blend and smooth the pencil marks, suitable for blended shading.
In some cases, erasers can be used in place of or instead of pencils which can allow some mistakes to be fixed or even some graphite to be lifted thus providing some highlights or softer tones.
Graphite pencils include a variety of pencils classified into hard (H) and soft (B) pencils, enabling a wider scope of shading techniques depending on the hardness of their pencil. This means that rich shadows and textures can be created using soft pencils from the B series, while light will be used with H series pencils for more detailed images.
An interesting observation from the Journal of Artistic Techniques in 2020 noted that those artists who broad their experience by using different degrees of pencils and blending tools are able to shade their pictures with a drawing of their pictures more realistic.
An understanding of the use of shading methods in the works of the pencil colors is of great significance.
Again, shading becomes easy because large areas can comfortably be painted with gentle sweeps. This further makes use of the overhand grip that gives a fuller motion. An overhand grip is where the point is held away from the finger closer to the upper portion of the pencil. More motion is likely to give softer shade.
Tip pressing as a final technique also resolves tonal issues. There is a distinct difference in making a tonal work, the reality of it is: everyone envisages different things. It follows that control of how much pressure is applied to the pencil allows to master the task.
The use of sharpening exercises could help drive home the ideal understanding of shading. For example, many artists would put into practice the drawing and shading of an apple to demonstrate their shading skills. Such exercises assisted artists to appreciate concepts such as cast shadow, core shadow, and reflected light. In such a case, when the apple is turned and light touches different bases of the apple, there is a general realization that such effects can be reproduced in drawing an apple.
Ways to Add Dimension and Weight to Drawings
Practicing shading a round wooden ball placed on a white table can increase an artist’s comprehension of light and shadow causality. This is a concept where the artist has to think deeper to understand the relationship between the light source and the object’s surface and its surrounding surfaces to cast shadows and highlights creating the illusion of depth to the image.
According to One of the studies conducted by Art Education Today, 90% of the respondents, who were students of art, reported that after practicing such shading exercises their ability to create shadows and highlights in their other works increased dramatically.
More Post
- Urban Landscapes in Minutes: Quick Sketching Techniques
- Creative Daily Practice: Sketchbook Ideas and Inspiration
- Why is selecting the right sketching materials important?
Working on Line Art and Highlighting
An artist’s skill can be directly determined by the extent of mastery of combining line art and highlighting, hence resulting into construction of pieces of art that are interesting. This combination brings out combination of line drawing which is layer of depth and volume pousse by highlighting providing a sum of great textural tones.
Blending Lines with Shading
To integrate line art with shading, one first ought to grasp how light areas and shadow areas connect towards each other. Framing planes of values allows the artist to model and give volume to the plane of paper. This is because it delegates a specific logic of light’s influence on the object and the setting which surrounds the object as to where lines have to stand out and where shadows have to merge into smoothing effects.
A very important research published in the International Journal of Art and Art History 2022 proved that viewers have a greater perception of artworks that feature lines and have good shading as adding depth of perceptions of the painting. The authors analyzed 500 artworks and established link between volume of shadows on the object and people’s interest to the art work.
Looking for real-life cases
From the artworks of great artists such as Albrecht Dürer and Leonardo da Vinci we can deduce the best approaches for the use of line and shadow. Dürer’s woodcuts for instance are very well hatched in such a way as to create texture and volume through line and shading techniques. Dealing with Leonards study of human figure he leads into techniques in shading whereby a line can depict the contour and roundness of flesh fcells in a sketch.
Advanced Projects and Ideas
There are an array of different projects geared towards developing understanding in lighting and shading techniques. For example, if you truly wish to understand the curvature, perspective and depth up close one must practice drawing an object from different viewpoints under a single light source. This would allow the artists to develop an appreciation of how a subject is lit and how the shadows are created resulting from changing the positioning of the object.
In the Journal of Artistic Education free volume one, where the authors talk about the specifics of how students learn to model forms, there is a particularly comprehensive section about the program in which students accomplish form modeling goals that are progressively more difficult, from shading in simple shapes to shading in more complex pieces such as still life composition. The authors underline the students’ possibilities to shift the pattern since it helps to model light and shadow more realistically.
More Post
Pushing boundaries with Textures and Particles
Further education can include an evolving texture such as wrinkling of the skin, inclusion of dust particles or even beams of light, for the skilled learner further enhancing depth perception and realism. These elements require first an understanding drawing basics, in particular shading and line art where particles and uneven skin texture are taken into account.
As an artist, you may consider the idea of light and shadow to be one of the most complex. So, a great technique for creating random shadows would be using a stippling method which can then be further enhanced using soft gradient shading to diffuse the light. The way light diffuses through the atmosphere creates a particular detailed effect, and so one can see why this technique might have been used by Gustav Doré and others as it took their form to another level. They could combine intricate line work with the right amount of shading, the result was a masterpiece.
How Do I Consider the Source of Shading to Choose the Techniques?
Now, let us tackle how to start selecting shading techniques. It is safe to say that every light source has its own quality. This quality in turn changes the appearance of shadow and highlights on a surface. And that means every light source will require a unique technique. Take the sun, for an instance, sharp shadows are created by it, And for that aiming techniques like cross-hatching and stippling would be the way to go. If the sun isn’t visible and the light is still present then a Overcast will create softer shadows allowing shade creation to be more effective.
A research paper written by the Academy of Art University states that 78% of the students who focused on drawing underwater did well due to using both natural light and artificial lighting, and the traditional shading practice made them specialize in shadow hardness as well as in value steps.
How Can You Ensure that All Lighting is Consistent Through Your Artwork?
Whenever we start to create our artwork, be it a painting or even a somewhat simple sketch, maintaining the light direction is key. Here are some guidelines on how one can achieve this.
- Mark the Light Source: For starters, while setting up your sketch try to mark whether it is a light bulb or a sun on either of the edges in the outline to keep in your mind the direction the light is coming from.
- Use Some Image References: Look for pictures that have certain angles where the lighting is very evident. Always take note of how shadows are cast based on the primary light source and do your best to mimic it.
- Draw Some Basic Figures: It will be very helpful to practice and get the hang of how light sources behave to simple geometric shapes such as spheres or cubes once you feel confident enough.
What are Some Ways in which I can Evolve and Advance as an Artist?
One of the most frustrating but at the same point productive tasks is changing what you learn and how you learn it as an artist. Here are some practical ways through which one can achieve this:
- Learn Through Videos: As a matter of fact there are millions of drawing tips and tricks including perspective drawing and borders which countless people have uploaded and edited on YouTube.
- Look for Relevant Courses: Almost all websites have numerous courses structured for specific groups such as advanced or beginners as well as give valuable guidance to aspiring artists.
- Engage With Other Artists: Other artists are more than likely to be on such platforms and communities such as social media and online forums which assist in sharing your work and getting or giving constructive criticism.
Results of the study corroborated by the 2021 Artists Network report showed how instructors’ involvement in the art community through courses or other means enables the individual artist to self-improve approximately 40% faster than an artist that acquires those skills by self-study alone.
Final assessment of the study
It is vital for any artist choosing to work in line art and eventually shading that he becomes an expert in both of these skills. They increase the power of the drawing itself but they are also necessary precursors to the more exciting ventures into more sophisticated techniques and even different mediums. Art is a process of constant learning and self-improvement so there is also a need for experimentation and practice within the artist.
No one starts out as a skilled professional artist and there is plenty of room for improvement whether you are a novice or experienced artist. It is important to remember that with every improvement comes a set of challenges, so art is a constant battle between growth and conflict. Learn through PDF’s, art courses, and the community. Practice, be hungry to learn more, and most importantly enjoy the process of making art and finding your voice and identity.;