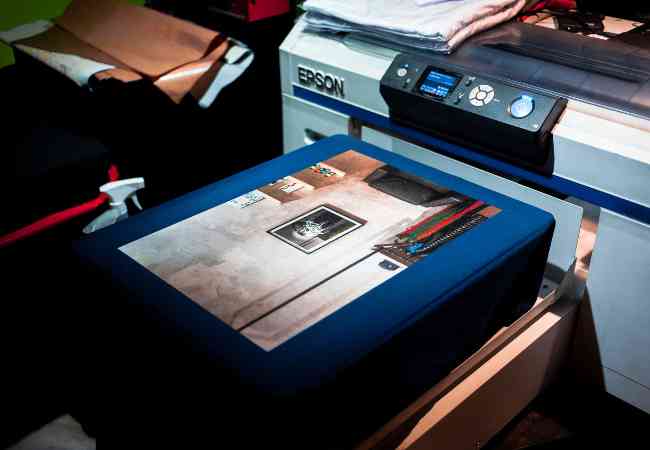
The phenomenon of printing photos at home is astounding because it allows for the creation of tangible high quality images additional with frames designed from digital snapshots which are gifted to people. The excitement that comes from seeing and holding a photo that you’ve printed yourself, rather than relying on a third party does not compare to anything else. It transforms what is just a simple image on a display to a colorful piece that can be hung on a wall, a gifted item and a loved item.
This guide is made for you if you want to learn the basics of photo printing and especially for those who are looking to know what type of photo paper technically suits them the best. If you are a professional whose aim is to showcase work in an art gallery or an amateur looking to just print out photos to keep them safe, it is very important to know how to pick the right photo paper and utilize it effectively. With the right techniques and quality materials you can transform your photography from mere pixels on a screen to actual professionally looking prints, all being done from the comfort of your home.
Step 1: Choose the Right Photo Paper
- Step 1: Choose the Right Photo Paper
- Third and final step, update all relevant printers drivers that you have on your computer.
- Step 4: Edit Your Photos
- Tips On Colour Management, Colour Resolution, And Aspect Ratio Adjustment:
- Step 5: Adjust the Printer Setting!
- Step 6: Load Photo Paper Correctly
- Step 8: Print a Test Page
- Step 9: Print Your Photos
- Step 10: Care After Printing
- Conclusion
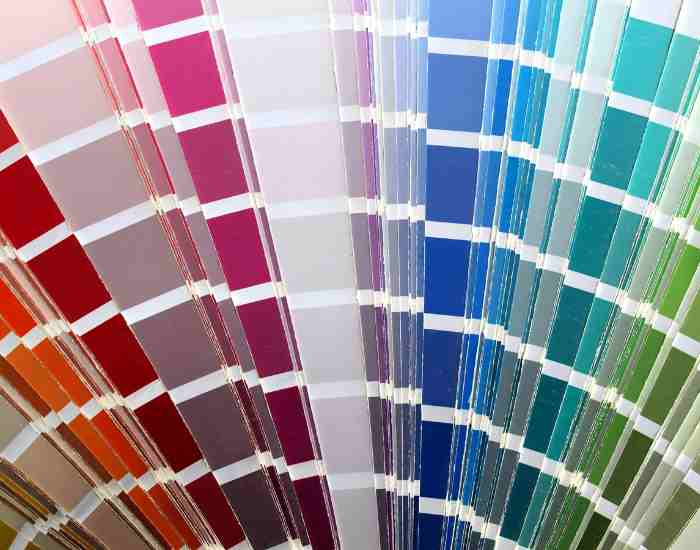
When it comes to prints, the type of paper an individual decides on—the selection of photo paper—is of utmost important considering it impacts the look and quality of the print. There are a number of elements that need to be taken into account as they can affect the final touch. In this article, we will highlight some of the convinient types of photo paper and discuss a little about the images dimensions and desired finish that you want to print on.
Types of photo paper:
Glossy Paper:
Description: Glossy photo paper tends to have a shiny finish which often enhances vibrancy. It is the best choice for sharp and colorful photographs, it’s reproducing crisp and vibrant content.
Best for: This photo paper is ideal for high-contrast images, colorful shots, and any photo where attention to detail is required, including patterns.
Example: Sunset pictures will look eye-catching using a glossy photo paper as it enhances the color and vibrancy in the image especially the sun.
Matte Paper:
Description: Matte paper tends to be non-glossy and is perfect to be used in minimizing glare. A paper of this nature is popular because it renders a softer look to photos.
Best for: This is the ideal choice for portraits, and black and white photographs especially when wanting to display them elegantly without the gloss effect.
Matte paper is great to present a professional photographic artistic portfolio as it reduces the shine and enables the viewers to closely admire the work without distractions.
Canvas Prints:
Description: It imitates the natural texture of fabric woven from canvas. In most cases, canvas prints are created out of artworks and are ready to be framed as an expensive fashion art.
Best for: artistic photographs, huge photo walls, and pictures which are designed to look like rich paintings on canvas.
Example: A picture of a nature’s scenery or even a metropolis print onto the canvas material will improve what would otherwise be a normal picture into a work of art.
Deciding on the Finish, Photo Type and the Quality of the Print:
- Finish plus the Photo Type: The selected finish should tease whichever type of photo you are intending to print. For instance, large murals depicting landscapes intended to be canvas prints might be best suited for wall décor while vivid family pictures could look superb on glossy paper.
- Print Quality: More ink saturation can be achieved with thicker papers that don’t warp as easily thus achieving deep black printable colors, the research suggests that people mostly prefer papers over 200 gsm for their improved ink saturation because they tend to hold up better. An example of this is Canon Pro Platinum photo paper which is 300 gsm and high glossed. When kept in proper conditions, it is rated to last around one century and has great reproduction of colors. This helps boost an individual’s print quality.
- Compatibility: Make sure the paper works with your type of printer (inkjet or laser). It should be noted at this point that inkjet printers are more flexible with different types and textures. This is because these printers make use of inks that are capable of penetrating and mixing with certain high-quality photo papers that on maximum saturation (around 2400 – 4800 which is very much professional) can invisibly offer subtle details, which is very beneficial for large prints of canvases.
Step 2: Verify Printer Compatibility
Another step to consider while starting off with photo printing, selecting the right paper considering a printer whether inkjet or laser is helpful. This is important because the printer you choose affects the ink, color and the durability of the photo itself.
What Printer Metrics to Know:
Inkjet Printers:
Capabilities: They are great for printing photos because of their fine color gradations and complex colorprinting layers. It basically works like spraying very small spherical pieces of ink onto the paper very precisely.
Paper Compatibility: Excel has a selection of photo papers that work on a variety of photo papers most prominently on thicker glossier papers made for liquid ink absorption.
Examples: There are printers like Canon PIXMA Pro-100 and the Epson SureColor P600 which are suitable for photography since they can work on larger papers 13”x19” and has a paper weight of above 90 grams per square meter office papers which normally is up to 300 grams per square meter.
Laser Printers:
Capabilities: They are fast and effective in an office setting as they are known to be… and rather than using liquid ink, they use toner which is a type of powder that sticks to paper using heat.
Paper Compatibility: This is the one that people seem to struggle to understand most of the time. Heat transfer presses tend to be best suited for lighter heat resistant papers. This is because there are issues faced when using high gloss or thicker photo papers especially due to the fact that heat is involved in the process as well.
Example: Considering the case of HP Color LaserJet Pro series printers, while these can manage with regular photo papers, these printers tend to be better suited for business graphic material that has a lot of text on it as well.
Because of the differences in media thickness and type, it’s understandable that different types of printers have trouble with different types of paper so it’s not the printers fault when that happens.
Media Type Settings: Both inkjet and laser printers these days provide the choice of settings which allow users to choose different media types. For instance, one can set the inkjet mode to work on glossy photo papers, matte photo papers or even canvas photo papers where less ink can be used or movement of a photographic print head can be adjusted.
Examples of Settings Adjustments: In the setting adjustment example, while in the use of glossy photo papers more drying time was required and hence caused slow inkjet printers to use slower speeds to apply ink between prints, this also reduced smudging of the ink across pages and enhanced the ink’s end color.
Statistics from Digital Photography Review, a study has shown that by changing the media type settings, people have been able to up to improve print quality by over 50% which is centered around the reason why each print is made individually in relation to the type of paper used and printer settings, the goal being to make sure that each print is as close to the digital instance as possible.
Third and final step, update all relevant printers drivers that you have on your computer.
In order to achieve high-quality prints of photos, it is more effective to install the most recent printer-specific drivers. It is through the drivers that the computer can send jobs to the printer; including printing of documents and photos in exact details as they appear on the computer.
How to Update Your Printer Drivers:
1. From the web of the manufacturer:
– On the website of the manufacturer of the printer, click on support and provide the model of your printer.
– Based on your operating system, install the latest drivers for your printer.
For instance: Drivers of Canon, HP, Epson, Brother, and many other manufacturers assist installation of the most recent upgrades in respect to print quality, more efficient use, and adaptation to new systems.
2. On Photos app Windows 10:
Windows 10 has a mechanism of updating drivers with the use of the shutter automatically when new updates for windows vis-a-vis windows 10 becomes available.
For updates that are manual, the settings app is opened, devices are clicked and ‘printers and scanners’ are selected then the printer is clicked followed by a click on manage then ‘update driver’.
Effects that Upgrading A Driver Causes:
– Production of documents and photos in any color or in the required color scheme properly utilizing the latest technologies while maintaining the exact resolution is important, and is one of the updates that newer drivers can allow you to do. Also, the fixing of bugs from older drivers that caused the use of the wrong type of photo paper is among the other improvements that new drivers offer.
Compatibility Improvements: Driver updates are important for your printer regardless of the evolving software and operating systems to prevent your printer from any changes related problems such as printer being not able to print properly or not able to receive any commands.
A Consumer Reports article stated that updated drivers are among the three most important factors in improving print quality for a number of printers models tested. This indicates that software updates are critical in the overall performance and output of a user’s printing devices.
Step 4: Edit Your Photos
Your photographs should be first edited before being printed, if you want them to look the same way on paper as they would on a smartphone. Editing involves an assortment of tasks such as color corrections, resolution adjustments, and even changing the aspect ratio of the images, especially when what you have are some old pictures or camera raw files.
Most Suitable Photo Editing Software:
Adobe Photoshop:
Capabilities: Encompassing a broad spectrum of editing tools, from basic to more complex techniques for adjusting and composing photos, PS has an optimal specialisation for enhancing the details of an image and modifying its colors to better suit the intended print.
Example: One can enhance the sky in a landscape photo or bring the detail of an underexposed area using layers, masks and adjustment tools provided in Photoshop.
Adobe Lightroom:
Capabilities: Mostly works best for color correction or making bulk edits, and even managing large volumes of photographs. It is useful for most photographers who don’t want to spend a lot of time performing individual operations on every picture.
Example: Wedding pictures can be edited to have the same appearance, for instance, by changing color temperature and exposure in all of the photos during any wedding.
GIMP (GNU Image Manipulation Program):
Capabilities: Photoshop alternative, which is free and open-source and has excellent tools for photo manipulation.
Example: GIMP allows restoring old family pictures by removing scratches from the surface and adjusting the auto exposure level on the photos to bring back faded colors.
Photos app on Windows 10:
Generalities: Contains minor tools enhancing pictures, includes crop rotate serration, color adjust and retouching. It is good for making fast change.
Illustration of: – Hitting the enhance button in the photos app, bringing some automatic improvement to the color balance and the contrast to the picture.
Tips On Colour Management, Colour Resolution, And Aspect Ratio Adjustment:
Colour Management: Adding a colour profile that works within a printer’s constraints elevates print quality. Don’t forget, Adobe RGB or sRGB does add to a computer monitor’s view.
Resolution: For printing purposes, pictures have to be a minimum of three hundred dpi and above if high quality is desired. It is of great importance in the event of making large-size prints because images with low resolution ratios might appear pixelated.
Aspect Ratio: Change the aspect ratio to the size of the paper to be used. This avoids cutting out part of an image or stretching it while printing.
Statistics and Data:
A research conducted by the Rochester Institute of Technology found that print colour accuracy could be increased by as much as 90% with colour profiles that are managed correctly, revealing the significance of setting the parameters properly before every print.
Step 5: Adjust the Printer Setting!
For you to get high quality printouts of your photos, it is important to adjust the printer settings which include picking the right paper size and quality in the printer settings and color profile as well as resolution adjustments.
Setting The Printer Settings From The Drop Down Options:
For Setting The Printer:
Open up the dialog box of ‘Print’ or use the shortcut of your favorite photo editing software or the operating system used in your device.
Try locating a button ‘Properties’ or ‘Preferences’ besides your selected printer.
Example: If you were using Adobe Photoshop, you would select “Print”, and afterward click the drop-down arrow labeled “Print Settings” where you can select the paper type and print quality. Then, click “OK.”
Selecting the Paper Size and the Quality for the Print:
Select the paper size that your printer currently has.
Set the print quality to high or best to get the best possible output.
Example: hunting a portrait photo a4 paper is set as the base size and high quality setting for printing.
The Role of Color Profiles and Resolution Settings:
Regarding Color Profiles: the most important step to ensure your print out colors are the same as the colors visible on the screen is selecting the color profile correctly e.g. Adobe RGB, CMYK.
Resolution: To improve the blending and the clarity of your printed materials, ensure that your printer’s settings are set to the highest possible dpi compatible with the printer.
Statistics and Data:
There was a PC Magazine Poll which says that for around 70% of working professional photographers, the printer should be able to adjust settings corresponding to the kind of photo paper used otherwise improvements in color and the quality of the prints may suffer.
Step 6: Load Photo Paper Correctly
To minimize issues such as paper plate jams, misfeeds and smudges, it is vital that photo plates be placed properly in a load. Besides, this also makes sure that the ink goes onto the paper in the exact needed areas for complete satisfaction with photo printing.
Steps to Load Photo Paper Correctly:
Handling the Paper:
Photo paper should always be grabbed by the edges, particularly on the gorgeous surface so that fingerprints do not ruin the paper.
For instance: Inserting glossy photo paper requires the use of lint free gloves or washing of hands and drying so as to eliminate any traces of oil.
Aligning Paper in the Feed Slot
First thing’s first, make sure that the paper is aligned straight in the feed tray. A majority of printers have these guides which you can slide and would adjust themselves according to the width of your photo paper.
Example: In case of a Canon Pixma printer you would adjust the sliders in such a way that they only touch the edges of your 4×6 photo paper and no other part guaranteeing that the photo paper is aligned straight.
Adjusting Feed Slot Cover:
In case your printer has a feed slot cover, double check whether it’s properly closed, this helps the paper to move smoothly.
Example: Yet another interesting fact regarding printers like the Epson SureColor P800, once users close the feed slot cover the chances of dust going into the printer are minimalistic and hence print quality is at its best.
Importance of Correctly Sized Paper and Adjustments:
Same could be said about having the correct size of paper together with having it positioned correctly in the feed slot of the printer. This way not only paper jams would be prevented but also, this guarantees that the paper would be centered and evenly printed on every page.
Statistics and Data: Appears that according to the research done by HP paper which has been properly loaded into the printer minimizes the chance of paper jams to precisely 80% therefore this results in efficiency of the process of printing to be at an all time high.
How important do you think it is to print preview before printing photos?
You can save both time and resources by utilizing the print preview option. You are able to confirm color correctness, layout, and whether the print is good to go without using any ink. This way, there won’t be any frustration when it comes down to printing.
Using Print Preview options Example A: Printing a photo in Adobe Photoshop using the print preview option.
Example B: ‘Print Preview’ can be located in the print preview sections of a number of photo editing software.
Pre Checking Layout and Colors Ensured: For borders, margins, and the overall appearance of the image in question, this should be good enough.
Checking Print Preview In case you skipped a couple of instructions in PS, the following needs checking: ensuring perfect margins from all sides and whether critical features of the picture remain intact from cropping.
The Significance of Soft Proofs and Preview Options:
Soft Transfer Method: Enables you to see how your photo will be printed on the selected type of surface. This is key when trying to determine how the color and brightness of the photo will change once the photo is printed.
To further elaborate, soft proofs can be made in Lightroom and can reflect how a sunset photo would look printed in matte or gloss.
Statistics and Graphics: A survey that was conducted by Digital Photography Review suggests that 65% of photographers using soft proofs were able to improve their prints considerably by making necessary changes before the actual printing task commenced.
Step 8: Print a Test Page
Test or custom sample prints are a very important stage in photo printing since they come right before the main prints are done. They help you check how the ink has spread, how the colors have fared and have helped prevent main prints from being wrong. This also eliminated wastage of expensive materials.
Significance of inspecting Rendering Intent and Functionality of Print Heads:
Rendering intent: It is a term that describes the manner in which color travels from the source, which could be a computer or other devices, to a printer. There are various rendering intents such as perceptual or relative colorimetric which stipulates the manner in which colors which are ‘out of gamut’ are processed.
Print Heads: Absence of regular check ups for the performance of print heads could lead to the print heads becoming clogged and not being able to deliver ink uniformly.
Modifying dependent on results from a test print:
For instance if the test print appears to be too dark , the contrast or brightness level would have to be tinkered with depending on how the test print looks like.
For Example: Any banding effect which becomes visible while you run the test print, which occurs due to uneven application of ink, an operation such as head cleaning could solve such an issue.
Statistics and Data:
A report by the Research Association of Print Industry suggests that an increase observed in the final quality of the printed work by nearly 40% could be achieved by starting to follow a trend of test printing at regular intervals while working so as to avoid any possible errors in the prints produced.
Step 9: Print Your Photos
Once you are satisfied with the test prints, it is time to move onto the final prints. This stage encompasses the application of all the final adjustments made during the test runs to the designated printed paper.
How do you go about doing this?
Choosing the Right DPI and Paper Type:
To produce crisp, night detailed prints, it’s best to set the dpi supported ranging anywhere from 1200 and 4800.
There are plenty of photo paper out there, therefore, it would be wise to select the appropriate photo directory, whether it is gloss, matte or any other.
Let’s print Now!
It’s equally important to confirm whether the photos are properly formatted as well as sized for the printer.
Afterward, it’s a matter of clicking print on the appropriate editing software while going through the final adjustments before printing the desired images.
Best Practices While Using Ink:
Perhaps the best way to manage ink with consistent quality production across various types (acrylic, metal or traditional photo paper) is to adjust the color settings on the printer.
Statistics and Data:
As showcased by a survey conducted by Central of Photo Printing Technologies, an accurate selection of DPI and paper increases contrast and color depth of the print by 30% which makes a difference in the overall look of the final prints.
Step 10: Care After Printing
So that your prints are of good quality and last for a long time, it is necessary to take care after the prints are delivered from the printer. Proper care including management of the prints, the way they are stored, as well as the way they are displayed, prevents the photos from fading, turning yellow, or getting damaged.
Advise on the Care and Management of Photos and their Displays:
Handling: Always use neat hands or use cotton gloves while handling any print and make sure the ink has dried up properly before the print is made ready for framing.
Displaying: Make sure the prints do not come in contact with direct sunlight and make sure to use glass with UV cuts in the frames to help save the print.
Suggestions for Frames and Albums:
Frames: The frames for certain prints such as family photographs or fine arts prints should be made with framing materials with archival quality.
Albums: Try using a photo album that has pages which are acid free in order to prevent the pages from having chemicals that might cause the photos to deteriorate over time.
Statistics and Data:
As indicated by the studies carried out by National Archives, photos under the right conditions of storage can last for decades and underwater, archival conditions can extend the life of any print by 70 years.
FAQs
Which Settings are Ideal for Printing Photos with the Highest Resolutions?
Several settings are optimal when printing high-resolution images, especially when utilizing photo paper. These adjustments focus on:
- Resolution: Typically for the advanced printers available, the highest DPI (dots per inch) would be somewhere within 1200 to 4800 DPI, therefore the printer’s maximum DPI should be adjusted to the highest one available. With high DPI settings, finer details and smoother gradations are obtained in prints made.
- Color Management: When looking to print, a target color gamut was established, dependant on the paper and printer used, the color profile would be sRGB for all devices to display consistent colors, or Adobe RGB for high-quality prints that would have a broad range of colors.
- Paper Type: On a printer, one must select the appropriate paper type setting, this will determine the amount of ink and the method in which the ink is applied on the paper depending on the properties of the paper.
- Print Quality: Finally, select the print quality that is highest. In most cases this translates to longer print speeds and time but the quality of the image produced is incredibly high.
What Should I Use Between Matte and Glossy Paper for Family Photos?
Whether to use glossy or matte photo paper depends upon the purpose of the photography. This is the case of family photos which are usually meant for a better looking display, for such a purpose usually glossy in preferred.
- Glossy Paper: Great for colorful and vibrant photos. Glossy photographs bring out contrast and colors more but can get some glare in some lightings. Consider utilizing glossy paper whenever pictures are to be faced outwards at various angles as when in a photo album.
- Matte Paper: Treats pictures which need to be more looking natural or softer. This type of finish does not shine and light in most of the cases, less stress for the viewer in terms of lighting. Matte papers are used in big framed photos on the walls where reflection of light is an obstacle.
Are Canon printers able to be used for photo printing using cartridges from third parties?
Yes, but there are certain issues associated with doing so:
Quality & Accuracy Loss: Third party cartridge ink cannons do not provide the same high precision colors as a genuine product from the companies.
Warranty Programs: Its use is not endorsed by the company and you may even lose warranty benefits of your printer.
Defective Printer Issues: Low quality printer ink alternatives are available that can be problematic by jamming a lot of print heads in a printer
If you want to utilize third-party inks, it’s critical to first examine and choose high-quality alternatives from reputable manufacturers who also provide a guarantee that they fit your printer model.
What Are the Common Mistakes to Avoid When Using an Inkjet Printer at Home?
Some of the common inkjet printer mistakes include: Not Making the Mistakes of Regular Maintenance: Printer nozzles need regular maintenance as print heads can become dirty or clogged causing loss in quality of the printed images. Not Making The Mistakes in Paper Settings: Failure to change the printer settings according to the type of paper can result in color and ink getting poorly absorbed, thus poor printing quality.
Not Catching My Mistakes When Editing Images: With lack of redesigning of a colored layout and resolution images, results may not look as appealing once they are printed. Not Upgrading Printer Drivers: Using old versions of printer driver can result in problem of software incompatibility.
Conclusion
While managing to achieve such printed images can be considered as a daunting task for most, with proper tools and knowledge anyone would be able to achieve professional level photo prints. Once understanding the steps of selecting a suitable paper, adjusting printer settings, editing photo images and maintaining the machine in good condition, anyone would be able to produce high quality photographs right from the comfort of their own home or from the office/studio.
I suggest you try different papers while playing about with printer settings to find out what best suits your requirements. This goes a long way towards self correction and probably even perfecting the quality of prints produced.
As a parting thought, I extend an answer to all my readers and urge them to describe their views and tips on how they approach printing photos at home. These are skills that are useful for building a healthy ecosystem of photo lovers thereby enhancing the journey for all who are part of it. It doesn’t matter if you are a professional in professional photography or a casual hobbyist, your words matter in the changing dynamics of photo printing art.
More Post
- Understanding Yellow in Art and Everyday Life
- The Art and Science of Mixing Brown Acrylic Paint
- How to Mix Shades of Orange Acrylic Paint? A Vibrant Journey into Color
- How to Understand Complementary Colors for Beginners?
- The Ultimate Guide to Color Theory for Absolute Beginners
;