The techniques of aquatint in etching reveal a balance of texture and tone not seen before. Emotion and thought gets poured into intricate prints, that is why aquatint is not just a technique, but a process. If you have appreciated the smooth shifts between tones in a print, you may have already witnessed the beauty of aquatint.
In the etching industry the medium known as aquatint carries a lot of weight. Why? Simply due to the fact that aquatint gives ordinary images dimension and depth which is after all the primary goal of print making. Traditional etchings depends solely on linework while aquatint expands the possibilities and adds tonal fills, which means so much more can be made to an image. This can be compared to adding tones on a black and white picture; now you can view additional light and shadow details that add depth to the image.
An etcher assembles a variety of techniques to convey their emotion, likewise how a painter combines pigments on his palette. Each procedure used in the aquatint takes us a step further when it comes to complexity, the best part is we as artists get to choose our own path in this wondrous adventure enabling us to create the one of a kind jubilee.

What is Aquatint?
Aquatint is a process of engraving that helps in creating a ‘soft tone’ on the engraved picture. It requires the use of powdered resin (rosin) on the engraving plate, which is subsequently heated in order to roughen its surface enabling it to take up ink. When an acid is applied to such a surface, it “bit” into the metal, producing different depths which, when inked, will yield different shades. It is this process which creates beautiful and distinct effects in aquatint, thus making it unique from other forms of printmaking.
A good history of aquatint can only be traced back to the 18th century, when it became the first painting media, which was able to imitate soft washes of watercolor. Later on, this method received recognition for enabling the production of prints that appeared more like paintings, due to more varied gradation of tones. It gave great creative opportunities to the artists, since it enabled them to work in a more free and expressive way.
It is safe to say that Francisco Goya is one artist who played a significant role in the history of aquatints. The works he did in the Los Caprichos series illustrate the outstanding capabilities of aquatint in expressing a narrative. Goya’s application of aquatint shows that the technique transforms print from a mere image to something that deeply comments on topics such as society or human relations.
The Chemistry Behind Aquatint
Additionally, let’s examine the products that contribute to aquatint’s final output. As we have noted peeling is one of aquatint’s materials and the other is acid. A rosin is a pure, natural resin that is finely dusted onto the plate before it is poured. The ash is melted and is bonded to the wires of a plate when it is heated. This texture is needed for the aquatint procedure.
The plate is then covered with rosin to protect the areas. Corrosive acids are often a mixture of ferric chloride and nitric acid. They will then bite into the plate where no rosin was applied. The quantity of ink the plate can retain is determined by the depth of the nitrogen acid etching, which also affects the tonal value of the printed image. I learned that it is an experience of its own and that all these different acids create so many different outputs.
I distinctly recall my initial attempts at aquatinting and how I was keen on trying out different varieties of rosin in a bid to strike that balance. I recall once thinking that a coarser rosin may enhance the texture so I decided to use it instead. The experience turned out to be quite the unexpected shock, resulting in a slightly dark print that did not meet the finesse I was trying to achieve. The value in this was however recognizing how the choice of materials that I use bears great significance to the outcome.
The Aquatinting Process
Etching Plate Preparing
In any aquatinting process, the etching plate preparing is perhaps the most important and the first step to begin with: so let us walk through it step by step. :
- Pick Your Plate: When choosing a plate, always go for copper or zinc as metals because they would resist the acid better and allow for further details to be infused.
- Doing the Plate Cleanup: The next step involves scrubbing the plate with soap and warm water followed by wiping it dry with alcohol to grab any occassional grease and finger smudges. This step guarantees four key elements which will allow the rosin to stick on – clean, grease free, oil free and fingerprint free.
- Polterning The Top Layer: Use finer abrasive sandpapers to shiny polish your plate. This is a very important part if you wish to maintain a clean print.
- Ground Application: This is the phase in which you will be laying your rosin application.
Beginners’ Aid
Missing washing the plate properly is one of the basic errors to avoid. Any remaining contaminations can lead to undesirable spots or textures marking the print.
Applying the rosin in all areas including the edges and center is pebble for some people. Patience is important for the task in order to do it well.
Ground Application
Coating the ground level on the plate is an intricate process which becomes complicated for the inexperienced. I recall this stage very well from my first encounter with this process. I was too impatient to see whether there would be any in the end result, so I tried to do it quickly hoping to rectify any errors later. Some areas of the plate got more rosin dust while other areas less leading to uneven textures in the print.
If you want to correctly apply the ground, here is a straightforward technique:
- Dusting the Rosin: Rosin dusting tools (a fine mesh screen or a sieve) should be held above the plate whilst at an angle and gently shaken to dust rosin over the surface.
- Heat the Plate: The plate is supposed to be heated gently using a torch or a hot plate and the rosin is supposed to be applied on the plate. Once applied, wait and watch the rosin to melt and further spread.Heating and smearing the rosin with a hot torch or a hot plate, now, feels like magic as it is ready to be worked on.
- Cool and Check: Leaving the plate aside, allow it to cool first and then look for any varying areas that still need fixing. If there are found any uneven patches, it is best to reheat them after applying a bit of rosin on them. At both stages, some tweaking is required, and hence, the focus has to be crescent that the fine-tuning is there, and minor details are filled.
Crafted stories and some insight together provide the perfect measuring to provide the final crafting that aquatint will be strong and fully equipped to tell. I often recall how every bit of the process is synonymous with crafting art or music, and am fully confident that every detail provided sticks to making some fully expressive visuals.
Creating the Texture
With the rosin application being the first step to getting started with aquatint, the process of getting started feels like magic. It’s the rosin application to cold curling for texture that provides beauty in combining all the steps.
Adding coal dust to a gravure base to add texture is the most cherished step of the process, alone, with a steady camera shake it’s like a whole visual treat.
To begin, you will need to prepare your materials. These are rosin, dusting tool (a fine mesh screen or sift works well) and the prepared etching plate. I distinctly remember the first time I loaded rosin over a plate, it rather felt like performing a choreographed ballet. You want to use the dusting tool at an angle by the plate and wiggle it gently to ensure that the rosin descends like snow.
The goal is to ensure that an even concentration is induced though this may be a difficult task. If one area is dusted for an excessive amount of time, it will darken the stain in the print. On the other hand, a section is not dusted enough then that section can nearly not exist. I remember how ecstatic I was the first time I managed to get it right the first time I attempted it by noticing the rosin dust evaporate in a soft, uniform layer. It was similar to mixing unseen colors while setting up the stage for the prerequisite etch.
The Consequence of Grain Size
Now we discuss the grain size and its importance when it comes to the texture of the prints. The rosin particles that are used have a lot of significance in terms of their size. For example, if the grain is finer, it results in a soft, delicate tone that is smooth in texture; coarse grain on the other hand makes tone stronger which implies that the texture is much rougher.
For instance, there was a time when I was working on a piece in which I wanted to light a soft gradient to use a very fine rosin but the end result of that was stunning to say the least, the soft washes that closely resembled watercolor looked amazing. There was also this time when I used a coarse grain on a different piece which was much more vivid compared to the previous one. Coarse grain in essence gave that image a result which as much livelier for that specific image.
Grain size and its effect on texture is a topic every artist should explore as it has so many options. It is about determining what exactly is the right combination for the emotion you want to set forth and what the artwork has to say.
Glass Plate Engraving
After the rosin particles are set and the texture is created, the next step is to engrave the glass plate. However, this stage requires a little finesse, as this is the stage where the artwork comes to life.
Aquatint etching begins with incising a metal plate. The proceeds are then soaked in acid. Soaking time solely determines the final tone; a prolonged soaking time would yield deeper indentations as well as darker final color for the plate.
During one of the sessions, I got into a conversation with an artist and completely lost track of my metal plate in the acid wash. When I checked again, the acid had discolored the plate more than I had expected, turning what was meant to be a dull gray into pure black. Although disappointed at first, that piece became my favorite because it taught me how certain results we do not expect can push the creative process in a different direction.
Becoming an Artist: Making an Impression
The first task in becoming an artist is making an impression on the paper. In an artist’s world, creating an impression by ink on a paper is the hardest job. Best quality artwork is achieved with intense attention to detail, and creating an etching is not easy. The etching process takes anywhere between a few weeks to a whole month.
The plate is prepared by smearing the artwork with grease, allowing only the engraved designs to hold ink. A stencil is made of the engraved metal, and a thicker layer of ink is applied, filling the engravings. The excess ink is removed, leaving only the engraved areas filled with ink.
Setting The Final Touch
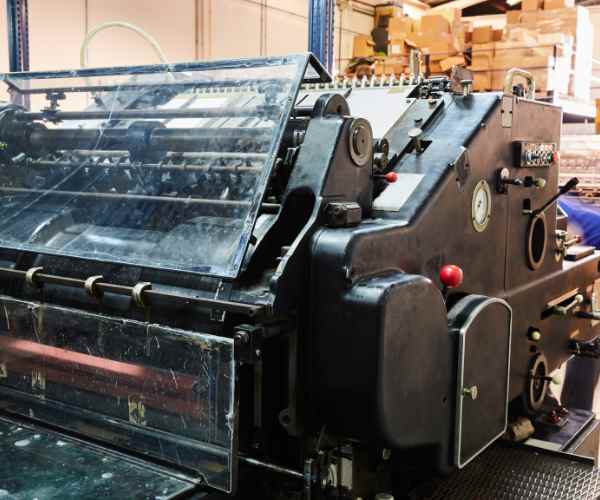
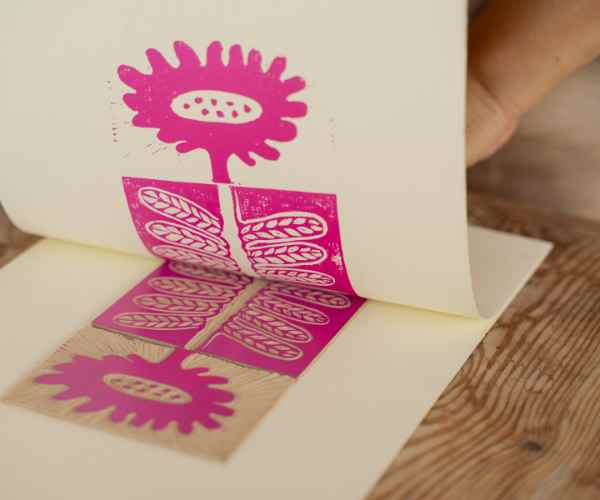
Once you have made the plate ready, you set it on a damp sheet of paper on the printing press machine. Then everything starts: pressing the button, watching the rollers move are all mere magic. Until today, the feeling of pulling the paper off the plate still leaves my heart racing. Wait until you see, dive into the wondrous feeling of joy and success. It is honestly a stunning moment, reaping more than the hours spent in preparation. It feels amazing when hard work gets repaid.
Techniques and Variations
Getting Creative With Color
I think the most fun part of aquatint is being able to add colour to it. It is true that aquatint has traditionally been used in a grayscale manner. However, being able to add some colour can certainly help to take your prints to the next level.
I remember working on a print making project where I wanted to portray nature in a few prints. I thought I would try a multi-plate aquatint and used a different plate for each of the colors. The process of applying colors was to first etch the plate and then print the plate, one after the other, in a sequence forming a layered and textural colored image. It was a little nerve wracking but once I saw the final prints, I was dumbstruck at the color combination I had achieved. The layered colors made the image look more lively, and I felt as if I were entering into the image itself.
Integrating Different Techniques
Taking that one step further by combining aquatint with a different etching technique is undoubtedly an advancement as well. The very same method can be adapted to aquatint, which I do with line etching in order to achieve sharp contrast.
In one of my favorite works, I employed classical line etching for the outlines and prepared aquatint for the shaded areas. The technique is skillfully done, which added more depth and complexity to the image, making it appear somewhat volumetric. It’s fascinating how using different techniques in one’s work can add new aspects to the work and broaden the coverage of the vision.
From these moments, I have also learned to respect that art is not only in the result but also in the process. Every action, every failure and every achievement contributes to the lesson they learn on how to be good artists in the future.
General Questions
What materials do I need to start aquatint etching?
With aquatint etching, getting started does not have to be a challenge however there are some materials that you will definitely need.
For starters, you will require a metal plate, which usually is copper or zinc which serves as a painting surface.
Then, you need rosin—the powder that creates texture and a dusting tool such as fine mesh screen for applying it evenly.
Another item you need are the appropriate acid for etching, usually ferric chloride or nitric acid which will mark the plate where there was no rosin.
And don’t forget goggles and other safety equipment! Such as acidproof gloves are also recommended when performing the activity.
Lastly, you will require some inking supplies which include a brayer or roller, printing paper (Rives BFK, dampened and of good quality is recommended) and a roll press if you are looking for professional results. When I was a novice at this, I used to have a dedicated place to keep work materials and set them up for use. It’s amazing to see how much more fun it is to work when everything is so easily accessible and close to the reach.
What’s the duration of the aquatint process?
Ah, time! Always an interesting component in any piece of art. The aquatint process can take almost an hour or a few depending on a few things such as your design intricacy and your skill level and experience.
The entire process of preparing a plate, inking it and printing it can take several hours, if not days, especially when you are trying to explore new techniques or colors, a single print can end up taking an amount of time greater than or equal to to what you might have imagined.
For me, the first aquatint tool application session took the entire weekend, and that’s not all, I was comfortable with the rosin application and in the etching most of the time.
But once perfected to a certain extent, the actuating was quite quicker in comparison to the first try I took out with it.
Never forget, the key thing is that the aspect of aquatint which makes it so sensual is the attention to detail, so don’t be too hasty. Relish the process!
Can I do aquatint prints in my house?
For sure! There are numerous artists doing aquatint prints in their home studios.
Nevertheless, there are some key factors to keep in mind. First and foremost, make sure you have a dedicated space where acids and solvents could be used safely. Good ventilation is of absolute importance throughout but especially when using any kind of chemicals.
When I first started I recall constructing a rough studio in my garage, and was flabbergasted how the entire process was so easy to get used to. I placed a table fan at the window for airflow and arranged tables for the other materials I had.
If you’re beginning small, it’s even possible to use a smaller printing press which can be hand pressed too.
It is all about optimizing your workspace to how works best for you and inspires you.
What do you think are the most common things that are difficult in aquatint?
Each artist has their hurdles to overcome and aquatint is not different. Most of the time I find a very common problem which is the very uneven distribution of the rosin.
As I mentioned previously, some particles are hard to come by, as I stated getting grain at the correct size can also be a challenge. If you use grain too coarse, your textures will be too thick, too fine and you will lose details.
The winding time on the acid bath is also a struggle. The plate should not be submerged for a long time else it might lead to over-biting which messes the print.
I recall one instance when I was just too passionate to create a design, and my concept of time was completely lost. This resulted in a black, overpowering print which wasn’t even close to what I had originally imagined. It made me learn that one cannot rush such a delicate yet profound process, and these days I use timers to avoid being too enthusiastic and getting lost.
What is the procedure killer of cleaning an aquatint plate?
An aquatint plate must be cleaned after every print to keep it usable and active for the next print while making sure to not damage it.
When you are done inking the plate, soak a paper towel or cloth into ink cleaner or mineral spirits and gently erase any ink that is still left on the resin.
Make sure to not rub excessively as this might erase the texture that you have worked hard to create.
After the plate is devoid of any ink, use a sponge and lukewarm water mixed with soap to wash the plate and ensure there is no leftover rosin or any other form of residue.
It should be dried immediately just to avoid the development of any water spots. During my initial printing session, I personally observed this and can assure everyone that it is highly disappointing to have an absolutely great plate covered with stains! Not an easy sight to see; as such, dry it off as best as you can.
Conclusion
We have come to the final chapter concerning the use of aquatint in etching and I hope you have seen why this simple art form can be so complicated yet so beautiful at the same time.
I do believe that aquatint really enhances the emotional content of your prints and gives you a possibility of using textures and tones that would normally just shock people.
Try to get used to the process as well as the material and practice with it. Don’t panic even if you fail once because it is just another lesson in your life as an artist.
So in case you wish to share any experiences you had with the usage of aquatint, then go ahead and do so, as their is a comment section where you can place your questions or stories. Let’s build up our community of enthusiastic artists who can teach and inspire each other!


