Let’s examine a topic that has significantly changed my perception as a digital artist, and that is the digital art workflow.
So, when I say digital art workflow, for those of you who are asking what that is, picture it as the compass that helps you trace out the route to your artistry. When going on a road trip, just as you wouldn’t go without a map or a good playlist (for most people! ), so do not work on creating your art without a plan on how you best approach the sometimes chaotic universe of digital art.
If I think back to when I first started trying out digital art, I was all over the place, hopping between this and that project with no sense of where I was going. Everything in my workspace was all over the place, I couldn’t find my files because they were all disorganized, and I felt as though creativity had no space to exist in me. But after one of the particularly complicated sessions in which I couldn’t even complete a thing I’d been working on, I reached the end of my tolerance.
After that, I realized there was a problem and began looking into ways to optimize my organizational methods. I began to decompose my projects into simple, actionable items along with target milestones when they should be developed, and even a dedicated location within my house for making my artwork.
The moment I figured out what benefited me, it was as if someone turned the lights on in a dimly lit room. I came to understand that finding a system that suits me is of utmost importance. Each one’s creative process is different and that is perfectly fine! Your work pattern should meet your character, your likes, and how fast or how slow you can work in a day.
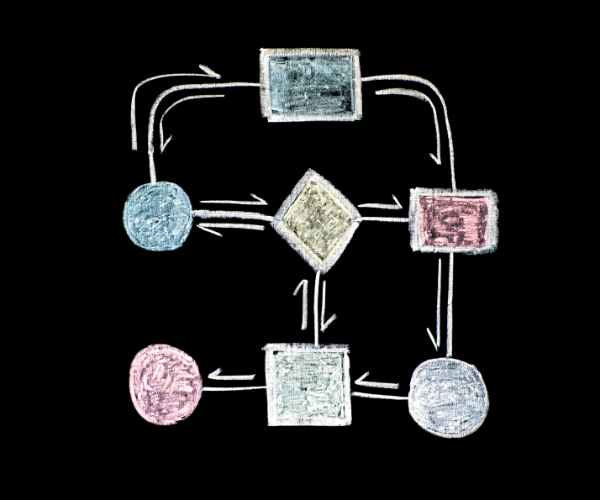
What is a Digital Art Workflow?
Let’s get one thing clear: What is a digital art workflow? It is essentially a set of sequential instructions which you adhere to when creating a piece of digital art. As the final piece comes together, these instructions may include brainstorming, sketching or making any touch-ups.
Just like every artist has their unique style, you can think of these steps as ingredients in a recipe that are mixed to create something beautiful. Depending upon your tools and techniques, along with the creative habits you possess, your workflow will allow you to establish a single structured mechanism that encompasses all your strengths and helps you deliver your best artwork.
It is safe to say that having a sound digital art workflow is fundamentally important for any and all digital artists—regardless of whether you’re a beginner or an experienced professional. Such a structure acts as a guide that can help you reduce stress, help you optimize your time effectively and ultimately give better results to your art. Without a proper workflow, it is more than likely to feel inundated or stuck just as I once was.
The Advantages of a Structured Workflow Ah, Moving onward, allow me to highlight some advantages of possessing a structured workflow To begin with, having a plan helps harness the power of time management. With a strategy in place, you will be able to bid specific time slots for each stage of your project.
This way, you can set proper goals for yourself while staying on time. I remember the time when I was trying to apply that in my own workflow. I set aside an hour for sketching and a separate hour for digital painting each morning. I realized that I was able to achieve a lot more because I had divided my work into smaller pieces.
Creativity is forever enhanced when one breaks their working hours into smaller subdivisions. It might sound paradoxical, but more structure actually makes room for creativity. When you understand the actions, you have to make, you do not waste time with details, you only care about the process.
After streamlining my process, it became clear that the newest ideas were less of a problem for me. It was possible to experiment with other styles and ways without a deadline.
And of course, when everything is in its right place, it is much easier to work and be productive. Ever since I’ve adopted the changes in my working style, which turned from being messy and on the edge to more structured, I’ve completed projects I thought I would complete in weeks, in just a few days.
To this day, thanks to the process that I’ve structured, I’ve been able to complete more pieces than I have before. The feeling of success arouses me and makes me want to try new things.
To sum it up, a definitive digital workflow is not just about check marking your responsibilities but it is about the process itself, the emotional effort made to pursue a goal or best describe art.
Core Aspects of a Seamless Digital Art Workflow
Let us begin from one of the more indispensable tasks on the digital art workflow task list: the workspace.
A well kept and appealing work environment can drastically set the mood for your artistic endeavors. I remember when I first transitioned to digital art; my work desk looked like a hurricane had struck as I had sketchbooks, old models of tablets and knob cables scattered around.
It was untidy and chaotic, which was evident in the quality of my art. Concentration was something which was hard to achieve and quite often, I would draw a blank with respect to any original ideas.
But there was a turning point, where I thought enough is enough. I reorganized my desk and only retained on the desk the absolute essentials to facilitate my working process : a tablet, an idea note book and some pens. My favorite art prints along with some plants were also placed on the desk to provide some additional comfort.
All of a sudden, it felt like a holy place! The expanse enabled my thought processes to function better and I realized I was able to think more rationally. Mess no longer distracted me and my productivity went through the roof. An organized workspace is similar to an empty space that is a good way of promoting creativity.
Choosing the Right Tools and Software
Next up comes the process of picking up the right tools and software. This is very important as the tools you wield affect your work flow and the art results produced greatly also.
When I was starting, I hopped on to every software that I could come across presuming that the more the number of options the better the creative_ness. Most of the time however, this led to a lot of confusion and annoyance.
It really wasn’t until I came to center my focus around a handful of tools and apps that I could kick off my great artistic progress. As an example, I finally decided to use Adobe Photoshop for meticulously painted pictures and Procreate for sketches on the go.
It is also worth mentioning that many users of Clip Studio Paint and Corel Painter could also find good features that fit their style within these programs, so it really is worth trying out what fits best for you. On the hardware side, a good tablet will finally help with this, for example Wacom or iPad.
These instruments are intended to ease your level of enlightenment instead of heightening the complication. It is important to note that it is not about the most priciest equipment but rather having the right equipment that is functional and cultivative to the user.
Setting Up Routines
Now, let’s discuss how to set up a routine. Such a routine plan can positively affect how much productivity you can accomplish.
As I began to include a daily routine alongside my workflow, things changed drastically. I set aside a specific block of time each day, anywhere from one hour to three hours, where I wouldn’t multitask and instead concentrate solely on my artistic work.
The measure of sticking to a time frame was a repetition of an action and I started anticipating that action. To assist you in building your own routine, here are some actionable ideas:
- Set Concrete Objectives: Be specific with what you want to accomplish during each of the sessions. For instance, try drawing a design with a specific concept you wish to work on whilst ensuring you am upskilling in new strategies.
- Favorable Time Selection: Figure out the period when your mind is acting with maximum creativity be it the early hours of morning or late in the night so that you know when to schedule the session.
- Elimination of Distractions: Look for a particular spot that is not crowded, keep the phone on non viber mode and work with artwork alone.
- Monitor Your Improvement: It would be good if you could maintain a record of each session in the form of an electronic or physical notebook. The act of reviewing what you have done may serve to enhance your efforts and ensure that you remain focused.
Integrating Sketching and Planning
In this address, let us now bring attention to the part that sketching plays in the process of creating digital art. It is undeniable that sketching is an integral part of all artworks because it serves a purpose for your concepts.
In my viewpoint, there has always been positive return for the time devoted to planning through sketching the details first. One time, I decided not to sketch out a piece before painting it thinking that this should not be too hard, and that I would work it out as I go. That was very annoying: I eventually discarded it because it turned out messed up.
However, that was only the case until I started sketching all of my thoughts in the first place, and then I understood how convenient visual planning was. It got me to organize my ideas and construct the layout of the final artwork that I would create. I think it is appropriate to use thumbnail sketches, as one can practice varying the configuration of the layout without attempting to handle the details too much.
Applying Digital Brushes and Techniques
Digital work calls for the use of brushes and it is time we incorporated those and learned some techniques. With appropriate brushes, you are certain to optimize the performance you put into an artwork.
If there is one breakthrough that I appreciate when it comes to digital painting, it has to be the use of custom brushes. I was able to do things that I assumed were impossible. There’s a complete transformation when it came to the use of textured brushes. The brushes gave more depth than the flat ones.
Also, I wouldn’t go to say these are the best, but there’s a plethora of options to pick and choose from geared towards your specific needs. From watercolour to inking, you can find very affordable brush sets that you may even get for free.
The perfect brush can help you in reaching new heights, so it’s important that you do not rush this process. Take your time and find out what suits you best.
What Works and What Can Be Done Away With
Working towards the ideal workflow can prove to be quite a challenging task. And for that, it is important that you know what is it that works for you or not.
Staying in tune with your workflow plays an essential role in identifying gaps. For the longest time, I thought I was being very productive when in reality I was being counter productive…. My energy on focusing on minor details would take away the attention from the major aspects.
Develop a method to engage with your workflow over time. After finishing a project, consider the following:
- Were there aspects in the process that felt easy and smooth to execute?
- Were there any aspects where progress felt frustrating or difficult?
- What adjustments would I make for the next time?
This reflective practice can be used to polish your approach in such a way, that it becomes easier to execute the work. In the end, it also increases the enjoyment.
Shifting With The Emerging Trends and Challenges
As a final point, let’s grasp the relevance of being able to adapt around the new challenges and trends that the sphere of the digital art encompasses.
The community of digital artists does not remain still, and every so often there are new tools or trends that emerge. For example, when I started, there was a growth of interest in 3D art and animation. I have to admit that going there was new to me, and I was not very eager to deal with it at first. However, later on, I decided to install the 3D application and give it a try.
That was a very big and deliberate shift in how I thought about my work as an artist and it also contributed to the workflow in a different dimension. Understanding to be flexible and to have an open mind to respond to change can only help you to a point, irrespective of how advanced your skills are.
Seek to tackle these challenges as learning opportunities. You never know! You may develop an interest in something that is not so conventional!
Frequently Asked Questions
What Kind of a Professional Digital Artist Am I Aiming To Be?
In regard to creating a professional digital artist workflow, one major thing is important and that is you customize it based on your requirements.
Here is a basic checklist of elements you might want to include:
- Office Organization: Make sure your office or workspace is set up in a way that it is organized adequately so that it fuels your creativity. Location, chairs, desks and almost all elements around your workspace will have an impact in how your work.
- Choosing Software: Since every artist has their own unique style, you should have the correct software that matches with the style. If you require any design programs, then you should have Adobe Photoshop, Procreate, and Clip Studio Paint which work best on the workflow systems.
- Tools & Brushes: Before jumping into any art or creation, you need to get to know some different types of digital brushes and tools. Make sure to use custom brushes before working on the final product of the art.
- Sketching: It’s important to reserve time to engage in brainstorming and sketching so those ideas can be turned into finished sketches and then into detailed designs. Reverse this process by browsing through your thumbnail sketches to visualize your detail ideas for the thumbnail sketches.
- Routine Creation: You will also want to work on building a practice schedule such as doing an hour worth of work daily or doing a couple of long sessions a week. Just be sure to set a schedule that works for you.
- Reflection and Evaluation: After finishing a project, make sure you take some time to review what went well and what did not go so well. This can greatly help you in your next work.
This checklist can be a good place to start from, but do not be afraid to vary it as you work through the processes. Emphasis is yours: Your workflow must always be changing and synergistic in all parts of your artistic journey.
How can I stay motivated while working on digital art?
Motivation especially in your digital art practice may sometimes be in low supply but there are a number of tips which can however ensure that creativity does not go on a downward slope.
- Set Small Goals: Sweeten big tasks by dividing them into smaller, more achievable parts. These smaller goals will not seem as intimidating and since they are easier to complete, they will build your motivation as you complete each one.
- Mix Up Your Projects: Do not hesitate to move between diverse styles or themes; if you feel that you are bogged down by one work, then alternate it with another completely different project which will help reshape your creativity and desired theme.
- Create a Routine: The moments that we touched on previously about creating a schedule are known to work and transform into octavias. When making art a daily task, engagement becomes simple.
- Seek Inspiration – Try to get new ideas from different places like nature, other art artists or even Music. Embracing creativity can trigger new thoughts and keep your desire alive.
- Join a Community – Interacting with other artists either on a personal level or virtually keeps one motivated. Some works done by others tend to be highly encouraging while sharing and seeking feedback.
There was a time in my life when I was feeling just drained out. Something I decided was to get involved in an art group which was life-changing. Watching the Fire and creativity in other people fueled my Fire and I was delighted to start creating again.
What are common mistakes to avoid in a digital art workflow?
Getting a To Do list type of plan for a digital art workflow can be complicated, especially for a beginner . Here are a few things you should not get caught up on:
- Skipping Sketching – Not being able to do some adequate planning before completing the final version can be annoying. Sketching, now that is a step that should not be overlooked while trying to build up your work.
- Overcomplicating Tools – Attempting to be too many tools or software can be convoluting. Rely on a small amount of which you most comfortable with and learn how to use them to effectiveness before spreading out.
- Neglecting Breaks: Working for extended periods without breaks can lead to burnout. Schedule appropriate breaks in order refocus your brain and creativity to be in a cutthroat competitive mindset.
- Ignoring Feedback: Critics will point out the flaws you may have missed when you have poured your heart and soul into something. Seek constructive feedback from credible people and be willing to make changes.
- Not Evaluating Your Process: There isn’t going to be any progress if you don’t contemplate what ideas go hand in hand with your workflow and what doesn’t. Contemplation regarding these factors from time to time is a necessity.
I too have fallen victim to my own tactics! There was a moment when I was completely head over heels for a piece and would not retire from it leading to my painting not being aligned with the picture I had in mind. Now, being able to take a break from the painting and reevaluating the process is a lifesaver.
How often should I update my workflow?
Your workflow is always in need of updating; it is never set in stone.
When referring to a communication as ‘workflow,’ it shouldn’t be perceived as a one-off event. After finishing a particular major piece of work or several art pieces, attempt updating this communication once more.
This allows you to assess the success and failures of your work and how to enhance it alongside suggestions regarding new techniques and tools that may be introduced in the future.
In addition to this, keeping abreast with the current trends in the world of digital art may necessitate changes in your workflow. For example, if there is a new tool or a particular technique that you like, then incorporate it in your workflow and determine where it fits.
The important thing is that you are flexible enough to accept changes. There should be progress in your artistic work, which means there will be progress in your workflow.
Conclusion
In summation, designing a digital art workflow that fit your requirements seamlessly is about optimizing the process to address your wants and needs as an artist fully.
For any progression to happen on your part as an artist, there must be a middle ground struck between order, invention, and contemplation.
I hope that you will play with the different components that we have discussed and comment with your experiences in the comments section below.
What is even more critical is the journey that you go through while trying to explore and develop your own digital art process, alongside the art that you make. Every venture is different, and so is the artist when it comes to their journey hence this different path will bring a multitude of wonders and growth to the artist when embraced accordingly.
So keep pushing, make art, and just enjoy the journey!

