There exists an infinite scope of imagination when it comes to digital art, however, failure to keep up with one’s layers will only result in a tornado like outcome.
I recollect when I decided to make the jump into the world of digital art. My goal was to enrich myself into this magnificent world of shapes and colors and because of my goal, I would be extremely inattentive to the layers. This would eventually lead to the painting becoming a stack of random bits and pieces which were out of order. I wouldn’t even call it a work of art, rather it more closely resembled a digital dumpster!
Layer management is the one absolute skill that every aspiring digital artist needs to develop and hone in on.
If you’re an artist who enjoys making paintings without layers try assembling a jigsaw puzzle where all of the pieces are unorganized. Sounds overwhelmingly boring and annoying, but that is what making a digital painting without layers feels like. Each layer in the painting helps with the process and once you are able to understand the significance of them, you should have no problems creating art as it will be more fun and easy to do so.
In this post, we’ll explore why layer management is crucial in digital art and how it can elevate your artwork and streamline your process.
So grab your stylus and tablet, and let’s get to know the tips for layer management!

Why Layer Management Matters
Layers define your digital work by being transparent sheets placed over each other within the canvas.
So what are layers? Consider them as parts of your final art piece, all adding up to that single awe inspiring piece of art. To put it in simpler words, I compare layers with a sandwich: there’s the top bun, the meat, and a top bun that goes on top. If one wants to replace the meat, it is simple to take out the tip of the bun as it does not interfere with the bread, correct.
Now even that particular layer can also contain different things, so an artist may work on certain details without disturbing other portions Suppose, for instance, that you focus only on characters and do not want to deal with the background or any other effects. Now you can work on all these without the fear of leverage your intended designs.
Increasing Ingenuity
Management of layers helps you be more creative and innovative in some aspects.
It was like opening a new dimension in my art when I first began to utilize layers. There’s more flexibility, more freedom and best of all – you won’t make a mistake. I remember doing character art and realizing that having the background, character, and foreground elements on separate layers made changing styles and colors so much easier for experimenting because I didn’t have to worry about ruining my previous designs.
Recoloring a character while constructing a scene is a whole lot easier. The freedom to experiment attributes to innovation in ideas and colors that can yield spectacular outcomes.
Improving the efficiency of the Workflow
Creating Layers makes the workflow more manageable, improving efficiency in the process of making art.
Consider this, imagine instead of granting layers and adjustments, you’re making more. This level of efficiency was game changing for me. I observed a 40% decrease in the time required to locate a particular layer when I placed them in groups. So when working on a digital portrait, grouping the layers of skin, hair, and accessories enabled me to click and lock or hide entire portions with one gesture.
This is very similar to having a well stocked toolbox; your reach for the required tool is simple, and you do not have to sift through the messy clutter.
Layer Management Principles
Setting the layer name and order
One of many practices that is very effective yet rather simple is layering, which helps to clearly signal the purpose of each layer.
Replace ‘Layer 1’ with ‘Character Body’ or even ‘Background Trees’. This tip helped save me a lot of hair pulling! When I was just starting, naming things was one of the things I was terrible at. It only dawned on me after doing a project that required me to have countless layers how crucial that one step would have been.
Now, Imagine wanting to create something and having to dig through ‘Layer 5’ or ‘Copy of Layer 3’ – sounds disgusting.
Implementing Color-Coding.
Color-coding layers can help wrap your head around the layout of your workspace.
This comes in especially handy! I would assign blue color to the sketch layer, green to the inked layer and red to the color adjusted one. It’s such an easy concept that can help reduce the amount of idiocy by a fair amount when the editing gets tougher.
Let us visualize this, you are deep into a task and your mind is bulging with ideas which layer need to do what, is the last thing you want. So that’s where color coded comes in like a GPS, helping you cut through the mess with ease.
Layer Grouping
Layer grouping is key to keeping related components in order and in an organized fashion.
So for instance, if you’re designing a landscape, make a set for the sky that includes clouds, a sun and perhaps even some birds. In this way, changes can be made without affecting any other part of your art.
One time, I took part in a huge mural and mastored the layers into the sections of the mural. I worked on the foreground, the middle ground, and then finally the background. All of this organization made it so much easier to think about how each of the one element would have effect to the comming element. I was able to modify the sky without fear of damaging the mountain range underneath.
Real Life Aplications
Example of a Character Design
So for this case, which I am claiming as character design project.
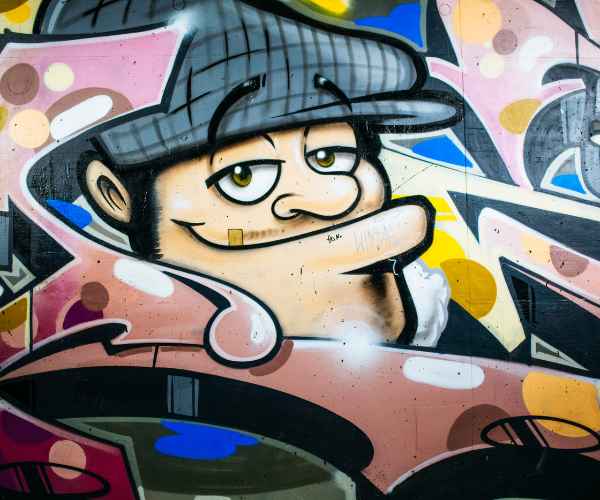
One of the personal projects I worked on required me to create a character from a Fantasy Book I had read. The thrill of watching my idea grow and develop was so real! It was clear to me I wanted to show the soul of that character, but at the same time I understood the need to work with layers in order not to end up in the mess I did during previous designs.
So this time, I opted to paint the head, torso, arms, and other additions in different layers. This method was a game changer for me.
For example, while I was experimenting with varying facial looks of my characters, I didn’t have to worry about altering my character’s body with a new layer toggle—I could turn the layer on or off and toggle with my avatar’s looks. Moderately bluestering the avatar’s torso would take me to the accessory section and allow me to change the shirt’s color. After altering the color, it would leave aside all other aspects.
Because of the flexibility offered, the whole experience became far more fun and very imaginative. Differing from other layouts that can be more hectic, this one allowed me to explore the blend of textures and saturations freely.
Think of trying to adjust the avatar’s character’s arm but moving the head in the same motion instead. With layers properly organized, I could rotate or resize different parts of the avatar independently, which made the whole experience fluid. And, more importantly, since it was all so organized on layers, I was able to remember which parts I had already done so there would be no panic of there being too many possibilities.
Use Case: Landscape Art
Now, how about we change topics and discuss landscape art?
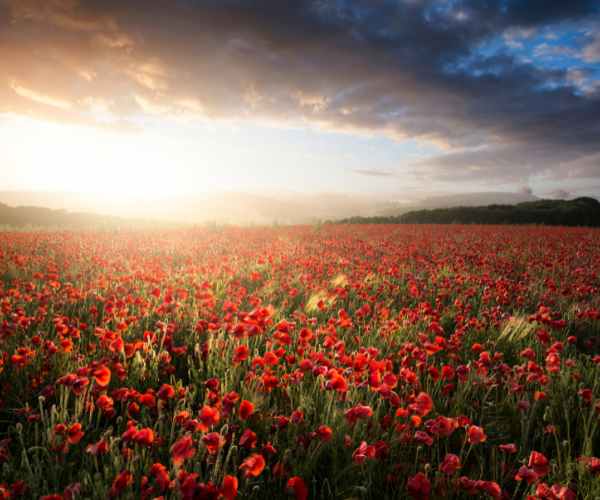
A stunning piece I’ve come across and enjoyed is a portrait of a mountain range during sunset. For this particular project, I had a definite hierarchy of layers in mind. The entire space was to be divided into a foreground, a middle ground and a background. This division was critical to increasing the dimensionality of the artwork.
As for the frontal part of the painting, I placed trees and flowers for this region as well. This detail was of utmost importance especially when considering these elements are the first points of focus for viewers. Placing these details on a distinct layer enabled me to adjust their colour, size and even apply shadows without needing to edit the mountain range or skies behind them.
For the middle ground, I added rolling hills and a river snaking its way through the boundaries. The best thing about layering in this region is being able to experiment with transparency. By changing the level of opacity, I was able to make the middle layer more distant, making hills feel further behind. Overall, this method enhanced the realism of the entire piece and gave me the feeling I needed.
In the end, I placed the mountains together with the sunset sky. Synthesis of these layers forms the possibility to add clouds and change the sky’s gradient or even add some birds and so on without interfering in other layers.
During integration of all the projects, the result was impressive and I think one of the reasons is that I was able to manage the layers. Instead of several drawings, the artwork was arranged in a single landscape that seemed to be outside the frame, which is exactly what I wanted to achieve.
FAQs
What are digital art layers?
Digital art layers are like every other digital layering technique which consists of individual sheets placed on top of each other on the canvas.
For example, you are making a sandwich and each layer in the sandwich adds its taste.
For example, in digital painting, each individual layer can contain colors, shapes, or textures.
This structure gives an opportunity to the artists to focus on certain areas of the work while other parts remain unchanged, therefore, improvements and changes become easier to make.
The first time I started using layers I was in utter shock, united in anger at how simple the technique is, yet so introductory.
Instead of dreading destroying the character design on for example a background layer or character design, I could design the character first and then adjust the background later.
That was a freeing experience, helping me engage with contrasting ideas with no apprehension of making permanent blunders, remember to check the outline panel.
Why is layer management important in digital art?
There are many digital paint tools out there, but any digital artist will tell you that having proper layer management is key.
For beginning artists, it allows us to have a broader scope of creativity.
When every component is on its own layer, you are not so much restrained anymore.
If you’d like to alter the shade of your character’s clothing, you can do so without having to worry about interfering with the background or other parts of the picture.
You’ve also improved your efficiency with layer management.
Imagine this: you are quite invested in a work and you need to change the color of the shading on the character’s arm.
If the layers are managed properly, you’ll be able to easily find that image layer and fix it.
Instead of scrolling over a long list of unnamed layers, you know exactly where you need to go.
Above all else, strong layer management intensifies the overall quality of your art.
It promotes a greater degree of structure which in turn means that one can concentrate on the most critical aspects of the art.
How can I improve my layer management skills?
Improvements on layer management skills depend largely on the practice and the organization.
To name things properly from the start Use easily identifiable names for your layers.
Instead of opting for ‘Layer 1’ and ‘Layer 2,’ you could use ‘Tree Background’ and ‘Character Body’ instead. This makes it easier to find the layer one intends to work with, and saves a lot of time when searching for a specific layer.
Using this you can avoid a lot of hassle in the long run. This change is minor but beneficial once in a while.
Moreover, color has been found to be a good tip in many situations. Red for sketches, blue for inks and green can be used for colors. You could give everything a different color and do the opposites for layers, this is also beneficial.
This visual cue can help ease your workspace and hasten your editing process, especially during those high-energy periods when you’re rushing to complete your best concepts.
To make matters worse, grouping related layers can also be very useful. So If you’re working with Finland scenes, for example, place all the sun and sky elements in one layer and try to consolidate them.
As a consequence, you would be able to position those items anywhere without having to worry about messing up everything else, which will in turn help you stay organized and tidy.
Can I use layer management techniques in other forms of digital media?
Of course!
Layer management techniques are able to be used in a lot more than just arts. For example in graphic designing, you can use layers to place images and texts without losing structure and organization in the end product.
While editing photo, layers serve as an excellent tool in terms of adjusting brightness, contrast and adding filters while ensuring that the original photo remains untouched.
Animation also makes use of layers and it helps a lot of those who use it.
You can divide different parts of your animation project such as the background, characters, effects etc thus permitting you to modify and improve every component of your animation project more easily.
Final thoughts
Layer management is important in digital art for both novices and professionals.
It is not merely a technical ability, but a means of expanding your imagination, making your work more efficient, and elevating the quality of your art.
As I think back on my journey as an artist, I realize that one of the turning points of my life was mastering how to handle layers in a more meaningful manner.
Following best practices such as naming and color coding, grouping the layers won’t let you down when it comes to advancing your digital art and making the whole process easier.
Therefore, jump into your next project with the mindset that knowing how to manage layers the right way will give you the best results you have ever made!