When talking about digital art, what is it that defines it and makes it stand out? How does one take a piece of digital art that is lifeless and feels flat, to a fully advanced piece that is full of dimensions? The answer lies in textures. In simple terms, textures refers to an image or pattern that has been imprinted on the digital canvas and applies a specific look or feel ranging from soft, metallic to smooth or rough. It is almost similar to feeling the grain when running your hand on a piece of wood, so textured surfaces in art would almost always provide a similar feeling but in a visual form. These textures effectively replicate real life surfaces, allowing people to admire and appreciate the artwork using their eyes.
I remember the first time I began working with textures in my own digital pieces. I feel that in my art, it was a little one dimensional back then. I was able to see the colors and forms, but it seemed to me that something was always absent, something that can be referred to as authenticity. I went on a search engine to locate a texture pack and it seemed as though my brain had a lucid moment. I was working on a digital painting of a portrait and I decided to apply a light linen texture on it. The results were instantaneous. Almost instantly, the clothes of the character appeared to be more three dimensional, grabbing out and feeling the fabric seemed plausible now. It totally altered all of my future interactions with art. Textures surfaced a new level of greater richness in my artwork than I previously comprehended.
In this post, textures will be analyzed in detail and how they complement and enhance digital art will be revealed to the reader. Apart from the technical aspect of their application, we will discuss why textures are important and look at their varying types. I will offer you a few tips that will enable you to make use of different types of textures in your artwork. But whether you are just starting out in the field of art or whether you are in veteran, you need to open your mind.
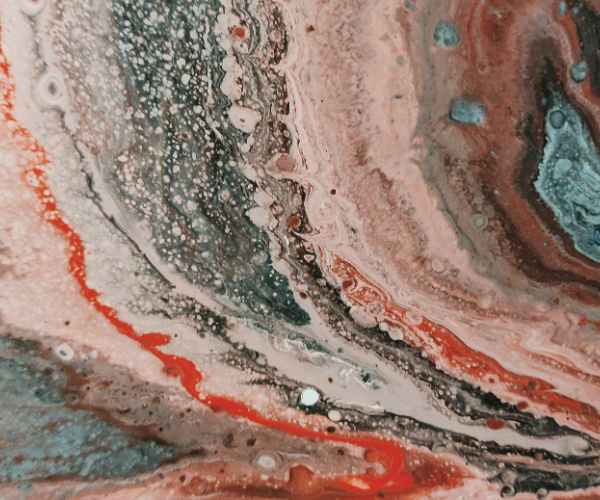
Why Textures Are Essential in Digital Art
Textures are a game changer for digital art, adding depth and interest when there would otherwise be none. When viewing a flat digital illustration, for instance, the colors can be very saturated, the shapes, while still there, may be vague, and the end product might still look appealing. Displaying that image alongside another one that has intricate textures would instantly enhance the flat image. Orientations mentioned earlier seem barren due to a lack of textures; the introduction of textures aids the viewer in appreciating a piece. They enrich a piece by providing dimensions, even if such dimensions are merely implied.
To make my point clearer, let’s say that paper is a two dimensional piece made out of smooth and clean material, now take that piece of paper and place a towel on top of it, something as subtle as a towel. The towel would add dimension to an otherwise dormant piece of paper. All of a sudden it becomes more inviting to practice due to how interactive the towel is. Altering how things feel makes a critical difference, especially in a world were realism is the most sought out matching class.
Apart from the visuals, adding textures to a design or piece also has a psychological effect. For example, applying a rough, coarse texture to an object may render it as rugged and aged due to repeated use, which can elicit emotions of nostalgia or even discomfort in some instances. In contrast, a velvety texture can convey a sense of comfort or opulence. Through the use of textures in a design, the mood of the piece is established by appealing to people’s instinctual relations with everyday materials.
In the digital sphere, textures are utilized extensively in the works of the digital artist Alberto Seveso. Many of his pieces feature simple digital shapes interspersed with highly rendered textures to create an incredible effect. In one famous piece of his, he portrays his subjects with paint and underwater ink textures which bring some motion and fluidity to otherwise static designs. By incorporating those textures, the final work feels far more sophisticated than what it would have otherwise.
Different Types of Textures in Digital Art
All forms of textures used in digital art are worth delving deep into due to their broad range avenues that facilitate various objectives. Outlined below are textures that have a lot of potential in changing your work for the better.
Photographic Textures
Incorporating textures into any sort of work can be achieved through various means and one of the most realistic means is that of using photographic textures which are basically imageries of a variety of fabrics or surfaces such as wood grain or stone. This method works best if a piece of work aims for hyper-realistic graphics or an alteration for life-like designs, 3D mockups, or architectural designs. For example, if one is aiming to create a digital painting for an old book, then using the texture of a cracked leather cover could help enhance the design.
Hand-Painted Textures
Hand-painted textures are the best means for one to add an artistic flair or touch to a piece of work. Hand-painted textures are those textures which are either manually scanned or painted in a digital platform and using them to add imperfections can make a piece much more appealing. When hand-painted textures were new to me, I used a brush to blend abstract textures, which in return resulted in a pleasing outcome, it made my digital clouds look more ethereal rather than using a flat monotonous color.
Grunge Textures
Have you ever wanted to make your piece look more industrial and maybe give it some wear and tear that looks realistic? Well, rough, dirty, or weathered grunge textures are the perfect addition to your work since these specific textures can add character and history to it. Imagine how a rusty piece of metal looks gritty and authentic, and how cracked peeling paint on a digital wall makes it artsy and broken.
Abstract or patterned textures
Abstract designs or geometric shapes indulge in giving your creativity a more modern sleek style placing them perfectly in minimalistic or futuristic styles. They do create a vibe for your work but instead of repeating normal shapes they put an easier twist to it layering color into the shape. For example, a soft pastel swirl texture can give your piece an innocent and delicate look while an abstract hexagon pattern could bring more of a technological and sophisticated feel.
The Technical Aspects of Texture Application
Knowing how to apply textures to digital art will make a huge difference in the final output. While it is good to have a texture at hand, the ability to use it when it is needed is equally important, otherwise it will suffice to look out of context.
Different Textures on Top of Each Other
One of the other effective techniques is using numerous textures on top of each other. This is an important aspect in creating work – a careful layering, it is an additional level of refinement of the materials. For instance, in one of my works, I took a stone texture and a light linen texture, and changed the opacity, so that the linen was almost invisible. The outcome? Gentle worn linen was worked into the composition without overdoing the whole visual.
Blending Modes
Not every texture will work according to your expectations. You will need to adjust the blending mode settings, which are features that can be found in programs like Photoshop and Procreate, these determine how your texture will work with the layers below it. There are various texture modes, such as Multiply, Overlay, and Soft Light. For instance, if you want to use a photo of a rusty wall, a multiply blending mode might be used, as it allows the photograph to be used in the design without taking up any color or shadow that already exists in beneath it.
Resolution Considerations
When it comes to textures, resolution is very important. Textures of high resolution will ensure that the work remains clear, regardless of how far you zoom. Take for example a texture that was made with low resolution; it might end up pixelating or appearing blurry, which detracts from the overall quality of your digital piece. This is the reason why people often suggest trying to find or create textures that have the highest resolution available. A personal tip: when I photograph real surfaces with the purpose of creating my own textures, I tend to use high quality images to ensure I get as much detail as I can. This gives me the ability to scale the texture without any quality loss.
How to Choose the Right Textures for Your Art
Refining the right textures can be quite an exercise when dealing in artwork and considering that one needs to consider how the textures fit in with a given style, it can become even more tedious. I recall during my time learning to use digital artwork and how I would sometimes feel disillusioned when applying certain things that did look cool and had excitement building around them but entirely missed the mark or felt out of place to the rest of my composition. For example, when I had a colorful whimsical idea of a cartoon garden and used a ‘grunge’ texture, it simply was too rough and dissonant. Eventually with all the lightness I was using, I felt how the texture derailed everything I was doing, it was after a while that I switched to a painterly texture and that reflection un outshone everything else I had done. The end result felt exactly how it should have, warm and inviting.
Moving on we coordinate color. When picking out a texture it’s very important to match it with a color scheme. One thing to keep in mind is that textures can be extreme or soft, however, they must never draw attention away from the colors of the artwork. An example of this is if I used soft pastels for a color scheme then a bright or aggressive texture would be unpleasing to look at. Textures must rather be complementing the colors you have used in your painting. While creating a dreamy underwater scene where I used soft blue and pink, I found a soft and translucent texture that went together perfectly with the dripping and blend of clouds. The color range was not overshadowed and created a light and calm feeling which suited the idea.
Now, finally, let’s move on to grasping the idea of complexity. On the other hand, depending on the amount of layering and brigade used, textures can give life to your work but an overdose of complexity can take the viewers attention off the subject. I had to struggle with this during one of the projects where I had thought layering a number of textures would build up a sense of depth to the work, instead it turned the minority part of my artwork to absolute riot! In that case I thought to myself what I really needed to do was to make my work easier. Instead sticking with several textures and layering, I went for just one undivided, strong texture and let the piece talk in terms of respect to where I wanted viewers focus to be in.
Tools and Resources for Finding TexturesIf you plan to create your digital art and are in need of textures, there is so much help that you can find at your disposal. Let us categorize it into free and paid resources. Free resources are best suited for beginners. Think of sites such as Unsplash and Pexels which allow users to obtain images instead of purchasing them. There are also sites that are solely for Textures such as Texture Haven or Textures.com where you can look through an enormous canvas of free textures, from concrete to abstract patterns! However, one thing to keep in mind is that when you use these free resources, especially in the art industry, you may come across texture options which other people might use it too. To be unique, you must consider some paid resources. Paid resources can provide designers with texture options that can be deemed as truly unique as well as of the highest quality. Websites such as Creative Market and Envato Elements always seek out professional artists to build up a library that focuses solely on texturing. I remember getting my hands on a bundle from Creative Market consisting solely on hand painted textures. Let me tell you, the quality was insane and the best i have ever come across. The best part about these textures was that they were compatible with a myriad of different styles which allowed me to make art that was truly one of a kind.
But what if you want something completely different? Making your own textures is the answer. Get a camera and start taking photos of stock textures for your art, whether it’s a brick wall, a wood grain, or even a couch. I make use of this method frequently, taking shots of natural textures while visiting local parks or markets. It enhances my work because it makes it more unique and also provides me the opportunity to add a part of my surroundings to the artwork.
And don’t forget about plugins and add-ons! If you use Photoshop, there are a variety of plugins that alleviate the burden of applying the texture. For example, the Filter Forge plugin makes it simple to create and apply textures while allowing you to customize features and blending modes without the hassle of doing it the old-fashioned way. Especially if you are under time constraints, this can help you a lot.
Best Practices on How to Use Textures in Your Art
There are best practices as you start to make textures for your digital art that will enable your workflow to be smooth and fun!
Firstly, one can start off by saying keep it simple. For someone starting out, the bad habit of using every interesting texture available could easily be acquired which would result in a cluttered outcome. Instead, the right approach would be to allocate one or two textures per piece and limit their use. Personally, back in the days when I was just getting started and used textures for the very first time I believed that adding more textures equates to adding more fun. When I started doing that, I realized that I was ruining my work. These days, I tend to remind myself often to avoid such things and keep the textures as supplementary instead of making them too powerful all the time.
When dealing with seasoned professionals, perfecting your routine is crucial, as it can greatly help in going forward. While refining the style that you are developing, try considering the best way to optimize on how you apply texturing. Consider saving your favorite ones into a separate folder for textures organized by color and type, for that saves time in the middle of creating things for the textures that you prefer. In this way, you will no longer have to waste time finding the right texture awaiting the right inspiration pouring over endless photographs.
Saving textures to be used in the future is also a best practice. Once you have a library of your favorite textures, keep them in a manner that you can always locate them for subsequent uses. I have a few texture libraries set up based on different themes—nature, abstract, vintage—and it has really reduced the workload. Moreover, it ensures reusing textures creates unity over a multitude of different projects which allows you to define your work.
If you are thinking in some way “Well that doesn’t really apply to my work, let me give you an example”, I asked a professional artist who is working on digital illustrations for children’s book once. Her texture workflow that she described involved adapting go-to textures which she developed for every art work she was working on. Keeping a few representative textures always paired with some appropriate projects settings gave her the opportunity to deliver quality works very fast. This method catered to both her artistry and her tight schedules as she achieved the standards without the need to compromise.
FAQs
Are there any kinds of digital art works that you cannot use textures for?
I would have to say no… whenever I am into textures, anything ranging from illustrations to 3D and even graphic art, texturing is one of the most important parts I feel.
To give some example, textures can add depth to the character and background in an illustration. Previously, I collaborated on creating a children’s book, one of the pages was an illustration of a fairytale forest. I remember adding soft hand-painted texture to the trees, so they wouldn’t feel harsh, and the leaves would appear swaying in the breeze. Such a design would otherwise lose a great deal of warmth if it was flat.
Url in 3d design textures play an important role too since they help create the surface attributes. For instance, take a cube and cover it in a brick texture, all of a sudden, the dull looking block now feels 3D and real. Furthermore, I have witnessed artists deploying textures for simulation of metal or glass, paint realism on their 3D work.
In any medium, textures have the potential to take your project to the next level. They can add depth to a logo or a background and typically make that feature stand out. As an example, I did a promotional poster for a local event and it needed a more rustic feel. Adding the grunge texture was perfect as it made the poster much more fit the theme of the festival than before. So yes, your work, regardless of the medium, can be taken to the next level with the use of textures.
Is there any texture that should not be used?
Yes, if used carelessly, some textures can ruin the already existing art in your work. For instance, too many details in a texture can pull attention away from the focal point of the design.
With painstaking effort, I figured this out during a project where I used rough background texture to a portrait. Instead of complementing the subject, it was the viewer who was overwhelmed and for whom I was the focus.
Moreover, the colour texture can also spoil the magic within the work if the shades do not coincide with the other texture. Dark, rough textures should not be applied to vibrant pieces as that will dull the original shine.
Finally, even though some textures may appear to be in fashion, they are poorly designed and become outdated very quickly. I used to have a distinct brushed metal texture, which was a rage a year ago, however, my works do not give that texture much importance. Always think how a texture can affect your general meaning before planning on one for a project.
Do you have any tips on designing my own textures?
The ability to create your own textures is super satisfying, it is also a cool way to inject a bit of yourself into your designs. Here are some actionable tips to get started:
Go on a Texture Hunt: Take out your camera or smartphone and start looking for surfaces that you want as textures. Anything from wood, stone, fabric, to rusty metal can make good textures. I went for a walk a few days ago, taking pictures of the interesting surfaces and I was shocked at how many different textures I came across.
Use Art Material: Another way to create textures is to use pen and paper, and then scan that textured surface in or take a picture of it. Some of my favorite methods are to use washes created from water color paints, scan it, and use it in my digital art.
Employ Texture Generators: There are several software applications that allow you to create your own textures. Applications such as the Texture Designer serve as excellent tools for coming up with procedural textures while other applications such as Photoshop enable you to edit images into textures.
Take Online Courses: Consider taking online courses if you need a more organized way of learning. Classes on websites such as Skillshare or Udemy are aimed at teaching the creation of textures and they are very good resources.
But remember, nothing beats getting your hands dirty and trying different techniques out there as this enables you to build a set of practical textures needed for your art!
Does elements such as texture affect the performance of digital art software such as Photoshop/Illustrator etc…
Yes, Textures slow down digital painter programs as they consume a lot of space especially when you’re using a lot of layers and textures. This is something I’ve had to deal with many times when I slapped 10 different textures over a single project and never watched the file size.
To solve the problem of computer slowdown due to texture use here are a couple rules:
- Don’t Overdo It: Adjust the size of your textures while keeping the intended use for the artwork in mind. For instance, if the artwork is only meant to be viewed over the web, then there is no point in using super high resolution textures.
- Arrange Your Layers: Keep your layers neat and flatten them whenever applicable. This can help ease the burden on your software. I frequently merge layers after the arrangement satisfies me to speed up my workflow.
- Use low-res textures for drafts: If you are still in the primary stages of your artwork, then low resolution or pixelated textures can be utilized. Remember that as the process goes on, you can always substitute them for a higher quality version.
- Closing Up Apps Not In Use: Many times, performance goes down due to having many applications running. Closing undesired programs will save your computers memory and help speed your digital art’s performance.
Keeping these aspects in focus will enable you to use textures easily without having to compromise performance.
Conclusion
To summarize, textures are crucial to creation of digital art. They build on the level, creation of the pieces, and providing them with interest. They can be simply understood as features, but for other forms of art whether its for illustrators, 3d builders, or graphic designers, they are essential tools to revive their creations.
Make sure to have fun with your next project, consider adding texture to it. You can come up with your own texture or explore different ways or styles and see how they enhance your piece. The possibilities for exploration and expression through textures can be endless.
But most of all, I’m looking forward to hearing about your relationships with textures! Have you stumbled onto any methods that are especially fruitful? You might even have suggestions about how or where to look for or how to design textures? Do comment below, I am excited to rest on this topic with you!

