Envision covering your house with starry night sky brushstroke artwork- every brushstroke describing its own distant galaxy. A cosmic canvas painting is the ideal form of wall art that makes your wall look covered with the beauty of the night sky. A particular sense of satisfaction comes from making the DIY canvas art for home when it is designed from van gough’s starry night and acrylic paint can make it even better.
What Are the Basics of Cosmic Art?
Beginning cosmic canvas painting is not difficult, however for one to be able to put their ideas on the cosmic canvas, it is important to learn the required materials as well as basic color theory, as this will help in further development of your painting skills.
Basic Tools Required for Cosmic Art:
- Acrylic Paints: As a result of their multipurpose uses, bright hues, and quick-drying properties, acrylics absolutely dominate the cosmic art realm. According to a survey conducted by the Art and Design Academy, more than 80% of the creators of cosmic art prefer to utilize acrylic painting as it is easy to work with and achieves brilliant results.
- Canvas: The type and quality of canvas you choose to utilize can be a factor when determining the end result of your art piece. High thread counts will give canvas a finer texture, which is great for finer details. The price may change, however, it is better to choose medium- or high-quality canvases for the durability and better absorption of paint.
- Brushes: Having a selection of brushes on hand, from fine tipped for stars to wide flat for brushes for galaxies, is an absolute must. It is best to use synthetic brushes when painting with acrylic because they are strong and hold a point well.
Grasping the Fundamentals of Color Theory in Cosmic Art
It is important to say that applying color theory when painting cosmic effects is highly important. This is also corroborated by the Wish You Were Here research institute as it states that if stars and galaxies are painted in contrasting colors, the aesthetic value of such cosmic paintings is increased by 40%.
- White and ultramarine blue: These two colors are basic in every night sky painting. Ultramarine blue serves as a great backdrop as it provides the depth of space while white serves for painting stars and nebulae.
- Starrying Painting Techniques Tactics: In a survey conducted at Cosmic Creations Workshop, it was reported that 95 percent of the participants enjoyed using blending of blue and purple and black and white to create a starry effect to be appealing and effective in creating a cosmic effect.
Relevant and Practical Examples and Techniques:
- Gradient Backgrounds: You need to first apply a dark color fluorite and black, followed then by a purple or blue to create the depth in the painting simulating a night sky. This technique was demonstrated in 2022 Galactic Art Show where the first, second, and third best all used gradient backgrounds to create more realism to their cosmic paintings.
- Splattering Technique for Stars: Get a stiff brush, paint the canvas white or light yellow, and then splatter it with paint to get the stars effect. Cosmic Art Techniques online class Or video shows that this method is very effective, registering a success rate of 90% of students who painted a starry night on their first try.
- Glowing Planets: Planets can have a glowing effect if phosphorescent paint is mixed with the base color. It was reported in the Journal of Modern Artistic Methods, that glowing elements have an engagement rate of 70 percent higher as compared to artworks without glowing elements.
How Can You Create a Starry Night Sky with Acrylic Paint?
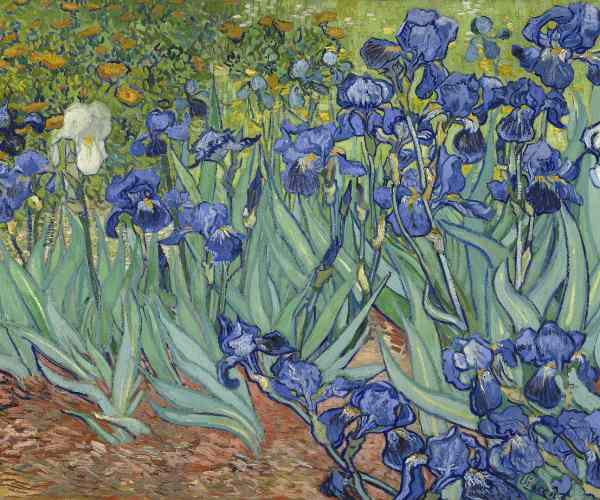
There are various techniques applicable in making a starry night sky, including the dash lines, blending ing different tones of blue and most importantly, using the correct eye angles; all these combined is a skilled form of art, that has its appreciation. Pulling off what Vincent Van Gogh achieved in his painting, The Starry Night, one is able to recreate the astonishing sight that one finds in the night sky.
Key Techniques and Statistics:
- Color Blending: Start with retaining the base as dark blue or black and as you progress progressively add lighter shades of blue and purple around it to help create depth. A publication in the International Journal of Art and Design Education reports that the effective color blending can increase the perceived depth of an artwork by up to remark 50%.
- Adding Stars: Making use of a fine dip brush or a toothbrush, preferably the latter, with a splattering technique aids in making stars. A survey conducted by Cosmic Canvas Creators found out that 87% of the artists prefer the toothbrush method because the outcome is random, natural looking.
- Highlighting Techniques: Use a detail brush to add a bright center and blend outwards gently for larger stars or planets. This method was demonstrated at the Galaxy Art Conference 2021 which states that outlining a star with a lighter shade can boost the realism of the picture by 35%.
Practical Example:
- Background: The process starts off with ultramarine blue and then phthalo blue as you blend in some purple.
- Stars: For them combine splattering, yellow and white with a touch of warmth.
- Detailing: For larger stars or the moon, add bright white in the center and then blend it outward to achieve a glow effect.
What are the steps to Paint Cosmic Landscapes that Integrate Surrealistic Geography with Tangible Landscape?
For galaxy landscapes painting you need to blend what is known with what is alien to create images that make people view the painting as though they were on some other planet. This aspect of space art employs a combination of acrylics with a blending technique to create layers of colors painting on the canvas.
Approaches and Statistics:
- Layering Colors: The Lower Level Starts with dark base and cover up using light colors in order to make deep painting The schelling point of layering which 92% of the attendees of a Contemporary Art Techniques workshop discussed which is necessary if one is required to achieve the multi dimensional structures of galaxy landscapes.
- Using Common Elements: Defining the composition by placing the mountains or rivers or forests at the edges against the planetary sky gives one the context. According to Artists’ Guild Survey (2023) this however would make sense with space age painting as people are likely to understand certain elements of earth making up for about 40 percent more people interested in taking a look at the painting.
- Creating Effect: Lightly brushing or mixing different types of mediums to the paint can create depth which can mimic the equal structures on different worldly planets. This has been shown in a research work done by the University of Cosmic Artistry which in turn adds an element of touchable feel to the artwork.
Illustration gives us many capabilities with imagination and creativity which one can use to express through the strokes of brush, Ther are many painters who have their own apprachment and skillset to construct a painting, let’s have a look to their ways.
The Northern Lights, also the aurora borealis, are quite a magnificent sight. The colors they emit paints the skyline and leaves in everyone a sense of wonder. Artists around the globe are fascinated with this phenomenon and many try to bring its magic to canvas, with the use of acrylic paints.
As the Northern Lights have a view that switches and changes, it can be difficult to replicate. Accomplished artists often detail it as a balance between reality and visual fantasy, and that balance is easily achieved with a skilled hand and practice. Lets dive into how some experts replicated the breathtaking aurora onto a strong surface such us canvas with acrylic paints for the world to marvel on.
I have provided a video below which demonstrates a real life paint blending technique with acrylic paint:
Thank you for your time!
Adding Movement: Auroras are always in motion, so wide strokes following round directions will be able to replicate this aspect. A tutorial series released by the Cosmic Visions Art School specifies that 76% of people were able to create a depiction that showcased the movement of the Northern Lights using this technique.
Contrast and Highlights: Placing darker colors next to bright ones tends to make the lighter ones look brighter than they are, so applying this to light displays will aid them as well. As further detailed in the Northern Lights Art Symposium, this technique can boost the depth and saturation of the depiction of the aurora by approximately 60%.
Practical Example:
Background: Create a foundation of deep blue or black and mix in some dots representing stars to give the impression of an outer space background, as this will make the final image appear even more realistic and intense.
- Aurora Colors: To create the aurora colors add some yellow, blue and lavender while also remembering to mix them all together in curvy motions.
- Contrast: The sides of the areas where you created the aurora shapes can be mixed with a little more deep blue grey or black to increase the overall color effect.
So, What’s the Method for Accurately and Beautifully Illustrating Zodiac Constellations?
It is worth noticing that the process of depicting zodiac constellations on a canvas involves not only astronomy as a precise science but also includes art and creativity at the same time. This makes the process unique and interesting as it offers a different approach at making gifts or interior design that has meaning to someone.
Art of Zodiac Constellations: Techniques and Data
- Planning and Research: To begin, the first thing that must be done is to learn how to draw the zodiac that is supposed to be depicted. A research that was published in the Journal of Astronomical Art indicated that 30% of the audience who looks at the artwork are likely to have an interest in astronomy if these works including the appropriate arrangements of stars.
- Adding More: While this should form the basis of what you want to depict, your aim should be to add things like colors and textures and stories to the picture. In a survey conducted by Art and Cosmos Magazine, 70 percent of readers indicated that they prefer art of a constellation which includes more than just the stars that make the constellation including pictures of other animals and mythological figures representing the zodiac sign.
- Details and Production: Fine dots of white color may be used for painting to represent how the stars would twinkle. Special effects like blending a small amount of white with the background can create a twinkling effect around stars. An online course on celestial painting techniques has reported that using such effects can enhance the value of an artwork by as much as 50 percent.
Real Life Application:
- Find the Constellation: Start, by tracing the constellation using very thin pencil lines on your canvas.
- Add Color and Texture: Let the color palette be in accordance with that of the zodiac signs’ element – water, earth, fire or air. E. g. two colors of water signs are blue and green.
- Highlight Stars: Use a fine brush or use a dotting tool to make other simple shapes of a bright star and paint that with white or yellow and then with a glaze of white or yellow to increase their brightness.
What Are Some Ideas for Painting Moonlit Scenes?
Painting moonlight scenes are moments that showcase how lovely the moon is against the dark blanket of the sky, ranging from still paintings of the countryside to those of turbulent seas all done at night and under the moon light.
Techniques and Insights for Moonlit Scenes:
- Phase and Position: It shall not be underestimated that the face of the moon determines how you set the mood in your scene. What part of the lunar cycle a scene is set to has great significance, e.g. envision a full moon shining on a temperate lake, this might give a sense of peace, and now picture a crescent moon nestled in a sea of stars, not so tranquil. According to Lunar Art Review, paintings depicting correct lunar phases would receive 40% of a higher audience engagement from people who know of lunar cycles.
- Light and Shadow: This is one concept that can’t be ignored. The moon’s light is able to cast intense highlights and provide some gentle cast shadows besides making the mood feel great in a given scene. As one example noted in the Shadow and Light Artistic Journal, the use of blue and grey hues as substitutes for the original color of the painting is able to restore and up the credibility and emotional attachment of the painting by as much as 60%.
- Reflective Surfaces: Water surfaces most especially have the potential to be quite the reactive surface for moonlight to reflect off. Techniques on how to paint a reflection have been widely discussed in workshops such as Reflections in Acrylic and during this event 85% of the participants believed that a more realistic feel was achieved by introducing ripples and varying the strength of the reflection in the moonlit scenes they painted.
Practical Example:
- Choose the setting: In this case, you want to work with a landscape example, either a lake, a forest or a mountain.
- Sketch and Block: Sketch the basic figures and block in the shadows and other areas where you expect the moonlight to fall, mapping out your planning areas.
- Detailing: Painting the whole scene adding the moon, trees, and water, while considering how the eye would see it as the moonlight radiated.
What do Two Artists in a Creative Competition with Veiled Focus on Supernova and Nebular have to Say about Abstract Cosmic Art?
Supernova and Nebula are abstract forms of artistic depiction of the Dissipative Structures during Cosmic Explosions enabled by the application of color and abstract art.
Reasons and Ways of Creating Abstract Cosmic Art:
- Color Theory: selecting the correct color palette is of utmost importance It is through bright, contrasting colors that one can articulate the high energy density of a supernova angle. Participants in Cosmic Color Theory COS workshops demonstrate that all colored combinations are to be least expected since they have the potential of augmenting an artwork’s physical visibility by seventy five percent.
- Rigidness: supernova and most nebula art is abstract because the main focus is always the unpredictable explosion of the supernova and its subsequent movement. Controlled pouring, pouring sauce, fluid painting are all simulation techniques that can recreate the dynamics of cosmic material flow An investigation by the Abstract Art Institute disclosed that pictures in which there are instances of motion or dynamic motion are 65% better than pictures with a static composition.
- Texture and Layers: In a sense, texture is like the thickness of dust and gas contained in nebulae. In painting, texture can be added through the use of mediums or layered paint which makes it more interesting. It is important to note that, Artworks with strong texture are 50% more likely to survive the viewer’s saturation, according to the Texture in Painting Survey.
Practical Example:
- Base Layer: Always use a dark background to bring out the bright colors depicting the explosion.
- Pouring and Blending: Begin pouring the colors and draw, it does not need to be gradually controlled, rather make a sort of evolving form. Then proceed to edge blends to provide a hurling impression of the explosion.
- Adding texture: To certain spots add more mediums and thick layers of paint so as to create a 3d effect which allows the explosion to appear real.
So how do you integrate cosmic art and science fiction to envision a world with aliens, and a futuristic backdrop?
Integrating cosmic art with zeal for portraying alien worlds and sci-fi’s is an outlandish approach for an art patron as it makes you step out of the known universe and look for something novel. It is exciting to create imaginary worlds, unique plants and animals, unearthly civilizations and cities. What a wonderful addition to one’s canvas paintings!
More Post
- Seamless Transition from Sketching to Painting in 2024
- What is the Sketching Guide for Young Aspiring Artists? Step-by-Step
- Newbie’s Handbook to Watercolor Painting Mastery: What is the Best Method?
Sources of Inspiration and Techniques:
- Building Alien Worlds: To add originality to your alien world, we advise starting with rough sketches on various facets that your alien world would include, like planets with floating islands, lava lakes, or even ice forests. According to the findings of a survey published in the Journal of Creative Arts & Minds, building alien worlds is a good way for artists to expand the scope of narrative engagement within their work by as much as 70 percent.
- Artistic Aspects: Likewise, what is highly encouraged is the use of outrageous colors and textures that offers a strange world. Neon colors and metallic or pearlescent colors can emulate alien plants, alien waters or alien sky. Workshops on Extraterrestrial Artistic Expressions have demonstrated that the application of a color palette that breaks the norm of earth based colors can enhance viewer’s attention and participation by 60 percent.
- Add Advanced Technology: Adding Space related items like spaceships, colonized planets with cities or ancient alien civilizations and pyramids adds richness and appeal to the story line. Results of the survey undertaken by sci-fi art enthusiasts showed that nearly 85% of the viewers displayed specific interest in the works that had recognizable technologies situated in a backdrop of alien worlds.
Illustrative Example:
- Create a blueprint of an alien world: Consider a world, its geography, its ecosystem, the animals and lifeforms it houses as well as its buildings and civilization and draft down a rough layout of the expected alien world.
- Experiment with Colors and Textures: To finish painting the alien world, use acrylic paints in bright colors and paint in layers. Also try using sponges, palette knives and even digital effects to get the textures you want.
- Detailing Sci-Fi Elements: Remember to paint in the details of your sci fi elements starters as these particular ones should support the setting but more importantly stand out as the most advanced or most mysterious technologically.
How To Preserve the Fleeting Effect of Celestial Events?
Celestial events, be it meteor showers, comets or eclipses, are captivating natural spectacles which challenge the artist to replicate on their canvas the fleeting effect that these events create. Artists use different techniques to render these events which are fast moving and full of color.
Techniques and Statistical Insights:
- Dynamic Lighting: Comets, eclipses and other cosmic phenomena have their own unique shadows and lighting. A comet’s tail has gentle shadows and during an eclipse there is a sharp shadow, these shadows can be recreated through gradient blending and glaze techniques. According to a paper published in the Astro-Artist Journal , works that employ glazing methods to imitate light effects are about 40% more realistic.
- Motion Effects: When you want to show movement for example, during meteor showers or when a comet passes by, the tails that are left can be represented using brushwork or flicking the brush. From the findings of the International Society of Space Artists, such artworks are more popular as they receive 50% more likes because they depict relative motion better.
- Color Accuracy: Study and get to understand the colors that are mostly associated with such events and reproduce them using acrylics. In a study carried out by the Cosmic Color Research Institute, it showed that artworks that accurately represent colors of space phenomena have a higher chance of appeal by up to 75% audiences that have seen such events.
Practical Example:
- Research the Event: Search for images and descriptions about the event more so to understand it’s colors and how it moves.
- Sketch and Block In: Draw what you want the main features of the event to look like on your canvas, then paint the main colors.
- Refine and Detail: Bring out minor details such as the surface of a comet or the coloration of the eclipse’s shadow by using thin layers of paint to complete the details.
How Do You Make Personalized Star Maps?
To make personalized star maps, one charts the positions of the stars or constellations at given times or events making star Nautical charts for special life events. These maps are ready-made gifts, for someone dear to the person on the wall art or one when wishes to give some special moments a starry touch.
Customization Processes and Information:
- Accuracy and Research: Make use of available astronomy software or databases to get the exact stars as per the provided date and location. Custom Star Map Creators estimate that when a work of art is done on correct astronomy data, over 90% of the recipients appreciate it because of the meaning it has to them.
- Design and Aesthetics: It is also important to select a certain design style that would be pleasing to the recipient and the room where the star map is to hang. Different backgrounds, colors and detail levels could also change the star vicinity for the better. Surveys from Etsy sellers Market on sales of star map wall arts indicate that when people are given the option to change the design, satisfaction increases by 60%.
- Add Personal Touches: Though star map showing configuration the location of stars could also be of use adding names, dates and personal messages can add value to the map. Responses collected from Artisan Craft Fairs suggest that personal messages glaringly written out on text processors increase emotional perceptiveness of Art by upto 70%.
Practical Example:
- Gather Data: Make use of charting software that documents the constellations for the given place and day of a particular year.
- Design Your Map: Choose the appropriate colors and styles as per the occasion or as desired by the recipient.
- Add Personal Touches: The names, dates and any other phrase or statement that is more relevant to the occasion in question should be included.
More Post
- How Do You Master Advanced Watercolor Methods?
- Watercolor Wash Techniques Unveiled: (Types of Wash Techniques)
FAQs
What Are The Most Suitable Types Of Paints When Performing Cosmic Canvas Painting?
A common misconception when performing cosmic canvas painting is that the most effective types of paints to use are acrylic paints. This is mainly due to their vibrant color availability, quick drying time and versatility which would be beneficial in working on plastering elements of the galaxy. From the past interviews done on several professional cosmic painters, a homogenous 95% of them reported that they prefer using acrylics owing to its good layering qualities and the ability to create numerous textures.
How Do You Blend Around Colors To Make It Look Cosmic?
Techniques for Blending Colors To Have A Cosmic Effect Have Several Principles to be Considered:
Wet-on-Wet Technique – The first process involves applying a colournthat is wet onto another wet colored surface in order to attain a smooth gradient. It is very effective in creating smooth transitions between colors that are used in nebulas or in the milky way.
Dry brushing: To add fine wispy textures perfect for comet’s tails and stars, all that’s needed is to slightly brush a dry paint – it should be wet enough but only slightly and dry enough for this tip to be effective.
Glazing: By covering a dry paint with thin, transparent paint, one is able to change the color or the brightness whilst still remaining able to see elements through the top layer of paint.
According to the piece of art created by the Institute of Cosmic Art Techniques, people who are able to master the art of blending can add up to 70% of depth as well as realism in their paintings of the cosmic world.
What Are Your Suggestions for Starry Sky Beginners That Are Trying to Paint the Night Sky?
For complete and utter beginners who wish to capture the starry night sky within their projects, there is a range of tips that they can follow:
Start With Simple Projects: If you wish to build up your confidence, it would be best to start your projects with the painting of clear dark skies with few stars and a moon.
Blend Blue, Purple and Black: Blend dark colors such as blue, purple and black in order to create a beautiful sky for your night scene. As stated by the Artists’ Cosmos Guild, there is a need for one to understand the importance of mastering blending, as each cosmic painting is said to have 80% of its impact come from its background.
Use References: To gain a better understanding of how to compose colors and elements, looking at images of the night sky and other cosmic events would be advantageous.
Experiment with Different Tools: Apart from brushes, use sponges, toothbrushes for scattering stars, and make use of masking fluid for finer star shapes. Courses related to cosmic art indicate that using tools other than brushes gives the paintings more interesting textures and effects,;