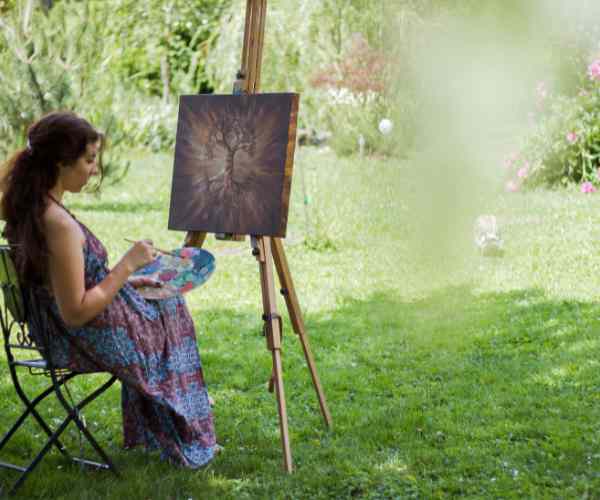
Imagine yourself standing in a picture watercolor sketch book blank white page with a brush, cuddled warm watercolor colors and you feel very ready for the challenge. As you dip your paint brush into a pool of rich paint, eager anticipation floods your thoughts. What brilliant ideas will flow from your thoughts today and how would it reflect on your art?
There is magic obsessed in every brush stroke in watercolor canvas which paints a marvelous story as each wash envelops the canvas itself with even more life to it.
But what exactly is this wash? you may find yourself saying. A wash is not just a simple watercolor coat in the World of watercolor artistry, it is an intrinsic skill that is required to create great many works of art. A wash is the application of either a fully diluted or heavily watered down paint binding to the water color paper, giving a bit of translucence that could further be layered and manipulated to make stunning vibrant colors.
At this point, you may wonder, “What is the importance of watercolor wash techniques ?” The reply is deeply rooted in the very nature of watercolour as a painting medium. Unlike oils or acrylics, watercolour is fundamentally about being free, making the most of the untamed properties of water. By mastering different wash techniques, artists learn how to steer the pigment, add fascinating textures, and generate movement in their artworks.
Indeed, the journey to becoming a proficient watercolorist is paved with the exploration of wash techniques. From the ethereal beauty of a flat wash to the dynamic energy of a variegated wash, each technique offers a new avenue for artistic expression and discovery.
Watercolor Washes
The essence of watercolor painting resides in watercolor washes. They provide a touch of color which allows the artist to further build upon it with more layers of emotion and detail.
So, what exactly is a watercolor wash? The wash technique is primarily a thin, see-through coat of watered down paint that’s used onto a piece of watercolor paper. It enables the artist to craft velvet like movements of colors, soft gradients and glowing effects that watercolors are renowned for.
Washes Can Be Divided Into The Following Types
First one being one of the most basic and widely used wash methods which is called a Flat Wash. The paper is entirely covered in paint, the color is spread evenly around eliminating any chances of inconsistency. This method is fantastic for placing large amounts of color or when for filling in the background of a painting.
Another technique is called a Graded Wash – this technique is a bit more advanced as it involves harmonically transferring from one color or tint to another with one single wash. To do so the Artist mutes the amount of paint or water to get gradual changes in hue.
Variegated Wash
Variegated washes in water color apply pigments and water in an irregular manner, which results in irregular blending patterns. The resulting photograph resembles a blend between texture and unpredictability. Wet on wet and wet on dry techniques are what I assume were used to achieve this effect.
Texture, Application and Outcome Variations
Each varnished article in each unique will definitely display its own unique characteristics and features.
Single surface varnish brings about as smoother and more even surface, suitable for usage as a backdrop or any other area for that matter.
Gradients varnish allows for slight shifts in the blend allowing for tones adjustments being made
Pains Variations allow for a blending pigment that completely encompasses the desired form.
Washes are greatly affected by the kind of brush, paper, and paint used for the job. By fusing an assortment of materials with various sorts and combinations of washes, artists may entirely uncover their potential.
The brush and paint are a few of the elements in watercolor painting that include two of the best options for helping to define their art. Combating the elements of paint requires you to comprehend and knowing how to correctly use them.
Picking the Correct Brush
The right brush to use when wanting to achieve a specific wash effect is crucial to getting the correct technique and effect needed to match your requirements. Brushes provide control, texture and fluidity to an artist and hence allow for multiple effects.
- Round Brushes: Good for detailing and painting broad washes
- Mop Brushes: Great for applications needing a lot of paint and water for the wet on wet and blending techniques
- Flat brushes: Focus upon edges and creating smooth thin even washes
- Rigger Brushes: Ideal for creating intricate detail’s and thin lines due to their long fine bristles
Artists can provide good insight if they know how each brush operates and can change tools therefore improving the overall outcome of the previously created artwork.
How Does Brush Selection Affects Washes
Brush selection has significant effects on the quality of washes, let’s look at the reasons:
- Bristle Type: Bristles come in two types, natural or synthetic, depending on preference. Natural, such as sable or squirrel bristles, hold more water and paint than their synthetic counterparts enabling for smoother and more even washes while their synthetic counterparts allow for more control but are stiff in nature.
- Brush Size: There are two types of washes, broad washes requiring a larger brush and detail washes requiring a smaller one, depending on the surface area you want to cover.
The mark your paper creates differs based on the shape of your brush as well; rounded edges may be created using a round brush while flat uncovers clean lines.
With the information above and with all the brush types available, artists have the ability to approach a painting with precision and flair altering the demands for it.
Selecting the Right Paint Consistency
Along with the right brush, paint consistency also has a role in determining desired outcomes in a watercolor painting. The thickness and fluidity of your paint can dictate how well it blends and spreads out on your paper.
- Thin Paint: This has a consistent watery composition that produces a translucent effect which highlights the white of the paper. This is best used when constructing multiple layers of color and contrasting hues.
- Thick Paint: A more dense composition creates a more robust color wash which allows for maximum vibrancy, ideal for creating deep accents and bold highlights.
- Medium consistency: This has an intermediate density which allows for flexibility in its usage while maintaining control over its application.
Exploring Paper and Water: The Foundation of Watercolor Washes
Watercolor paper is not simply a material for a painting, more like the canvas for watercolor washes. There is a combination between paper and water that is helpful to comprehend in order to learn how to paint watercolor washes.
Washes in watercolors can be altered by the type of watercolor paper that is selected. Consider the following:
- Texture: Rough paper is textured and causes the washes to have unique and textured patterns and textures and hot-pressed paper allows for more level washes and sharp details in the final work.
- Weight: The heavier’s weight is, the better as it will withstand many washes and the wet-on-wet approaches without bending. For the lower weight papers, they will have to be stretched or taped about the edges, so they do not de-inflate.
- Quality: For artist grade paper, it is created from 100% cotton/reconstituted cellulose paper, which ensures even water absorption, and longevity for yellowing or any other deterioration of. Student’s grade quality is made with wood pulp and there always tend to be consistency issues with texture and soak.
Indeed, with proper bedding, the type of paper enhances to the beauty of the watercolor paintings while improving their old age.
Perspective towards control of water and its impact on paper.
Water control is crucial while pyrotechnic painting because it will define the way the watercolor paint flows across the paper. Water management provides artists with the ability to make smooth even washes and other softer transitions of color to finish the painting.
- Excess water: Overuse of water will lead the paining to pool up and expand uncontrollably resulting in backruns, blooms as well as uneven washes.
- Less water: Lesser water than needed would cause the painting to dry up way earlier than expected causing streaks and rough edges.
In order to get the desired effect in watercolor paintings, understanding how different kinds of papers work is key.
- More absorbent paper: Absorbent paper such as Rough and Cold pressed papers are more absorbent and allows dynamic textures to be created with control over the paint flow.
- Less absorbent paper: On the other side of the spectrum is Hot pressed paper which is smoother in texture, less absorbent and ideal for seamless washes and sharpening of details.
Once a painter knows how to balance between management of water and absorption by the paper, they are free to express their creativity in the form of magnificent watercolor paintings that not only catch the eye but move the soul as well.
Whitepaper Paper Selection Guidelines
Ensure the following factors when looking for a watercolor paper.
- Paper weight: Determine how the weight of the paper corresponds to your style of painting. For painting or doing multiple washes, a paper weight that is above 300 gsm is more preferred, while for sketches and studies it is common to use а weight of around 140 gms to 200 gms.
- Texture: You are able to try out various textures that would gel mastery of style. Hot pressed paper is greatly used to achieve fine details due to its smooth surface, while rough papers are utilized to produce textures and interest in washes, enabling it to inhabit artistry.
- Quality: Consider getting some papers constructed from 100 percent cotton or good cellulose because those perform great and stay for a longer time.
Mastering Basic Wash Techniques
Watercolor wash techniques are the first steps in the process or development of many colorful artworks where depth and emotion are essential elements. In this section, we will be working with two basic wash styles: flat wash and graded wash.
Flat Wash
This is a smooth even approach towards a piece of paper in watercolor as the weight of the color remains the same throughout the piece.
Explain what the Flat Wash Technique is and when to use it.
A flat wash technique involves taking a piece of paper and using the diluted paint to cover the entirety of the paper with the same level of intensity. This goes well with larger objects that need coverage of the similar color for instance walls and skies.
Flat Wash: A Step by Step Guide:
Gather everything: Ensure you have all the essential items such as water color paper, brush, a palette and of course, water.
- Mix: Consider placing paints on a very diluted base with water as thinner paints will for easier flow.
- Wet: Carefully use a clean brush to wet the paper avoiding any oversaturation.
- Paint: Brush with the diluted paint and for horizontal strokes from top to bottom giving long and even strokes.
- Blend and Adjust: Load your brush with more paint and gradually cover any traces of brush marks or streaks. Be careful to not over saturate the object as that would involve excess coverage.
- Let it Dry: After you’ve painted the entire surface, wait for the wash to completely dry before applying more layers or details.
Ways to Keep Paint Consistent and Achieve Smooth Blends
- Brush Selection: Selected a soft bristled large flat brush for easy blending to enable both application and painting to be easier.
- Quick and Assertive Action: Paint in a single fluid movement avoiding overlaps and improving on blemishes.
- Uniform Paint Texture: Ensure the intensity of color is uniform for the entire wash by blending the mixture thoroughly.
- Exhibit Patience: Allow every layer to completely dry before adding another layer or more otherwise you can experience streaking.
If you can master the flat wash technique, then you can paint nice even foundation washes for your watercolor paintings.
Graded Wash
Graded washes softens or lightens a color and vice versa and adds scope and space to your water color paintings.
What Are Graded Washes and Why Are They Used
A graded wash is moving from one pigment or tone to another while still applying pigment. This method is widely employed to create dimensionality such as across surfaces to volumetric forms three dimensional spaces within watercolor paintings.
Tell the process of making of a graded wash in detail.
- Gather Needed Items: Set out the watercolor paper, brushes, a palette, and a container of water.
- Prepare Your Colors: Determining the colors you want to work with and having light and dark hues, prepare two or more shades.
- Rinse the Paper: With a clean brush, rinse the paper while applying flat wash technique.
- Start With the Lightest Hues: Begin by painting one side of the paper with the lightest color using horizontal strokes.
- Use Gradually Darker Shades: As you move from side to side, use darker shades in conjunction with the lighter color to give a smooth transition effect.
- Transition Control: Use a medium dry brush in smooth strokes to shift hues from darker to lighter to create a gradient effect.
- Modification and Blending: As you incrementally adjust the color with the aim of achieving smooth coverage without creating blotches, and also regularly reload the paint onto your brush.
- Let it Dry: After covering the entire area with colors, let it dry out completely before adding further details.
Strategies For Achieving Seamless Transitions and Managing Color Density
- Handle Different colors With Separate Brushes: This helps in avoiding unwanted colors from mixing.
- Wet On Wet Technique: Keep spraying water on the surface you are working on to prevent hard edges when changing colors.
- Multiple Colour Putting: More layers = more intensity. Just ensure that mud is allowed to dry out, and only after that will new layers be applied.
- Change The Direction Of The Paper Angle: This can assist with the direction the paint flows, resulting in unusual variations in the wash.
Paint With A Variety Of Colors
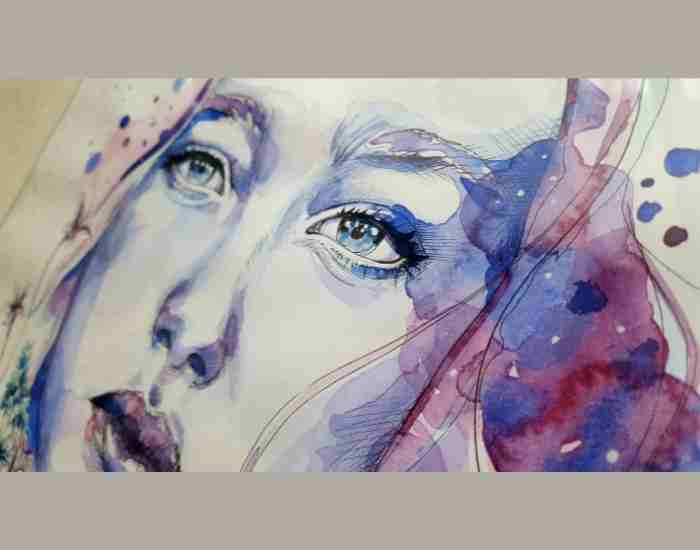
The application of colors, especially in a spontaneous manner, is an excellent addition to watercolor paintings as it encourages depth, dynamism, and visual fascination.
The technique of color combination in water color paintings mix up and produce an irregular pattern of color along with parts that have a mottled make up that has not been evenly applied with water on the page. This method combined with watercolor artworks promotes a very visually effective design due to the movement it creates alongside color to plenty different textures.
Outline Techniques for Obtaining Interesting Wash Effects
Wet-in-Wet Method
As the name suggests, it is a method in which wet paint is brought into contact with a wet surface. Because of such application there is greater scope for colors to mix and bleed into each other. To create a variegated wash using wet-on-wet: Applying a clean water mist, wet the paper evenly. Take diluted paint of one or more colors and gently apply to the wet paper allowing it to react and mingle. Spray or angle the paper, to assist the colors to drip and blend thus making and achieving the wonderful patterns along with gradients that would otherwise be unobtainable.
Wet-on-Dry Method
Unlike the above methods, with the wet-on-dry technique, the user is required to paint a dry surface with wet paint, resulting in more precision and sharper edges. To create a variegated wash using wet-on-dry: After application of water to the paper, ensure that the paper is dried completely. The dry paper gets applied often one or more colors of diluted paint applied gently with a brush or a sponge. Make sure to use a combination of resource with texture or patterns along with the above techniques. For a greater experience ensure to incorporate try various brushstroke techniques, layering to tackle different pigment concentrations for the variegated effect you prefer.
Give Explanation on the Managing of Pigment Dispersion and Modelling of Textures
- Managing the Dispersion of Pigments: By adjusting the density of your paint and controlling how much water is in your brush, you can adjust the dispersion of the pigment. With thicker paint, you will have more defined areas, whereas with thin paint you will have a much smoother transition as the areas blend easily and spread rapidly.
- Modelling of Textures – Apply some drawing tools to enhance texture on your variegated wash. Things like sponges, spritzers and scraping the surface with a credit card or similar to add texture depth and even more detail to the painting.
- Washing and Glazing – To build colour and form depth in the wash, add sufficient thin transparent washes to the variegated washes. Allow the bottom layer to dry before adding another layer as piling multiple layers wet will make the colour too muddy without clarity.
Sophisticated Techniques for Watercolour Wash
Sophisticated techniques for watercolour wash extend the traditional boundaries of painting techniques with regard to the materials and tools the artist will make use of with a view to achieving nice and original effects. In this subsector, we will content ourselves with showcasing two more advanced techniques Salt and Sponge Effects.
Sponge and Salt Interaction
Salt and sponge effects enhances the visual output of texture adding more complexity and dimensionality to a water color wash.
Use out of the box techniques.
When it comes to watercolor painting using salt and sponges can be a first for some but these tools can come in handy if used effectively:
- Salt: Adding salt to wet paint creates intricate pieces due to the clothing getting wet and absorbing some of the salt. The size, type and amount of salt used is also a factor which impacts the end result.
- Sponge: On the other hand, applying paint with a sponge provides the silhouette and fuzzy textures needed to pop out a blend. The end product can be affected by the type of sponge used for example, household or natural sea sponge.
Demonstrate How Sponge and Salt interacts with the Watercolor Paint
When it comes to watercolor pigment, Sponge and Salt reacts with it differently which improves the quality and expressiveness of the art.
- Salt: Adding salt to wet paint creates a mottled or speckled pattern as it draws moisture out of the paper. The size and shape of the salt crystals influence the resulting texture’s size and intensity.
- Sponge: However, when combining a sponge with paint, it softens the colors while providing a gentle tone. The dye is retained inside the sponge and splattered in different shades. When it comes to special effects, the sponge can also create a gradient, along with more vivid textures.
Share tips on experimenting with salt and sponge techniques.
In salt and sponge techniques, it is crucial to experiment while incorporating salt and sponge tools into your watercolors. Here are some tips to get you started:
- Start Small: You should start small by trying out salt and sponge techniques on almost finished pieces and see how various materials interact with the techniques.
- Wetness: The wetter your wash is with salt or sponge, the better it is. But, with a bit drier wash, the effects can be more subtle along with varying textures.
- Mix and Match: As you splash more colors, combine the salt and sponge technique with the brush to create a multi-sensory composition. Get randomized by covering, layering or lifting their paint on the canvas in order to have some detailed effects in your painting. Wet-on-wet and wet-on-dry Most artists employ wet-on-wet and wet-on-dry techniques as the primary methods in a watercolor painting. This embracing of practices not only facilitates from progressive artistic styles most importantly provides an artist with wide options. Any watercolor artist would benefit from knowing and distinguishing these techniques and skills which employ proper usage of water and pigment. Differences Between wet on wet and wet on dry techniques Wet on wet and wet on dry techniques utilize the timing of the application of the paint with the state of the paper used, wet or dry. Wet on wet In this technique, wet paint is used accompanied with the wet surface area, hence the colors blend into one another which results to soft and visible color edges. Wet on Dry On the other hand, the wet on dry technique uses dry surfaces using wet paints. This makes the application of paints more precise and the details clearly sharper.
Gains Associated Preparing Certain Effects Employing Various Methods
Wet-on-wet Method
- Interior Blending: The wet-on-wet method is best for when gradual modification of color or tone is desired, and is excellent for inversion of colors in the sky, and for landscapes and other paintings requiring atmospheric action.
- Earthy Fusion: The colors blend or burst forth effortlessly on the wet surface, giving the painting natural organic patterns that are lively and volatile.
- Luminous Effects: Using this, the wet surface ensures that the paints used are fully vibrant and luminous, thus resulting in colors which are overly saturated and bright.
Wet-on-dry Method:
- Intricate Details: The wet-on-dry method offers the ability to control how wet the surface is before applying paint ensuring that the method is perfect for any requiring intricate details poise and definition with an edge.
- Composite: It allows the creation of composite complex visual images on a dry surface by layering the paints and easing the richness of the entire work.
- Toggle Control: Whereas in the wet-on-wet method, almost all the colors merge freely, in this method, blending and layering has more restriction and effects to be achieved are more controlled and precise.
Help on Control Over Water and Pigment to Target Effects:
Obtaining the desired results in wet-on-wet and wet-on-dry techniques relies heavily on controlling water and pigment.
- Water Control: Monitor the amount of moisture present at the surface of the paper closely. When using the wet-on-wet technique, ensure that the paper has an even coat of moisture before paint is applied, while for the wet-on-dry technique, ensure that the amount of water on the brush is sufficient to obtain the paint consistency required.
- Pigment Consistency: To suit your technique, modify the consistency of your paint. The wet-on-dry technique requires a thicker paint with sharp details, while the wet-on-wet technique requires blending and flow resulting in thinner paints.
- Experimentation: Engage in a feel of how water and pigment interact on the paper surface by practicing different ratios of water to paint, different timing of applying paint and brush techniques.
Troubleshooting Wash Techniques
Painting with watercolors is a very enjoyable and fulfilling art but it does have its own set of problems. This is the part where we shall look at some of the more common problems that artists experience when painting watercolor washes and offer suggestions including tips useful for solving technical issues that you may face when painting watercolors.
Widespread Issues Encountered While Performing Watercolor Washes
Backruns
Excessive moisture causes beige blobs and streaks to appear. This phenomenon is often referred to as backruns which is where excess pigment is pushed to certain areas and is also a cause of moisture related issues, also known as blossoms or cauliflowers.
Blooms
Splotches which can be unsightly or simply of different pigments, are the result of uneven wet surfaces. A surface which is slightly drier requires more paint to be applied, while on a surface which has a slightly dampened texture, as a result, Blooms or irregular patches of pigments can be formed on the paper.
Uneven Washes
Uneven blotching in a painting can be a blunt incident, as a result of uneven washes, where a specific color can be interrupted due to uneven paint placement, which can be at times streaky.
Fixes And Adjustment Strategies
Backruns
Backruns can be prevented by ensuring that the paper you are working on is evenly wet so that when a coat of paint is placed on top of the newly applied paste, the moisture evaporation won’t be able to push certain sides of the mixture. If any back polls are discovered, wiping them with a towel or a moist brush could be effective.
Backruns can be countered by using a paint to water imbalance along with an adjustment of brushes and how much pressure a person needs to exert while control is still required which dances along the line of being excessive or not.
Blooms
Solution: Until the paint has cooled, it is best to avoid blooms by moistening your paper evenly and fast bonding a large area at one go. In case blooms form, seek out excess moisture with a clean brush or paper towel and let the area fully dry before applying more paint to it.
Troubleshooting Tips: If there is a paper with lower bloom temperatures, try different weights and textures of paper. Remember to not use water excessively or paint wet areas which will lead to more blooms.
Uneven Washes
Solution: Same as uneven washes, to reduce the likelihood of your other areas getting more uneven, maintain the wetness of your paper prior to painting it and go fast to paint the portions in one go. If there are uneven washes, gently soften and blend the borders with a clean damp paintbrush.
Troubleshooting Tips: Try using different brush techniques as different strokes can call for larger or smaller brushes. Controlling the amount of water and pressure applied onto the paint will provide for better accuracy and result consistency when painting.
FAQs
How do I stop backruns in my washes?
Backruns are also more popularly known as blossoms or cauliflowers and can be quite annoying to handle. To avoid backruns ensure that your paper is uniformly wet before you start to paint. Dropping too much water can lead to overworking your paint and aggravating back runs. Utilize a clean brush or towel to blot out excess water before it can move the pigment, if backruns have already occurred.
What is the best type of paper for wet-on-wet techniques?
To wet-on-wet techniques, watercolor paper that can hold the absorption and flow is ideal. When dealing with wet-on-wet techniques, rough or cold-pressed paper is optimal as the textured surface will let the paint spread more easily. When choosing the weight of the paper, ensure that it matches your painting style and technique. For wet-on-wet techniques, heavier weight paper above 300 gsm is recommended to avoid the paper buckling or warping.
What should I do to manipulate the intensity of the colors used in the painting?
It is important that a careful approach is taken when attempting to control the intensity during color wash applications; this entails a close attention to the ratio of water to the paint as well as the consistency of the paint. For weaker colors, more water must be used while for stronger colors the amount of water used should be cut down significantly. It is advised to gradually increase or build upon the intensity of the desired color through the use layering and multi brush techniques. Keep in mind there is a need to test out the colors to avoid any unwanted surprises in the actual painting.
What brush size is best suited for flat washes?
For flat and broad application of cones, a larger brush with soft fibers is optimal. A brush that is closer to the 1 inch mark should be employed to enhance the application. Furthermore, due to the increased surface area covered in the wash, plenty of water alongside pigment must be added to achieve a sharper tone. Many different sizes and shapes are available for experimentation, allowing the user to employ what best fits their artistic style and approach.
How can I avoid wash transition discrepancies?
Instead of providing a remedy to inconsistencies in wash transitions, a more appropriate recommendation would be patience since a healthy dose of it will enable one to effectively carry out detailed tasks. For instances in which there Perhaps, make some layers of thinned paint so that the color becomes bolder and covers the blotchy patches. You get the point, gently blend fractures with a brush that is clean and damp to help smooth out the transition. The application of repetitive brush styles alongside layering helps with smoothing transitions and creating a blend of the needed elements.
Conclusion
As a lowdown, now that we’ve covered it all, it would be less of a hassle for anyone to watercolor paint alongside exploring and understanding the world around them as throughout this guide a variety of techniques such as troubleshooting have been covered as well. Remember the following points as they are pertinent to what would be discussing next::
Foundation of Wash Techniques: Grasping the significance behind flat washes and graded washes amongst other peripheral techniques is critical to acknowledging as it provides further understanding of the rudimentary washes and their importance.
Advanced Techniques: Finally, we provided illustrative ideas alongside practical tips so that one could easily comprehend sponge, dry-on-wet, wet-dry and other more intricate approaches presented earlier.
Troubleshooting Challenges: Looking at the more common problems or issues encountered with watercolor artists, we tackled topics like backruns, blooms, and uneven washes. The key matters discussed will ensure that you as an artist are able to handle complains of a technical nature with ease.
With the ongoing trend of allowing students to assist in the development of their own education goals, it is only reasonable that in the process of fulfilling those goals, trying out new things evolves into a path of practice. So, pick up your brushes, grab your paper and paints, and let this new artistic adventure begin. Happy creating!