Transparency paper, which is also called a transparency film, is a clear sheet that finds use in creative and professional work. It includes a number of types, including acetate sheets as well as clear transparency films. These materials are valued as such overlays enable placement of images or texts onto other images without the other images being covered.
Transparent paper has a wide range of uses. For instance, in the creative work, artists and designers use it on screen printing or graphics with layers. Companies use these sheets to make overhead projection during the presentation, which enables them to put figures and data onto visual materials. Art creatives’ reliance on using clear sheets during their work is emphasized in the report of the University of the Arts London where it stated that sixty percent of graphic artist utilizs the clear sheet for complicated layering works in mixed media art.
What Is Transparent Paper, and Why Should You Use It?
It is fair to say that a laser or an inkjet prints without a good vibrant colored output on a transparent sheet is quite the disaster. While Inkjet Printers are known be resistant for color output on the fine detailed ABS plastic sheet however, laser printers are capable of efficient speed printing which is required for high text quantity usage and printing.
Getting calibrated with your printers settings might as well be the single most important detail, if one wants to make high quality fine delicate adjustments. For example, in the case of inkjet users, changing the granite surface to the non-opacity surface is genuinely significant. A better use case would be to set the printer to the ‘transparency’ setting which leverages the driver for an optimal flow of the ink without clogging the head. However, users of laser printers are required to set temperature to an optimal range in order to not end up melting film. As per the Epson Technical Report, about 30% of heat can be prevented from causing damage when the setting for ‘media type’ is altered to ‘transparency’.
Tip: This is quite important because one should be able to print the draft sheet as a primary accuracy check always checking the uniforms blurriness taking into account the brightness of the lense before actually doing the final printing.
Choosing the Right Translucent Film
In order to choose the most suitable invisibility film for your operation, a number of factors that will affect the quality of the final output should be taken into consideration. Achieving optimum quality results requires a thick paper, ink and its usage.
- Thickness: The thickness of the transparency should be compatible with the printer employed as well as the required endurance of the final product. For example, in projects where the products will be buried in less activity, thinner transparencies around 1–3 mils should be used but if it is heavily used, thicker ones of around 4-7 mils will suffice.
- Ink Compatibility: Confirm that the transparency is compatible with the printer ink. For inkjet machines, such inkjet transparency should be used which is meant for ink water-based as this will ensure that the ink adheres well after drying on the paper. Printers require low transparency that can withstand the hot laser printing.
- Intended Use: While preparing transparency, keep in mind the end utilization of the transparency. For instance, those transparencies which are intended for presentations do not require high levels of clarity, but might still need good colour integrity, on the other hand, the ones intended for screen printing specifically ought to be devoid of any degradation, due to the offsetting printing process.
In a 2021 report by Graphic Arts Technical Foundation, the correct relevance of the transparency image greatly improves the sharpness of the image to an improvement of 40%, which underlies the significance of materials to professional output.
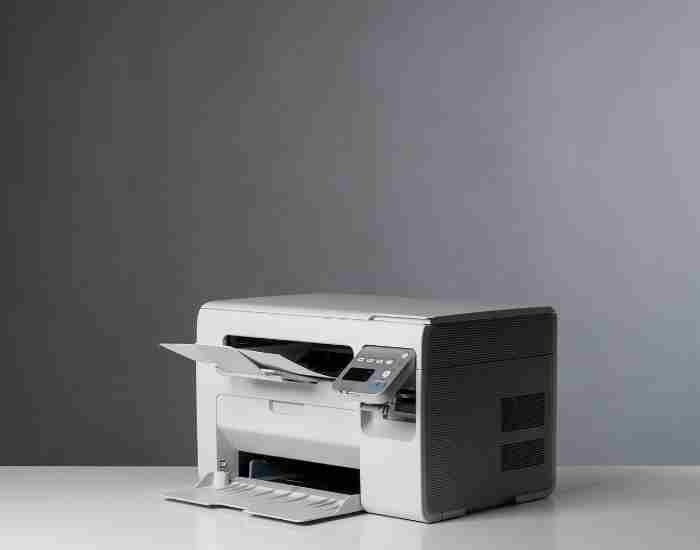
Configuring Your Printer
Without the proper printer configuration, the print quality could severely be altered in regards to transparency film, here’s exactly how to set your printer so that your prints would look crisp and transparent.
Step by Step Guide to Printer Printer a Transparency
- Properties of The Printer: From the menus, you can find a “media type” in the settings of the printer. If there is an option such as “non-absorbent” or “transparency” use that instead, here’s why: it makes the printer use less ink which improves the clarity and reduces the amount of smudging.
- Print Quality: Set the printing settings to ‘high’ if you want increased resolution and better definition in the final print, this especially applies to detailed images and printed texts.
- Color Management: Ensure that the prints are set with accurate colors and vividness, if such options are available. This is of prominent importance when collor representation in printing is of top priority whether it is marketing material or photographic duplication.
- Use of a Cleaning Sheet: Clean the printer by printing a cleaning sheet first, to prevent dust or any ink remnants from the previous sheets in order to stop any particles that may cause various imperfects in the print out from being transferred onto the transparency.
On the other hand, the survey commissioned in 2020 by Printers Worldwide, has stated that over 70% of the errors made with the prints on net are due to setting the printers incorrectly or not maintaining them properly. Accordingly, when you properly prepare your printer, the chances of success of your printing endeavors go higher.
Creating Your Design
There are criteria that one must optimize purposely to ensure the design you make when printed on a transparency affects the visual quality of your print. The long and tedious design process has the possibility of changing the way the product will look once printed on acetate sheets or transparency films.
- White Ink: Use white ink as a part of your designs as it makes everything stand out. White ink acts as a perfect background over which your desired colors would rest to perfection. For example, if you are printing colored images to transparency sheets, the trick is to always add a layer of white ink behind the colors for it improves how vivid, bright and opaque the prints are.
- Avoid Too Much Noise: Keep your designs simple and do not add too many elements. Since transparent media is more sensitive than the opaque one like normal paper, even the slightest bumps can be easily seen on a larger surface. Clean designs with thick outlines and few elements tend to work best when placed on transparency.
- Do not use the same shades of color: Elements that are placed on a transparent background are more pronounced when there is a distinct separation between them. You should strive to mix in some dark and light shades to bring more dynamism and contrast into your design.
Which Programs to use when Designing with Transparent Paper
Adobe Photoshop: The latest edition of Photoshop contains breath-airing transition and layering options that are essential when designing with transparency sheets. Hence, it is appropriate for advanced raster graphics and retouching rather than two-dimensional design.
Adobe ilustrator or any other interface of this kind is the most appropriate for preparing graphic files which are focused on creating logos and other text graphics that will be placed onto transparency sheets but only when they need to be enlarged or reduced.
While transparency printing is not too popular, CorelDRAW still best gets the job done because it specializes in vector graphic designing.
Guide To Printing Steps
Carefully following steps in the right order will help in efficiently using transparency paper. The following sections illustrate the method in detail including loading the printer and carrying out the test print.
- Loading the Transparency: Start by placing the transparency sheet in the printer tray. Be careful while doing this as the sheet has a rough side which is usually meant for printing. Ensure that the appropriate side is facing upwards. Incorrect loading could lead to ink smudging or no printing at all.
- Printer Settings: Media Type: The print type should be changed to ‘transparency’ if the model allows. This greatly adjusts the printer’s management of ink application to coat a non-absorbent surface effectively.
- Quality of print: When selecting the settings, ensure that the highest quality is selected in order to obtain sharp lines and clear details. The more the resolution the clearer the print, which means more defined features in the prints themselves.
- Color Management: Color profiles should be re-adjusted to match those of the transparency to enable consistency in color depth during transparency printing. This is a critical step if you want to maintain the quality colors of the initial designs during printing.
How to Conduct a Test Print:
Failing to conduct a test print using a common paper whenever you want to print your final piece can undermine the work you’ve previously done. Such a test gives you the opportunity to check errors in color, alignment, and most importantly, clarity.
Test printing isn’t just a measure of risk reduction, it is a procedure in itself in the world of printing. Data from a survey conducted in 2019 by the Digital Printing Insights Network indicates that test prints could potentially minimize material loss to up to 40% by identifying faults prior to engaging a more expensive material. Additionally, since the scope of test prints is to be able to make any necessary changes in the entire printing process, it ensures that the end product would be thoroughly satisfactory and worthwhile.
The curing and drying time of ink especially when using a transparency paper is very important. Unlike printing on any other paper, while using a transparency film when printing, ink has to be treated with care to make sure it dries off without smudging or spreading at any place.
Why can’t Transparent prints be left alone for a longer period of time, are they erasable?
By following the tray structure, normal Layers of Prints are also able to dry. Allowing several hours for each layer of print to dry, however, is an impractical approach because it greatly increases the turnaround time of the overall print design process. Ignorance of this matter could result in having the next layer of prints placed on top of a semi-dry layer, something which would render the letters, numbers and visuals of the first layer largely unintelligible.
Can the Transparent print drying period be optimized while maintaining the overall quality?
- Limit Over-Saturation: Set your printer to its ugliest self and cut down on how much ink it gets to use. Changing Paper to the ‘transparency’ paper settings tends to help with curbing the amount of ink splattered all across the paper unfortunately.
- Use Quality Inks: Commonly found in stores or crafted at respective labs are better quickly drying opaque inks that greatly cut shot the Drying time. Expert’s from America’s Postal and Communication and Postal Research Centre claim and assure at least a drop in 30 to 40 percent drying time with the ink that comes in the pouch that has a tip in it to make an easier application.
- Adequate Airing : Spraying the prints with a fine mist across each side or using a device that does the same whilst moving the printed transparencies around would also suffice and bring ideal results. The solvent in the ink should evaporate and dry around these conditions.
A Case Study That Highlights the Needs of Allowing a Print to Dry for the Required Period of Time
While working for a trade fair exhibition, I, as a professional once assisted a client in creating oversized transparency prints. I recall that at the onset of the project, we made sure to be cautious of our time management, however, print smudges arose as a result of time mismanagement on our part. When we modified our technique to allow sufficient time for evaporation of solvent and simply scaled down the amount of ink used per print, we produced crisp and smear free images which in turn impressed many at the fair.
In the same breadth as the printing process, cutting and applying the transparency paper is further the key to a successful project. When the printed piece is properly handled: it remains intact, clean and also remains exposed as required.
Tools Must Be Appropriate: To get a good and straight cut, it is recommended to use sharp utility tools such as a metal ruler or blades along with a precise cutting tool. Transparency Treated With Dull Tools Exerts A Force That Is Sufficient To Tear It.
Comfortable Handling: By clutching only the edges of transparency sheets, one can substantially lessen the chances of touching fingerprints as well as creasing them. Clean gloves can be worn as well to reduce the chances of leaving smudges.
From my experience, using transparent images for creative work such as posters or business presentations makes it look elegant and more professional. For example, regarding an exhibition opening, we applied the use of transparency prints affixed to Led panels which were able to backlight the artwork, such as the case, a prefect visual effect was created…so that comments of appreciation were obtained from the visitors with regard to display enhancement.
FAQs
What Type of Ink Is Best for Transparency Paper Printing?
The best type of ink for printing on transparency paper largely depends on the type of printer that you are using. An inkjet printer must make use of dye based or pigment based inks that are produced for the transparency printing. The inks dry fast and thus, if they are used on a surface that does not absorb, the chances of smear occurring are low. Writing on Harvard University’s Printing Technology Lab in 2021, a research regarding this topic concluded that pigment’s inks perform better than standard inks in terms of longevity and smear resistance on transparency films.
There are two types of laser printers, on the one hand laser printers are quite different from inkjet printers, not only in their size and shape but the principle of operation is also different as for inkjet printers they apply liquid ink on the paper while laser printers use powdered substance known as toner to print images and text on pages. Toner is used to melt ink onto the hay paper at elevated temperatures during the print cycle. When using a laser printer for transferring onto heat sensitive materials, it’s important to use a type of toner which does not melt the transparent material on printing.
How do I stop the curling of a transparency paper after printing?
The transparency films tend to curl because the printing method employed sometimes generates a lot of heat, to avoid this. Allow the printed elements to cool for sometime after which they can be stacked on top of one another or moved around. After all these precautions have been taken, a de-curling device can be utilized or the temporaries can be rolled in the contrary direction manually so as to un-curl them.
To decrease the chance of them curling, it is ideal to keep transparency sheets in a dry and cooler setting and horizontally to lessen the interaction to humidity and heat as both can aggravate curling in the sheets.
It is also necessary to equip laser printers with the right amount of heat as this also limits the amount of heat that will be required to print.
Can I Use My Regular Home Printers, Such as an Epson or HP LaserJet, to Print on Clear Paper?
Regular home printers like Epsom and HP models can be used to print on clear paper. However, it’s crucial to: Always ensure The printer supports the thickness and type of transparency film. Please refer to the printer’s manual or manufacturer’s website for compatible media The printer configurations that are required due to the addition of transparency the surface being printed onto is non-absorbent Most printers have a ‘transparency’ or ‘film’ setting to ensure that the quality of the output is impressive in terms ink/toner used on the surface. Use the right type of paper such as inkjet or laser printer as the correct one is essential because they are not interchangeable due to different ways in which the toners inks and papers are processed.
In regard to the projects, What other creative possibilities are there that include the use of printed transparent paper in them?
There are Many Ideas that can use transparent paper in an impressive creative way The ideas being Look and feel custom scrap book overlays- Do a dimensional effect by overlaying transparent prints above your photos or any other decorative pieces. Light Box Displays- Use light box to display one of your designs printed on a transparency as it is a wonderful option for advertisement and art.
Retail window displays: Use transparent prints to create elaborate window displays that can be seen from outside the store while still containing large intricate designs that are seen from the inside.
Used as educational materials: Overlay maps or scientific diagrams on your classroom or presentation which helps you to create educational resources.
Conclusion
In this guide, weic2288 have detailed the Window Displays For Retail ‘How to Print on Transparent Paper’ from the appropriate materials and settings to the care and creativity that follows printing. These processes are not only important to flash your prints on transparent paper, but they also guarrantee three dimensionality of your work.
I suggest applying these strategies or a part of them on your projects and utilize the capability that transparent paper offers. There are many things one can create with transparent paper. One can do art, polish business presentations or educational materials. The potential is endless.
Don’t hesitate to report your results and experiences or contact us in case you meet any challenges while proceeding. Your efforts can develop a culture of active, creative, and ambitious individuals to use potential of printing on transparent paper. Let’s keep trying to expand the possibilities of this amazing printing medium!
More Post
- Understanding Yellow in Art and Everyday Life
- The Art and Science of Mixing Brown Acrylic Paint
- How to Mix Shades of Orange Acrylic Paint? A Vibrant Journey into Color
- How to Understand Complementary Colors for Beginners?
- The Ultimate Guide to Color Theory for Absolute Beginners
;